Best Time for Everest Base Camp Trek

Spring (March to May) and autumn (September to November) are considered the best time for the Everest Base Camp trek. Because of better mountain visibility, relatively stable weather, and more comfortable conditions than the colder winter and wetter monsoon months, these months offer some of the most favorable trekking conditions in the Everest region.

However, each month has its own advantages. April and October are particularly popular, while March, May, September, and November can also be excellent depending on your priorities.

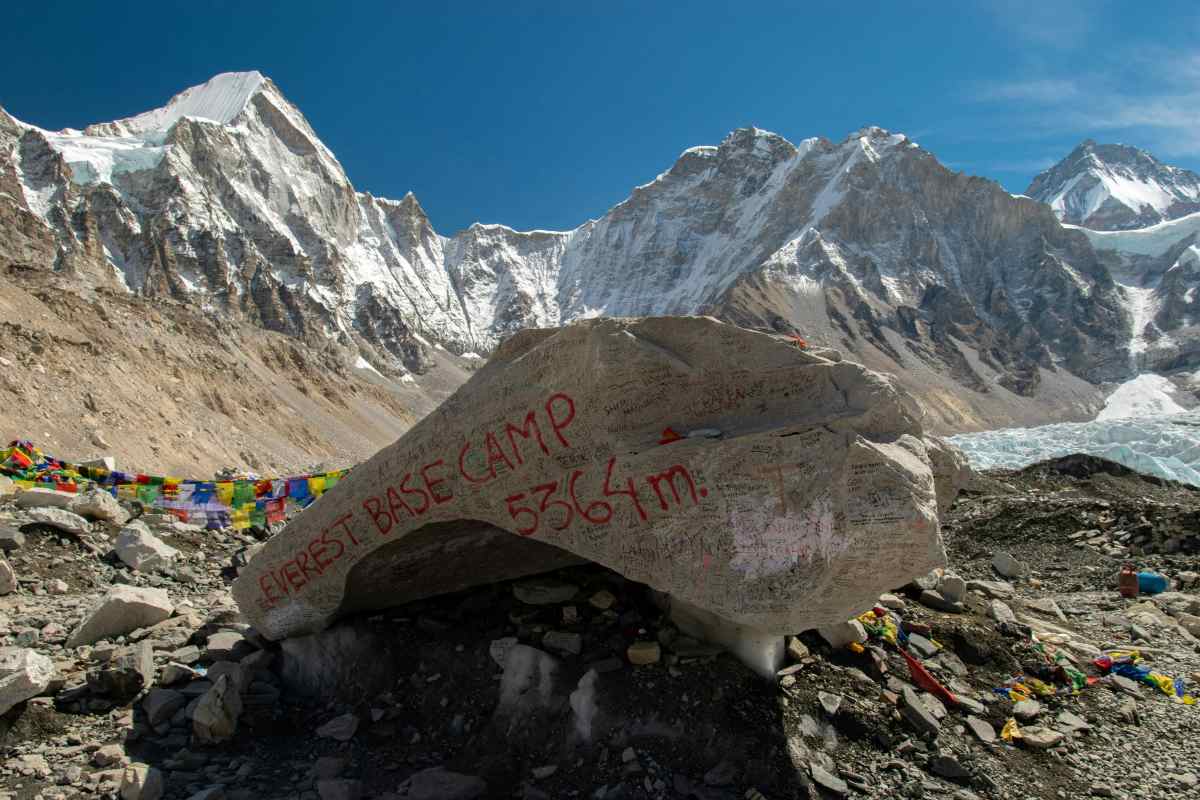
The Everest Base Camp trek is a high-altitude adventure through Nepal’s Khumbu region. The journey takes you through Sherpa villages, Buddhist monasteries, forests, alpine valleys, and dramatic Himalayan landscapes before reaching Everest Base Camp at 5,380 meters. The Himalayan Yatri itinerary is a 12-day trek, with the route also taking you to Kala Patthar at 5,545 meters for sunrise views of Mount Everest and surrounding peaks.

If you are planning your trek and wondering when is the best time to visit Everest Base Camp is, understanding the seasons will help you choose the right month.

When Is the Best Time for Everest Base Camp Trek?

The best time for the Everest Base Camp trek is during spring (March to May) and autumn (September to November), when the weather is generally stable, skies are clearer, and mountain views are spectacular. Spring offers blooming rhododendrons, while autumn brings crisp mountain views and excellent trekking conditions.

For many trekkers, April and October are especially attractive because they generally offer favorable weather and good opportunities for mountain views.

Month Weather Visibility Crowd Level
March Cold but improving Good Moderate
April Stable spring weather Very good High
May Warmer, increasingly cloudy Good Moderate
June Monsoon begins Variable Low
July Wet and cloudy Limited Low
August Wet and cloudy Limited Low
September Improving conditions Good Moderate
October Stable and clear Excellent High
November Cold but generally clear Very good Moderate
December–February Very cold Often clear Low

Himalayan Yatri currently lists March to May and September to November as the suitable seasons for its Everest Base Camp trek.

Everest Base Camp Trek in Spring

Spring is one of Nepal’s most popular trekking seasons. From March to May, temperatures gradually become warmer, and the weather generally becomes more suitable for long days on the trail.

The lower sections of the Everest trail can become colorful with spring vegetation, while higher elevations continue to offer dramatic, snow-covered mountain scenery.

Spring is also a good season for trekkers who want a balance between favorable conditions and the lively atmosphere of the main trekking season.

March: The Beginning of the Spring Trekking Season

March marks the beginning of the main spring trekking season.

Higher parts of the Everest region can still be very cold, especially in the mornings and at night. However, conditions generally improve as the month progresses.

One advantage of trekking in March is that the trails can be less busy than during the peak months of April and October.

If you enjoy cooler conditions and want to experience the Everest region before the busiest part of spring, March can be a good option.

April: A Popular Month for Everest Base Camp

April is one of the most popular months for the Everest Base Camp trek. The weather is generally suitable for trekking, and spring is well established across the region. The lower sections of the route can offer colorful landscapes, while the higher areas provide spectacular views of peaks such as Everest, Lhotse, Nuptse, and Ama Dablam.

The main disadvantage is that April can be busy. If you plan to trek this month, arrange your flights, accommodation, guide, and other logistics in advance.

May: The End of Spring

May is the final month of the spring trekking season. Early May can still offer good trekking conditions, while temperatures at lower elevations warm up. As the month progresses, cloud cover can gradually increase as Nepal approaches the summer monsoon season. May can therefore be a good option for travelers whose schedule doesn’t allow an April trek.

Everest Base Camp Trek in Autumn

Autumn is another excellent time to trek in the Everest region. After the summer monsoon, skies generally clear, and the mountains can look particularly sharp against the blue sky. September to November is therefore one of the most popular periods for trekking in Nepal.

For travelers whose priority is mountain visibility, autumn is particularly attractive.

September: The Transition Into Autumn

September is a transition month between the monsoon and autumn trekking seasons.

Early September can still experience some rain or cloud cover, but conditions generally improve as the month progresses.

Late September can be a good time for trekkers who want to start their journey during the beginning of the autumn season while potentially avoiding some of the heavier crowds of October.

Because September is a transition period, flexible planning is useful.

October: One of the Most Popular Months

October is widely regarded as one of Nepal’s main trekking months. The post-monsoon atmosphere often provides excellent mountain visibility, while temperatures are generally comfortable for trekking compared with the colder winter months.

The Everest Base Camp trail can also be busy during October because many trekkers choose this period. If you want to trek in October, plan early, especially for flights and accommodation.

November: Clear Views and Cooler Conditions

November continues the autumn trekking season. The weather gets colder as winter approaches, especially at higher elevations, but clear days can offer excellent views of the Himalayan mountains.

November can appeal to trekkers who want autumn’s favorable conditions but prefer slightly cooler temperatures and potentially fewer trekkers than in October.

Is Winter a Good Time for Everest Base Camp Trek?

The Everest Base Camp trek is possible in winter, but conditions become considerably colder. December, January, and February can bring freezing temperatures at high elevations, and snow may affect sections of the trail. Days are also shorter, so trekkers need to plan their walking hours carefully.

The advantage is that the trail is generally quieter than during spring and autumn.

Winter trekking suits people who are comfortable with cold-weather conditions and properly equipped for high-altitude trekking.

If you decide to trek during winter, warm layers, a suitable sleeping bag, insulated gloves, good footwear and flexible plans are particularly important.

Can You Trek to Everest Base Camp During Monsoon?

You can technically do the Everest Base Camp trek during the monsoon, but June, July, and August are generally not the preferred months for the classic EBC experience.

Monsoon conditions can bring rain, clouds and reduced visibility. Weather can also affect flights to and from Lukla, creating possible delays or changes to travel plans.

The lower sections of the trail can become wet, while cloud cover may hide the mountains that trekkers travel to the Everest region to see.

For these reasons, spring and autumn remain the main seasons for the Everest Base Camp trek.

However, weather conditions vary from year to year, so no season can guarantee perfect weather.

Which Month Has the Best Mountain Views?

If mountain views are your main priority, October and November are strong choices because they follow the monsoon season.

Spring can also provide excellent visibility, especially during stable weather.

Remember that mountain weather can change quickly. Even during the best trekking season, clouds, wind, snow or other weather conditions can affect visibility.

Instead of expecting clear views every day, choose a season that generally offers a higher chance of favorable conditions and build flexibility into your travel plans.

What Makes the Everest Base Camp Trek Special?

Choosing the right season matters, but the experience is about much more than reaching base camp.

The trail passes through the heart of the Khumbu region and introduces trekkers to the culture and landscapes of the Everest area.

On the Himalayan Yatri itinerary, the journey begins with a flight from Kathmandu to Lukla, then continues to Phakding and Namche Bazaar. From there, the route continues through Khumjung, Tengboche, Dingboche, Lobuche and Gorakshep before reaching Everest Base Camp.

Along the way, trekkers experience:

  • Traditional Sherpa villages
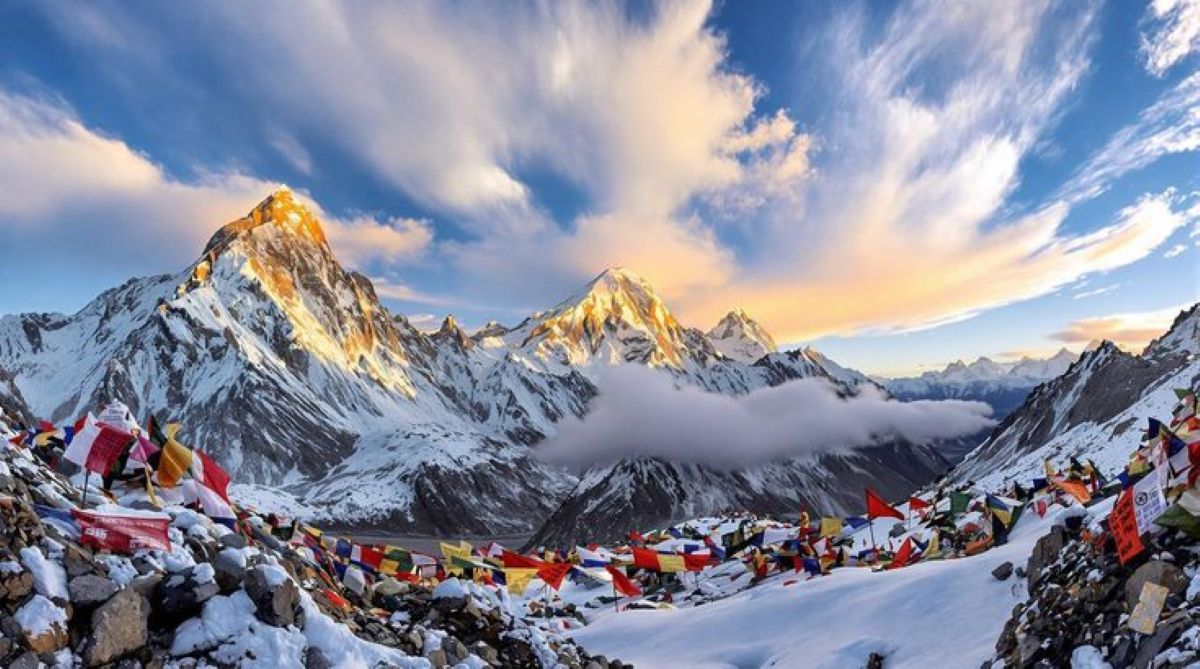
  • Buddhist monasteries and prayer flags
  • Suspension bridges
  • Rhododendron and pine forests
  • Khumbu Glacier and alpine landscapes
  • Views of Everest, Ama Dablam, Lhotse and Nuptse
  • The famous Namche Bazaar
  • Tengboche Monastery
  • Everest Base Camp
  • Sunrise from Kala Patthar

Himalayan Yatri classifies the route as moderate to challenging, with typical trekking days of around 5–7 hours, though some days are longer. For example, the journey from Lobuche to Everest Base Camp and Gorakshep is listed as about 8–9 hours.

Why Acclimatization Is Important on the EBC Trek

The Everest Base Camp trek reaches a very high altitude, making acclimatization one of the most important parts of the journey.

The trail gradually climbs from Lukla toward Namche Bazaar and then into the higher valleys. As you gain altitude, your body needs time to adjust to the reduced oxygen levels.

Himalayan Yatri’s itinerary includes time around Namche and the higher settlements before reaching Everest Base Camp.

Do not choose a trekking season based only on weather. A well-planned itinerary with appropriate acclimatization is equally important.

Walking slowly, staying hydrated, eating properly and paying attention to how your body feels can all contribute to a safer and more enjoyable trek.

What Should You Pack for Everest Base Camp?

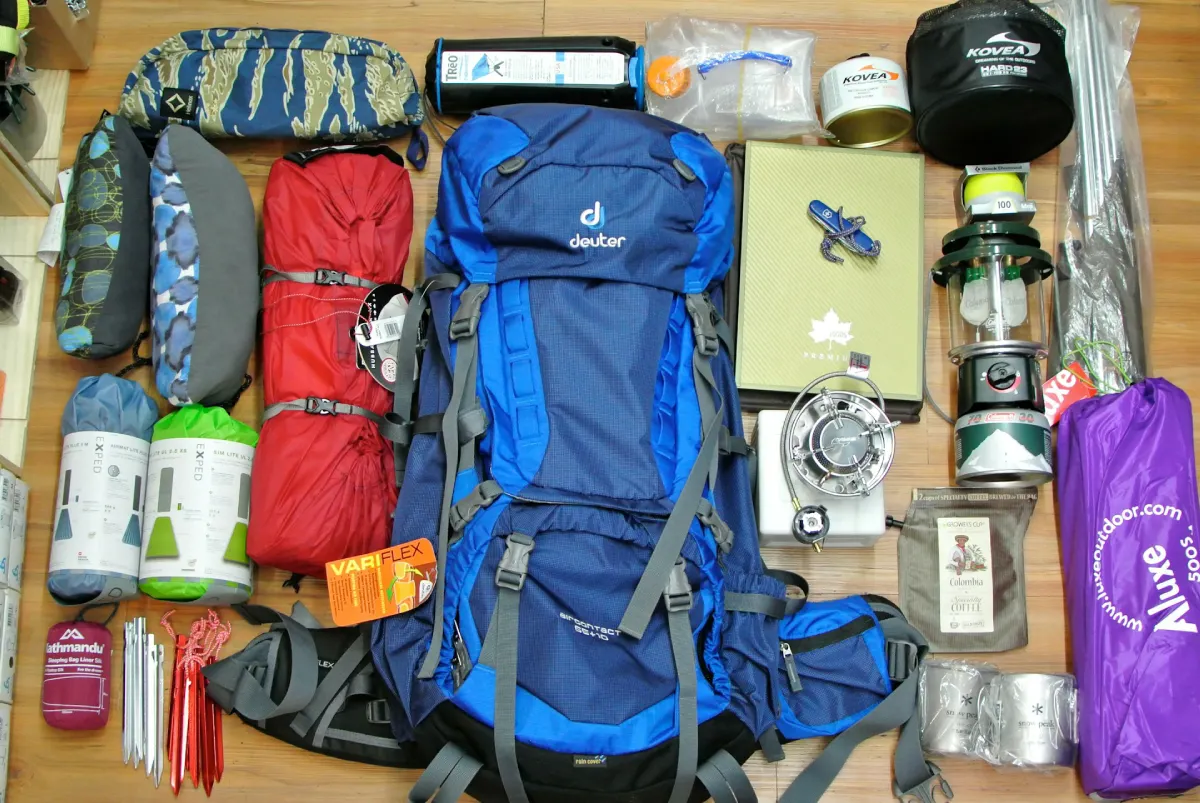
Packing the right gear is essential for a comfortable Everest Base Camp trek, as temperatures and weather conditions can change quickly with altitude. Your packing needs will also vary depending on whether you trek in spring, autumn, winter, or monsoon. Focus on lightweight, warm, and practical items that can handle changing conditions throughout the journey.

Essential Clothing

  • Thermal base layers
  • Fleece jacket
  • Down or insulated jacket
  • Waterproof jacket and trousers
  • Comfortable trekking trousers
  • Warm trekking socks
  • Gloves
  • Woolen or fleece hat
  • Sun hat

Trekking Equipment

  • Comfortable trekking boots
  • Trekking poles
  • Backpack and daypack
  • Suitable sleeping bag
  • Sunglasses
  • Sunscreen and lip balm
  • Reusable water bottles
  • Headlamp
  • Basic first-aid supplies
  • Personal medication
  • Power bank

Himalayan Yatri provides a duffel bag and trekking poles as part of its current Everest Base Camp package, while trekkers must bring their own clothing and other trekking gear.

Tips for Choosing the Best Time for Your EBC Trek

Choosing the best time for an Everest Base Camp trek depends on what you want from your journey, including weather, mountain views, trail conditions, and the number of trekkers on the route. Spring, from March to May, is a popular Everest Base Camp trekking season, with gradually warming temperatures, blooming landscapes at lower elevations, and generally favorable trekking conditions.

Autumn, from September to November, is another excellent period, especially if clear skies and spectacular views of Everest and the surrounding Himalayas are your priorities. October is particularly popular because of the generally stable post-monsoon weather, although the trails can be busier during this time.

If you prefer quieter trails and fewer trekkers, winter, from December to February, can offer a more peaceful Everest Base Camp experience, but you should be prepared for freezing temperatures and challenging conditions at higher elevations.

The monsoon season, from June to August, is generally less preferred because rain, cloud cover, reduced mountain visibility, and possible weather-related travel disruptions can affect the trek. However, every season has its own character, and the right time ultimately depends on your schedule, weather preferences, and trekking experience. By choosing a suitable EBC trekking season and allowing enough time for acclimatization, you can enjoy the journey through the Everest region more comfortably and make the most of your time on the trail.

Final Thoughts: When Should You Trek to Everest Base Camp?

So, what is the best time for the Everest Base Camp trek? For most trekkers, March to May and September to November are the best seasons to consider. Spring brings warmer conditions and colorful landscapes, while autumn offers post-monsoon weather and generally clear mountain views.

If you want to choose a specific month, April and October are two of the most popular options. March and November can also be appealing if you prefer cooler conditions and potentially fewer trekkers.

Regardless of when you go, remember that Everest Base Camp is a high-altitude trek. Weather can change quickly, and conditions cannot be guaranteed even during the main trekking seasons. Proper acclimatization, physical preparation, suitable equipment, travel insurance and a well-planned itinerary are all important.

Himalayan Yatri’s current 12-day Everest Base Camp Trek reaches Everest Base Camp at 5,380 meters and includes a sunrise hike to Kala Patthar at 5,545 meters. The trek starts and ends in Lukla and is designed for groups of 2–10 people.

If Everest Base Camp is on your bucket list, choosing the right season is the first step toward making the journey more comfortable, enjoyable, and memorable.

Frequently Asked Questions

What is the best time for Everest Base Camp trek?

The best time for the Everest Base Camp trek is generally spring, from March to May, and autumn, from September to November. These periods offer generally favorable trekking conditions and good opportunities for mountain views.

Is April a good month for Everest Base Camp?

Yes. April is one of the popular months for EBC trekking because of generally favorable spring conditions and good mountain visibility. The trail can be busy, however.

Is October good for Everest Base Camp trek?

Yes. October is one of the main autumn trekking months and is popular for its generally clear post-monsoon conditions and mountain views.

Can I trek to Everest Base Camp in winter?

Yes, but winter trekking is colder and can be more challenging. Proper cold-weather equipment and flexible planning are important.

Can I trek Everest Base Camp in July?

It is possible, but July falls within Nepal’s monsoon season. Rain, clouds, reduced visibility, and possible flight disruptions can make the journey less predictable.

How high is Everest Base Camp?

Everest Base Camp is approximately 5,380 meters above sea level. On Himalayan Yatri’s itinerary, trekkers also reach Kala Patthar at 5,545 meters.

How long does the Everest Base Camp trek take?

Himalayan Yatri currently offers a 12-day Everest Base Camp itinerary, including the flights between Kathmandu and Lukla.

Is Everest Base Camp suitable for beginners?

The trek does not require technical climbing skills, but it is a physically demanding high-altitude journey. Good fitness, preparation and proper acclimatization are important.

Manaslu Circuit Trek Cost 2026: Complete Price & Budget Guide

Planning a trek around Mount Manaslu requires more than preparing your physical fitness and packing your trekking gear. Understanding the Manaslu Circuit Trek cost in advance helps you create a realistic budget and avoid unexpected expenses during your journey. The total cost can vary depending on the trekking package, group size, transportation, permits, accommodation, meals, guide and porter services, travel insurance and personal spending.

For 2026, Himalayan Yatri offers the 16-day Manaslu Circuit Trek from USD 2,850 per person on its listed departures. The package includes major trekking services such as accommodation, meals, transportation, permits, guide and porter support.

This complete Manaslu Circuit Trek Cost Guide explains what you should expect to pay, what is included in a trekking package, what additional expenses you need to prepare for, and how to plan your budget effectively.

Manaslu Circuit Trek Cost at a Glance

The cost of the Manaslu Circuit Trek depends on how you organize your journey and what services you choose to include. An organized trekking package is generally the easiest way to manage the major expenses because transportation, accommodation, meals, permits and guide services can be arranged together.

For Himalayan Yatri’s current 16-day Manaslu Circuit Trek, the listed price is USD 2,850 per person. The trek covers the Manaslu region and reaches a maximum altitude of approximately 5,106 meters at Larkya La Pass.

Cost Factor What It Covers
Trekking Package Main trekking services
Permits Required trekking and conservation permits
Accommodation Teahouse lodges during the trek
Meals Breakfast, lunch and dinner
Guide Licensed English-speaking trekking guide
Porter Dedicated porter support
Transportation Airport transfers and ground transportation
Trekking Gear Duffel bag and trekking poles
Insurance Usually purchased separately
Personal Expenses Usually paid separately

The exact amount you spend beyond the package depends on your personal preferences and spending habits.

How Much Does the Manaslu Circuit Trek Cost?

The Manaslu Circuit Trek cost in 2026 can vary depending on the operator, itinerary, group size and services included in the package.

Himalayan Yatri currently lists its 16-day Manaslu Circuit Trek at USD 2,850 per person for upcoming 2026 departures. The package is designed to cover many of the major expenses involved in completing the trek, including accommodation, meals, transportation, permits, guide and porter services.

However, the package price is not necessarily the same as your total trip budget.

You may still need to budget separately for:

  • International flights
  • Nepal visa
  • Travel insurance
  • Medical or emergency evacuation coverage
  • Personal trekking equipment
  • Alcoholic and bottled beverages
  • Laundry
  • Internet
  • Snacks and personal purchases
  • Tips for guides and porters
  • Other personal expenses

Therefore, when comparing trekking packages, look beyond the advertised price and check exactly what is included.

What Is Included in the Manaslu Circuit Trek Cost?

Knowing what is included in your trekking package is essential when comparing the Manaslu Circuit Trek Cost between different companies. A package may cover accommodation, meals, transportation, permits, guide and porter services, while other operators may charge separately for some of these services. Understanding the inclusions allows you to compare packages based on their actual value rather than simply choosing the lowest advertised price.

Himalayan Yatri’s current package includes the following major services.

Airport Transfers

Private airport transportation is provided for airport pick-up and drop-off.

This can be particularly convenient after a long international flight and when returning to Kathmandu after the trek.

Ground Transportation

The package includes the required ground transportation for the itinerary, including public bus transportation and reserved jeep services where applicable.

Transportation costs can otherwise become a significant part of a Manaslu trekking budget because the trailhead and exit points are located away from Kathmandu.

Accommodation

Accommodation during the trekking section is provided in available teahouse lodges on a shared basis.

The Manaslu region becomes increasingly remote as you gain altitude, so accommodation facilities are generally simpler in the upper sections of the trail.

Meals

The package includes three meals per day during the trek, along with seasonal fruits, tea and coffee.

Having meals included can make budgeting easier because food costs at higher elevations can be considerably different from prices in Kathmandu.

Guide and Porter

The package includes a licensed English-speaking trekking guide and dedicated porters.

A guide helps with navigation, accommodation arrangements, communication, altitude management and general trekking logistics, while porters help carry luggage.

Permits and Entry Fees

The required trekking permits, entry cards and applicable monument fees are arranged by Himalayan Yatri as part of the package.

This is particularly useful on the Manaslu Circuit because the region includes a restricted trekking area with specific permit requirements.

Trekking Equipment

Himalayan Yatri provides company duffel bags and trekking poles for the trek, which are returned after the journey.

Trekkers still need to bring their own personal clothing and equipment.

Taxes and Service Charges

Government taxes and agency service charges are included in the listed trekking package.

What Is Not Included in the Manaslu Circuit Trek Cost?

Not every expense associated with a Manaslu trek is included in the package price. Knowing the exclusions beforehand helps you calculate your actual travel budget rather than relying only on the advertised trekking price.

Himalayan Yatri currently lists international travel, personal gear, alcoholic and bottled drinks, personal insurance, customs duties, personal expenses and tips among the exclusions.

International Flights

Flights to and from Nepal are not included in the trekking package.

International airfare can vary significantly depending on your country of departure, airline, booking date and travel season.

Nepal Visa

Visa fees are paid separately by international travelers.

The amount can depend on the visa type and duration.

Travel Insurance

Travel insurance is not included in the trekking package.

For the Manaslu Circuit, make sure your policy specifically covers high-altitude trekking and emergency evacuation where applicable.

Personal Trekking Gear

Although Himalayan Yatri provides a duffel bag and trekking poles, personal equipment is generally your responsibility.

This can include:

  • Trekking boots
  • Down jacket
  • Thermal clothing
  • Gloves
  • Sleeping bag
  • Headlamp
  • Sunglasses
  • Backpack
  • Personal toiletries
  • Water bottles

Drinks and Personal Purchases

Alcoholic beverages and bottled drinks are excluded.

You should also budget separately for snacks, charging, internet, laundry and other personal purchases.

Tips and Gratuities

Tips for guides and porters are not mandatory but are commonly appreciated after a successful trek. Himalayan Yatri lists tips and gratuities as excluded from the package.

Manaslu Circuit Trek Permit Cost

Permits are an important part of the overall Manaslu Circuit Trek Cost because the trekking route passes through a restricted area and a conservation area. The required permits depend on the route and season, and their fees can change according to government regulations. Understanding the current permit requirements and costs before departure helps you calculate your trekking budget more accurately and ensures that all necessary documentation is arranged before entering the region.

According to the Nepal Tourism Board and Department of Immigration, the current Manaslu Restricted Area Permit fee for the Gorkha Manaslu Area is:

  • September–November: USD 100 per person per week
  • December–August: USD 75 per person per week
  • Additional days beyond one week are charged separately.

The route also passes through the Manaslu Conservation Area. The Nepal Tourism Board currently lists the Manaslu Conservation Area entry fee for foreign visitors at NRs. 3,000 per person per entry.

Depending on the route and itinerary, trekkers may also require an Annapurna Conservation Area entry permit for the section after crossing Larkya La. The Nepal Tourism Board currently lists the foreigner entry fee for the Annapurna Conservation Area at NRs. 3,000 per person per entry.

Permit fees can change, so always confirm the latest rates before departure.

How Much Do Food and Drinks Cost on the Manaslu Circuit?

Food and drinks can become an important part of your trekking budget, particularly if they are not included in your package. Teahouses along the Manaslu Circuit serve a variety of local and international meals, but prices generally increase as you reach higher and more remote areas. If your trekking package includes three meals each day, you will mainly need to budget for additional drinks, snacks and other personal food purchases.

Teahouses along the Manaslu Circuit serve common trekking meals such as:

  • Dal bhat
  • Noodles
  • Pasta
  • Soup
  • Momo
  • Rice
  • Potatoes
  • Eggs
  • Porridge
  • Tibetan bread
  • Tea
  • Coffee

Prices generally increase as you move toward higher and more remote settlements because supplies must be transported into the mountains.

If your trekking package already includes three meals per day, your additional food budget can focus on snacks, drinks and occasional extras rather than full meals.

Accommodation Cost on the Manaslu Circuit Trek

Accommodation is another important component of the total trekking budget.

The Manaslu Circuit is primarily a teahouse trek, with accommodation available in villages along the route. Himalayan Yatri’s package includes the best available teahouse lodges on a shared basis during the trek.

Lower sections of the trail generally offer more accommodation choices, while facilities become simpler at higher elevations.

Additional costs can sometimes arise from:

  • Hot showers
  • Device charging
  • Wi-Fi
  • Extra blankets
  • Drinks
  • Private rooms, where available

If these services are not included in your package, keep some Nepalese cash available.

Guide and Porter Cost for Manaslu Circuit Trek

Guide and porter services are an important part of the cost of a Manaslu Circuit Trek.

The route passes through remote terrain, restricted areas and high-altitude environments. An experienced guide can help with navigation, accommodation, permits, communication, weather-related decisions and altitude management.

A porter can carry your main luggage, allowing you to focus on walking with a lighter daypack.

Himalayan Yatri’s current package includes a licensed English-speaking guide and dedicated porters, meaning these services are already included in its listed USD 2,850 per-person price.

When comparing other trekking companies, always check whether guide and porter services are included or charged separately.

Transportation Cost for the Manaslu Circuit Trek

Transportation can make up a significant portion of the overall Manaslu trekking budget because the trek begins and ends away from Kathmandu.

The journey involves road transportation between Kathmandu and the trekking region, as well as transportation during the itinerary.

Himalayan Yatri’s current package includes airport transfers and ground transportation, including public bus services and reserved jeep transportation where required.

The final transportation cost depends on the itinerary, road conditions, vehicle type and group size.

When comparing packages, make sure the transportation from Kathmandu to the trailhead and from the trek’s ending point back toward Kathmandu is clearly stated.

How Much Extra Money Should You Carry?

Even when your major trekking expenses are included in a package, carrying some additional money is recommended for personal expenses. During the Manaslu Circuit Trek, you may need cash for snacks, drinks, hot showers, charging, internet, laundry, souvenirs and tips. Because ATM access can be limited in remote mountain areas, it is better to prepare sufficient Nepalese cash before heading into the higher sections of the trail.

Your personal spending may cover:

  • Snacks
  • Extra drinks
  • Hot showers
  • Charging electronic devices
  • Internet
  • Laundry
  • Souvenirs
  • Personal emergencies
  • Tips

The exact amount depends on your personal spending habits.

It is also useful to keep some emergency cash separate from your daily spending money because ATM access is limited or unavailable along much of the remote trekking route.

Manaslu Circuit Trek Cost for Solo vs Group Trekkers

The cost per person can vary depending on group size.

Organized group departures can sometimes offer better value because certain operational costs such as transportation, guides and logistics are shared among trekkers.

Private trips may cost more per person because the group has fewer people sharing these expenses.

However, private trekking also provides greater flexibility in terms of:

  • Pace
  • Departure date
  • Accommodation preferences
  • Rest days
  • Itinerary adjustments
  • Group composition

If your priority is keeping the Manaslu Circuit Trek cost lower, joining a group departure can be worth considering.

How to Reduce Your Manaslu Circuit Trek Cost

There are several practical ways to manage your Manaslu Circuit Trek Cost without compromising the quality of your trekking experience. Choosing a group departure, booking a package with clear inclusions and avoiding unnecessary equipment purchases can help control your expenses. It is also useful to plan your personal spending in advance and compare trekking companies carefully to make sure a lower advertised price does not mean important services have been excluded.

Choose a Group Departure

Joining a group can help distribute transportation and operational expenses.

Book a Package With Clear Inclusions

A package that includes accommodation, meals, permits, transportation and guide services can make your final budget easier to predict.

Avoid Unnecessary Gear Purchases

If your trekking company provides items such as trekking poles or a duffel bag, you do not need to purchase duplicate equipment.

Carry Reusable Water Bottles

Reusable bottles can help reduce your dependence on bottled water.

Plan Personal Spending

Set aside a specific daily amount for snacks, drinks, charging and other extras.

Compare Packages Carefully

Do not choose a trekking company based solely on the lowest advertised price. Check the itinerary, accommodation, meals, permits, transportation, guide experience and porter services before making your decision.

Why Does the Manaslu Circuit Trek Cost More Than Some Other Treks?

The Manaslu Circuit can cost more than some shorter or more developed trekking routes because of its remote location and restricted-area requirements.

Several factors contribute to the price:

  • Restricted-area trekking permits
  • Remote transportation
  • Longer trekking duration
  • Guide and porter logistics
  • Limited mountain infrastructure
  • Teahouse accommodation
  • Food transportation
  • Conservation-area fees
  • High-altitude support
  • Longer overall itinerary

The route reaches approximately 5,106 meters at Larkya La Pass and passes through remote areas where logistics are more complicated than in many lower-altitude destinations. Himalayan Yatri lists the trek as a 16-day journey with moderate-to-challenging difficulty.

Is the Manaslu Circuit Trek Worth the Cost?

For many trekkers, the Manaslu Circuit Trek offers excellent value because the price covers much more than simply walking through the mountains.

The journey combines dramatic Himalayan scenery, traditional villages, Tibetan Buddhist culture, remote mountain landscapes and the challenge of crossing Larkya La Pass.

A well-organized package also reduces the logistical burden of arranging transportation, permits, accommodation, meals, guides and porters individually.

For travelers who value a more remote Himalayan experience, the cost can be justified by the combination of adventure, cultural immersion and professional support throughout the trek.

How to Choose a Manaslu Circuit Trek Package

Choosing a trekking package based only on price can sometimes lead to unexpected costs later. When comparing options, look carefully at the itinerary, accommodation, meals, permits, transportation, guide and porter services and emergency support. A slightly higher Manaslu Circuit Trek Cost may provide better value if it includes more essential services and reliable local support. The goal should be to find a transparent package that balances price, safety, comfort and service quality.

Before booking, compare:

1. Itinerary

Check the number of trekking days and whether the itinerary allows sufficient time for acclimatization.

2. Inclusions

Make sure accommodation, meals, permits, transportation, guide and porter services are clearly listed.

3. Guide and Porter Support

Ask whether guides are licensed and whether porters are properly supported and insured.

4. Accommodation

Check whether teahouse accommodation is included and whether rooms are shared or private.

5. Transportation

Confirm whether transportation to the trailhead and back to Kathmandu is included.

6. Emergency Support

Ask what procedures are followed in case of illness, injury or severe altitude-related problems.

7. Company Experience

Look for a trekking company with experience operating in the Manaslu region rather than choosing solely based on price.

Manaslu Circuit Trek Cost: What Should Your Total Budget Include?

Your total Manaslu Circuit Trek Cost should include more than the advertised trekking package price. A realistic budget should account for the main trekking package as well as international flights, Nepal visa fees, travel insurance, personal trekking gear, drinks, snacks, internet, laundry and tips. Setting aside an emergency fund is also recommended. Considering all these expenses together will give you a clearer idea of how much you should prepare for your complete Manaslu adventure.

Before leaving for Nepal, consider these categories:

Trekking package:
Your main organized trekking cost.

International travel:
Flights to and from Nepal.

Visa:
Nepal entry visa fees.

Insurance:
Travel and high-altitude trekking coverage.

Personal equipment:
Clothing, boots, sleeping bag and other trekking essentials.

Personal expenses:
Snacks, drinks, showers, charging, internet and laundry.

Tips:
Budget separately for guide and porter gratuities.

Emergency funds:
Keep additional money available for unexpected expenses.

Planning all of these categories together will give you a much more realistic picture of your actual Manaslu Circuit Trek cost.

Frequently Asked Questions About Manaslu Circuit Trek Cost

How much does the Manaslu Circuit Trek cost in 2026?

Himalayan Yatri currently lists its 16-day Manaslu Circuit Trek at USD 2,850 per person for its listed 2026 departures. The package includes major services such as accommodation, meals, transportation, guide, porter, permits, trekking equipment, taxes and service charges.

Does the Manaslu Circuit Trek cost include permits?

Yes. Himalayan Yatri’s current package includes the necessary trekking permits, entry cards and monument fees.

Is food included in the Manaslu Circuit Trek package?

Yes. Himalayan Yatri’s package includes three meals per day during the trek, along with seasonal fruits, tea and coffee.

Is accommodation included in the Manaslu Circuit Trek cost?

Yes. The current Himalayan Yatri package includes the best available teahouse lodges on a shared basis during the trek.

Is a guide included?

Yes. Himalayan Yatri includes a licensed English-speaking trekking guide in its current package. Dedicated porter support is also included.

Are international flights included?

No. International flights to and from Nepal are excluded from the Himalayan Yatri trekking package.

Is travel insurance included?

No. Travel, accident and medical emergency evacuation insurance are listed as exclusions. Trekkers should arrange suitable insurance separately.

How much is the Manaslu Restricted Area Permit?

The current official fee for the Gorkha Manaslu Area is USD 100 per person per week from September to November and USD 75 per person per week from December to August, with additional daily charges after the first week.

Can I do the Manaslu Circuit Trek on a budget?

Yes, but the Manaslu Circuit has unavoidable costs such as restricted-area permits, transportation and guide support. Joining a group departure and choosing a package with clear inclusions can help make the overall cost more predictable.

Why does the Manaslu Circuit Trek cost more than some shorter treks?

The route is relatively remote, requires restricted-area permits and involves longer transportation, guide and porter logistics. The trek also reaches high altitude and takes around 16 days in Himalayan Yatri’s current itinerary.

Final Thoughts on Manaslu Circuit Trek Cost

Understanding the Manaslu Circuit Trek cost before your journey allows you to plan your adventure with greater confidence. While the advertised package price is an important starting point, your actual trip budget should also account for international flights, insurance, personal equipment, visa fees and personal spending.

For 2026, Himalayan Yatri’s current 16-day Manaslu Circuit Trek is listed at USD 2,850 per person, with major trekking services such as meals, accommodation, transportation, permits, guide and porter support included.

The best approach is to compare trekking packages based on their total value and inclusions, not simply the lowest price. With a transparent package, proper preparation and a realistic personal budget, you can focus on enjoying the spectacular landscapes, culture and adventure of the Manaslu Circuit.

Manaslu Circuit Trek Guide 2026: Itinerary, Cost, Permits, Difficulty & Everything You Need to Know

The Manaslu Circuit Trek is one of Nepal’s most spectacular high-altitude trekking adventures, taking you from lush river valleys and traditional mountain villages to the dramatic alpine landscapes beneath Mount Manaslu. The journey combines breathtaking Himalayan scenery, Tibetan-influenced culture, remote villages, ancient monasteries, suspension bridges and the challenging crossing of Larkya La Pass.

For trekkers looking for an experience that feels remote, culturally rich and physically rewarding, the Manaslu Circuit is an excellent choice.

Unlike some of Nepal’s more established trekking routes, the Manaslu region retains a strong sense of wilderness and traditional Himalayan life. The trail follows the Budhi Gandaki Valley before climbing toward the high settlements of Lho, Shyala, Sama Gaun, Samdo and Dharamsala, eventually crossing Larkya La before descending toward Bhimthang and the Marsyangdi Valley.

This Manaslu Circuit Trek Guide 2026 covers everything you need to know before planning the trek, including the route, itinerary, permits, cost, difficulty, altitude, best seasons, accommodation, food, packing list, altitude sickness and practical preparation tips.

Manaslu Circuit Trek at a Glance

This Manaslu Circuit Trek Guide provides a complete overview of one of Nepal’s most spectacular Himalayan trekking adventures. From the starting point and trekking duration to the highest altitude, difficulty level, permits, accommodation and best seasons, understanding these essential details will help you plan your journey with confidence.

The Manaslu Circuit Trek takes you through remote mountain villages, diverse landscapes, Tibetan-influenced communities and breathtaking Himalayan scenery before reaching the challenging Larkya La Pass at 5,106 meters. Whether you are planning your first high-altitude adventure or looking for a less crowded trekking experience in Nepal, this guide covers the key information you need before setting out on the Manaslu Circuit.


Trek Feature Details
Trek Region Manaslu, Nepal
Difficulty Moderate to Challenging
Highest Point Larkya La Pass – 5,106 m
Starting Point Machha Khola
Ending Point Tilije / Besisahar
Average Trekking Hours 5–6 hours per day
Best Seasons Spring and Autumn
Accommodation Teahouse / Mountain Lodge
Recommended Group Size 2–10 people
Main Highlight Larkya La Pass crossing
Mountain Highlight Mount Manaslu (8,163 m)

Himalayan Yatri’s current Manaslu Circuit itinerary follows a 16-day route from Machha Khola toward Tilije, with an average of 5–6 trekking hours per day and a highest point of 5,106 m at Larkya La Pass.

What Is the Manaslu Circuit Trek?

The Manaslu Circuit Trek is a long-distance Himalayan trek around Mount Manaslu, the eighth-highest mountain in the world at 8,163 m.

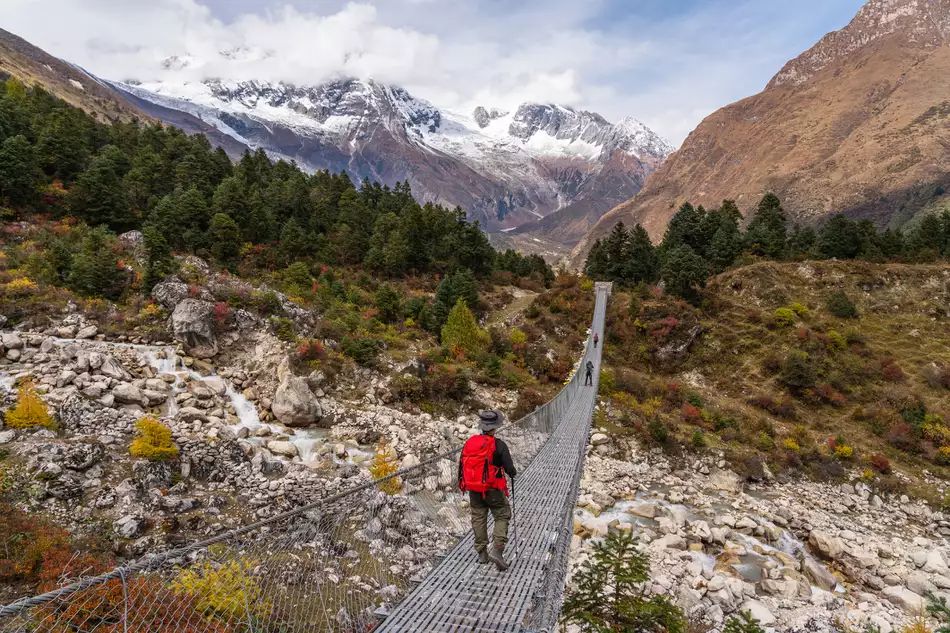
The route begins in the lower valleys of the Gorkha region and gradually follows the Budhi Gandaki River through forests, waterfalls, suspension bridges and traditional villages. As you gain altitude, the landscape changes from subtropical forests to alpine terrain and eventually to the high Himalayan environment surrounding Larkya La.

One of the defining characteristics of the trek is its cultural diversity. Lower sections of the trail feature communities influenced by Gurung traditions, while the upper Manaslu region has a strong Tibetan Buddhist cultural influence, visible in monasteries, mani walls, chortens, prayer flags and traditional mountain settlements.

The final major challenge is the crossing of Larkya La Pass, after which the trail descends toward Bhimthang and eventually joins the Marsyangdi Valley.

Why Choose the Manaslu Circuit Trek?

The Manaslu Circuit Trek is an excellent choice for trekkers who want to experience the natural beauty and cultural richness of the Nepal Himalayas while exploring a relatively remote trekking region. The route offers stunning views of Mount Manaslu, traditional mountain villages, ancient monasteries, dramatic valleys and diverse landscapes that change with altitude.

Trekkers can experience the warm hospitality of local communities while learning about the Tibetan Buddhist traditions of the upper Manaslu region. The challenging crossing of Larkya La Pass adds another exciting element to the journey. Together, these experiences make the Manaslu Circuit a rewarding adventure for travelers seeking scenery, culture and high-altitude adventure.

1. Spectacular Views of Mount Manaslu

The trek provides increasingly impressive views of Mount Manaslu and surrounding peaks as you climb higher.

From villages such as Lho, Shyala and Sama Gaun, the Himalayan panorama becomes one of the major highlights of the journey.

The route also offers views of peaks including Manaslu, Himal Chuli, Naike Peak and other surrounding mountains.

2. Authentic Himalayan Villages

The Manaslu region provides opportunities to experience traditional mountain communities and lifestyles.

Villages such as Namrung, Lho, Shyala, Sama Gaun and Samdo offer a glimpse into life in the high Himalayas.

Rather than simply walking between viewpoints, the trek becomes a journey through living mountain communities.

3. Tibetan Buddhist Culture

As you move toward the upper Manaslu region, Tibetan Buddhist influence becomes increasingly visible.

You will encounter:

  • Buddhist monasteries
  • Mani walls
  • Chortens
  • Prayer flags
  • Traditional villages
  • Mountain monasteries
  • Tibetan-influenced architecture

This cultural aspect makes the Manaslu Circuit much more than a mountain trek.

4. Larkya La Pass

The crossing of Larkya La Pass at approximately 5,106 m is the defining challenge of the trek.

The pass is also one of the most rewarding points of the journey, with dramatic mountain scenery surrounding the trail.

The crossing is demanding and normally requires an early start, good preparation and appropriate acclimatization.

5. Diverse Landscapes

One of the biggest attractions of the Manaslu Circuit is how dramatically the environment changes throughout the trek.

You can experience:

  • Green forests
  • River valleys
  • Waterfalls
  • Suspension bridges
  • Terraced hillsides
  • Traditional villages
  • Alpine meadows
  • Glacial landscapes
  • Snow-covered mountain passes

This variety makes each section of the trail feel different.

Manaslu Circuit Trek Difficulty

The Manaslu Circuit Trek is generally considered a moderate to challenging Himalayan trek and requires reasonable physical preparation. Although the route does not involve technical mountaineering, trekkers need to be comfortable walking for several hours a day over uneven and sometimes steep terrain.

The increasing altitude, long trekking days, changing weather and remote sections of the trail can make the journey physically demanding. The crossing of Larkya La Pass at approximately 5,106 meters is usually the most challenging part of the trek. With proper training, gradual acclimatization, appropriate equipment and experienced local guidance, physically fit trekkers can successfully complete this rewarding Himalayan adventure.

The main factors that make the trek challenging are:

  • High altitude
  • Long trekking days
  • Steep ascents and descents
  • Remote terrain
  • Changing weather
  • Larkya La Pass
  • Limited facilities at higher elevations

The most demanding day is generally the Larkya La crossing, which can involve approximately 8–10 hours of trekking. Himalayan Yatri’s current itinerary classifies the trek as moderate to challenging.

Who Can Do the Manaslu Circuit Trek?

The trek can be suitable for people with good general fitness and a willingness to prepare properly. Previous high-altitude trekking experience is helpful but not always essential. Before the trek, you should be comfortable with:

  • Walking 5–7 hours on consecutive days
  • Uphill and downhill terrain
  • Carrying a daypack
  • Walking at high altitude
  • Cold temperatures
  • Long trekking days

A good training program before departure can make a significant difference.

Manaslu Circuit Trek Altitude and Acclimatization

Altitude is one of the most important considerations when planning the Manaslu Circuit Trek. The trail begins at a relatively low elevation and gradually climbs through the Budhi Gandaki Valley before reaching high-altitude settlements such as Sama Gaun, Samdo and Dharamsala. The highest point of the trek is Larkya La Pass at approximately 5,106 meters, making proper acclimatization essential. A carefully planned itinerary allows your body enough time to adjust as you gain elevation. Staying hydrated, maintaining a steady pace, eating properly and informing your guide about any unusual symptoms are important parts of managing altitude during the Manaslu Circuit Trek.

Important elevations include:

  • Bihi Gaun – 2,130 m
  • Namrung – 2,630 m
  • Lho – 3,300 m
  • Shyala – 3,520 m
  • Sama Gaun – 3,530 m
  • Samdo – 3,860 m
  • Dharamsala – 4,460 m
  • Larkya La – approximately 5,106 m

Himalayan Yatri’s itinerary includes a Serang Monastery acclimatization hike and a gradual progression through Shyala, Sama Gaun and Samdo before the Larkya La crossing.

Best Time for Manaslu Circuit Trek

Choosing the right season is essential for enjoying the best possible Manaslu Circuit Trek experience. Weather conditions in the Himalayas can change significantly throughout the year, affecting visibility, temperatures, trail conditions and the Larkya La Pass crossing. Spring, from March to May, generally offers pleasant trekking conditions, blooming rhododendrons and beautiful mountain scenery.

Autumn, from September to November, is another highly preferred season because of clearer skies and excellent Himalayan visibility following the monsoon. Winter can bring snow and freezing temperatures at higher elevations, while the monsoon season can result in rain, muddy trails and landslides in lower sections of the route.

Spring: March to May

Spring offers warmer conditions, blooming rhododendrons and generally favorable trekking weather.

March and April can provide excellent mountain visibility, while May can become warmer at lower elevations.

Spring is particularly attractive if you want a combination of mountain views and colorful landscapes.

Autumn: September to November

Autumn is widely considered one of the best seasons for trekking in Nepal.

The monsoon usually leaves behind clearer skies, fresh landscapes and good mountain visibility.

October and November are particularly popular for the Manaslu Circuit.

Winter: December to February

Winter is possible but significantly more challenging at higher elevations.

Snow and freezing temperatures can affect the Larkya La crossing and accommodation availability.

Trekkers choosing winter should be properly equipped and prepared for changing mountain conditions.

Monsoon: June to August

The monsoon brings rain, clouds, muddy trails and potential landslides, particularly in the lower sections. Although experienced trekkers may still travel during this period, it is generally not the preferred season for the Manaslu Circuit.

For Himalayan Yatri’s standard itinerary, spring and autumn are listed as the suitable seasons.

Manaslu Circuit Trek Permits

Obtaining the correct permits is an essential part of planning your Manaslu Circuit Trek because the region includes a designated restricted trekking area. Trekkers need the appropriate permits to legally access the different sections of the route and pass through the required checkpoints.

Depending on the itinerary, these generally include the Manaslu Restricted Area Permit, Manaslu Conservation Area Permit and the Annapurna Conservation Area Permit for the relevant sections after crossing Larkya La. Permit fees and regulations can change, so it is important to confirm the latest requirements before your trek. Working with a registered trekking agency makes the permit process easier and ensures the necessary documentation is arranged correctly.

For foreign trekkers, the main permits generally include:

1. Manaslu Restricted Area Permit (RAP)

The Manaslu Restricted Area Permit is required for the restricted section of the route.

According to Nepal’s Department of Immigration, the current listed fee for the Gorkha Manaslu restricted area is:

  • September–November: USD 100 per week
  • December–August: USD 75 per week
  • Additional daily fees apply beyond the first week.

2. Manaslu Conservation Area Permit (MCAP)

The route passes through the Manaslu Conservation Area, so trekkers also require the applicable conservation permit.

3. Annapurna Conservation Area Permit (ACAP)

The standard circuit descends toward the Annapurna region after crossing Larkya La, so an ACAP is generally required for the section through the Annapurna Conservation Area.

Do You Need a Trekking Agency?

Restricted-area trekking permits are handled through registered trekking agencies, and the Department of Immigration states that trekking permits for restricted areas are issued through listed trekking agencies.

Because permit regulations and fees can change, trekkers should confirm the latest requirements with their trekking agency before departure.

Manaslu Circuit Trek Cost

Understanding the overall cost of the Manaslu Circuit Trek can help you plan your Himalayan adventure without unexpected expenses. The total price depends on several factors, including the length of the trek, group size, transportation, permits, accommodation, meals, guide and porter services, equipment and personal expenses.

Organized trekking packages can make budgeting easier because many essential services are included in one price. However, trekkers should also consider additional expenses such as international flights, travel insurance, Nepal visa fees, personal equipment, drinks, laundry, internet and tips. Before booking, always check the latest package details carefully to understand what is included and excluded from the trekking cost.

The total cost of a Manaslu Circuit Trek depends on several factors, including:

  • Trek duration
  • Group size
  • Accommodation standard
  • Guide and porter services
  • Transportation
  • Permits
  • Meals
  • Personal expenses
  • Travel insurance
  • Equipment rental
  • Season

A typical organized trek package may include transportation, accommodation, meals, guide, porter, permits and government taxes.

Himalayan Yatri’s current Manaslu package includes airport transfers, ground transportation, three meals per day during the trek, teahouse accommodation, licensed guides, porters, permits and entry fees, trekking equipment such as a duffel bag and trekking poles, and applicable taxes and service charges.

However, international flights, Nepal visa fees, personal equipment, personal insurance, alcoholic and bottled drinks, laundry, internet, personal expenses and tips are excluded from the listed package inclusions.

For an accurate current price, it is best to check the latest Manaslu Circuit Trek package before booking because transportation, permit and operational costs can change.

Accommodation During the Manaslu Circuit Trek

Accommodation along the Manaslu Circuit Trek is mainly provided through teahouses and mountain lodges located in the villages along the route. These accommodations offer trekkers a simple and comfortable place to rest after a long day of walking. In the lower sections of the trail, accommodation options and facilities are generally more developed, while higher-altitude villages offer more basic services.

Rooms typically include beds and mattresses, while dining areas provide a place to eat and relax. As you approach Samdo, Dharamsala and Larkya La, facilities become increasingly limited and temperatures can be very cold, making a suitable sleeping bag an important part of your trekking gear.

Most teahouses provide:

  • Basic rooms
  • Beds and mattresses
  • Blankets
  • Dining areas
  • Hot meals
  • Tea and coffee
  • Basic charging facilities in many locations

At higher elevations, facilities can be more limited and temperatures can be very cold.

A good sleeping bag is therefore an important part of your trekking equipment.

Food on the Manaslu Circuit Trek

Food provides the energy you need for long trekking days, making nutrition an important part of your Manaslu Circuit experience. Teahouses along the route generally offer a variety of Nepali, Tibetan and familiar international dishes to suit trekkers’ needs. Popular options can include dal bhat, rice, noodles, pasta, soup, momo, potatoes, eggs, porridge, pancakes and Tibetan bread.

Dal bhat is particularly popular among trekkers because it provides a filling combination of carbohydrates and protein. As you climb higher into remote mountain settlements, food choices may become more limited and prices can increase. Eating regular meals and staying hydrated can help maintain your energy throughout the trek.

Typical options may include:

  • Dal bhat
  • Rice
  • Noodles
  • Pasta
  • Soup
  • Momo
  • Potatoes
  • Tibetan bread
  • Eggs
  • Porridge
  • Pancakes
  • Tea
  • Coffee

Dal bhat remains one of the most practical trekking meals because it provides carbohydrates and protein and can be replenished as needed.

At higher elevations, food choices can become more limited, so maintaining regular meals is important.

Manaslu Circuit Trek Packing List

Packing correctly is essential for a comfortable and safe Manaslu Circuit Trek because the route passes through a wide range of elevations and weather conditions. You may experience warm temperatures in the lower valleys before encountering cold, windy and potentially snowy conditions at higher elevations.

Your packing list should therefore include layered clothing, waterproof trekking boots, a warm down jacket, thermal wear, gloves and appropriate rain protection. Essential trekking equipment such as trekking poles, a sleeping bag, backpack, headlamp, water bottles, sunglasses and sunscreen should also be included. Carry important personal documents, travel insurance details, toiletries and any required personal medication throughout your journey.

Clothing

  • Moisture-wicking T-shirts
  • Trekking trousers
  • Thermal base layers
  • Fleece jacket
  • Down jacket
  • Waterproof jacket
  • Waterproof trousers
  • Warm socks
  • Underwear
  • Gloves
  • Warm hat
  • Sun hat
  • Buff or neck warmer

Footwear

  • Waterproof trekking boots
  • Extra trekking socks
  • Camp shoes or sandals
  • Gaiters if required by seasonal conditions

Trekking Equipment

  • Trekking poles
  • Sleeping bag suitable for cold temperatures
  • Backpack/daypack
  • Duffel bag
  • Headlamp
  • Water bottles or hydration system
  • Sunglasses
  • Sunscreen
  • Personal first-aid supplies

Personal Essentials

  • Passport
  • Permits/documents
  • Travel insurance details
  • Power bank
  • Camera
  • Toiletries
  • Lip balm
  • Hand sanitizer
  • Personal medication

Himalayan Yatri also recommends equipment such as trekking poles, waterproof footwear, warm layers, a down jacket, gloves, sunglasses and a cold-weather sleeping bag for Himalayan trekking.

Manaslu Circuit Trek vs Annapurna Circuit

The Manaslu Circuit Trek and Annapurna Circuit Trek are two of Nepal’s most famous long-distance Himalayan trekking routes, but they offer distinctly different experiences. Manaslu is known for its remote atmosphere, restricted trekking areas, traditional villages and strong Tibetan Buddhist influence, while the Annapurna Circuit generally has more developed infrastructure and easier access along many sections. Both routes feature spectacular mountain scenery and high-altitude passes, with Larkya La on the Manaslu Circuit and Thorong La on the Annapurna Circuit. Choosing between them depends on your preferred level of remoteness, cultural experience, trekking difficulty and available infrastructure.

Manaslu Circuit Annapurna Circuit
More remote atmosphere More developed infrastructure
Restricted-area trekking Easier access
Strong Tibetan influence in upper villages Highly diverse cultural landscape
Larkya La Pass Thorong La Pass
Fewer facilities in remote sections Generally more accommodation options
More expedition-style feel More established trekking infrastructure

If you are looking for a more remote and culturally immersive Himalayan experience, Manaslu can be an excellent choice.

Is Manaslu Circuit Trek Suitable for Beginners?

Yes, but with preparation.

The Manaslu Circuit is not an easy beginner trek. However, someone without previous high-altitude trekking experience can potentially complete it if they are physically prepared, follow a gradual itinerary and trek with an experienced guide.

The biggest challenge is not simply walking distance. Altitude, long trekking days, cold temperatures and the Larkya La crossing require preparation.

If you are new to high-altitude trekking, allow sufficient time for training and acclimatization.

Frequently Asked Questions About Manaslu Circuit Trek

How many days is the Manaslu Circuit Trek?

A standard itinerary can take around 14–17 days depending on the route and acclimatization plan. Himalayan Yatri currently offers a 16-day Manaslu Circuit Trek itinerary.

How high is Larkya La Pass?

Larkya La is approximately 5,106 m above sea level. Himalayan Yatri lists 5,106 m as the highest altitude of its Manaslu Circuit itinerary.

What is the best month for Manaslu Circuit Trek?

October and November are among the most popular months, while March, April and May are also excellent for trekking depending on weather and trail conditions.

Is Manaslu Circuit Trek difficult?

The trek is generally considered moderate to challenging. The major challenges are altitude, long trekking days, uneven terrain and the Larkya La Pass crossing.

Do I need a guide for Manaslu Circuit Trek?

Because the Manaslu region is a restricted trekking area, permit arrangements must be handled through an authorized trekking agency. Trekking with a licensed guide is strongly recommended for safety and logistics.

What permits are required for Manaslu Circuit Trek?

The standard route generally requires the Manaslu Restricted Area Permit, Manaslu Conservation Area Permit and Annapurna Conservation Area Permit for the relevant sections.

Can beginners do the Manaslu Circuit Trek?

Beginners with good physical fitness can potentially complete the trek, but it is important to prepare properly and understand that this is a high-altitude, moderate-to-challenging trek.

Is there Wi-Fi on the Manaslu Circuit?

Wi-Fi and mobile connectivity vary significantly by location. Connectivity becomes less reliable as you move into remote and higher sections of the route.

What type of accommodation is available?

The trek primarily uses teahouses and mountain lodges. Facilities are generally basic, particularly at higher elevations.

Is Manaslu Circuit better than Everest Base Camp?

Neither trek is universally better. Everest Base Camp is famous for its iconic Everest views and established trekking infrastructure, while Manaslu offers a more remote atmosphere, cultural immersion and the challenge of crossing Larkya La.

Final Thoughts: Is the Manaslu Circuit Trek Worth It?

Absolutely. The Manaslu Circuit Trek is ideal for trekkers who want more than a straightforward Himalayan walk.

It combines dramatic mountain scenery, remote villages, Tibetan Buddhist culture, challenging high-altitude terrain and the unforgettable experience of crossing Larkya La.

With the right preparation, a carefully planned itinerary, appropriate permits and experienced local support, the Manaslu Circuit can become one of the most rewarding adventures in Nepal.

If you are ready to experience the Himalayas beyond the usual routes, the Manaslu Circuit Trek with Himalayan Yatri offers a carefully planned 16-day journey through one of Nepal’s most spectacular mountain regions.

Ready to explore Manaslu? Plan your Manaslu Circuit Trek with Himalayan Yatri and begin your journey through the heart of the Himalayas.


Altitude Sickness in Manaslu Circuit: Symptoms, Prevention & What Trekkers Need to Know

The Manaslu Circuit Trek is one of Nepal’s most rewarding Himalayan adventures, taking trekkers from lush lower valleys and traditional mountain villages into the remote highlands surrounding Mount Manaslu. But as the trail climbs higher, the landscape is not the only thing that changes. The amount of oxygen available in the air decreases, and this can affect the body. This is why altitude sickness in Manaslu Circuit is something every trekker should understand before starting the journey.

The Manaslu Circuit reaches its highest point at Larkya La Pass, around 5,106 meters, making altitude one of the most important factors to consider during the trek. Himalayan Yatri’s 16-day itinerary gradually moves from the lower elevations toward Bihi, Namrung, Lho, Shyala, Sama Gaun, Samdo and Dharamsala before crossing Larkya La.

The good news is that altitude sickness can often be prevented or managed when trekkers understand the warning signs, follow a sensible acclimatization schedule, and listen to their bodies.

What Is Altitude Sickness?

Altitude sickness, commonly called Acute Mountain Sickness (AMS), occurs when the body has not had enough time to adapt to the reduced oxygen available at higher elevations.

It can happen to anyone, regardless of age, fitness level, or previous trekking experience. Being physically fit does not make someone immune to altitude sickness. The main factors include the altitude reached, how quickly you ascend, previous experience with altitude, and individual susceptibility. The Wilderness Medical Society recommends considering both the altitude and the rate of ascent when assessing altitude-illness risk.

Altitude-related illness generally becomes a greater concern as trekkers move above approximately 2,500 meters. The Manaslu Circuit therefore enters an altitude range where proper acclimatization becomes increasingly important.

Why Is Altitude Sickness a Concern on the Manaslu Circuit?

The Manaslu Circuit does not take trekkers directly to extreme altitude. Instead, the route gradually climbs through forests, mountain villages and increasingly high alpine landscapes before reaching Larkya La Pass.

This gradual progression is important because the body needs time to adapt to lower oxygen levels.

Himalayan Yatri’s itinerary includes several important stages in this progression. After reaching Bihi Gaun at 2,130 m, trekkers take a day hike toward Serang/Nubri Monastery at approximately 3,100 m before returning to Bihi Gaun. The route then continues toward Namrung at 2,630 m, Lho Gaun at 3,300 m, Shyala at 3,520 m and Sama Gaun at 3,530 m.

Interestingly, Himalayan Yatri recommends spending the night at Shyala rather than skipping directly to Sama Gaun. Shyala and Sama Gaun are at almost the same elevation, but the additional stop provides a more gradual progression through this section of the trek.

The route then climbs further to Samdo at 3,860 m and Dharamsala/Phedi at 4,460 m before the demanding crossing of Larkya La Pass at 5,106 m.

As the altitude increases, trekkers should pay closer attention to symptoms such as headache, nausea, dizziness, unusual fatigue and loss of appetite.

When Does Altitude Sickness Usually Start?

Altitude sickness can develop within several hours after ascending to a higher elevation and commonly becomes noticeable during or after the first night at that altitude. Symptoms may also appear after moving higher during the trek.

On the Manaslu Circuit, trekkers should pay particular attention once they begin spending nights above approximately 3,000 meters. The section from Namrung to Lho, Lho to Shyala, Sama Gaun to Samdo and Samdo to Dharamsala deserves particular attention because the sleeping elevations continue to increase.

The final approach to Larkya La is especially demanding. Dharamsala/Phedi sits at approximately 4,460 m, while the pass rises above 5,100 m.

Common Symptoms of Altitude Sickness

Recognizing the early symptoms of AMS is important because mild symptoms can worsen if a trekker continues ascending.

Common symptoms include:

  • Headache
  • Nausea
  • Loss of appetite
  • Dizziness
  • Unusual tiredness
  • Weakness
  • Difficulty sleeping
  • Vomiting in some cases

A headache following recent ascent, combined with one or more symptoms such as nausea, dizziness, fatigue or loss of appetite, is characteristic of acute mountain sickness.

Don’t Ignore a Headache

A headache at altitude should not automatically be dismissed as dehydration, lack of sleep or exhaustion.

If you develop a headache together with nausea, dizziness or unusual fatigue after gaining altitude, tell your guide and monitor your condition rather than simply taking painkillers and continuing upward.

The key principle is simple:

Never hide altitude symptoms from your trekking guide. Your guide can help determine whether you should rest, remain at the same elevation or descend.

Mild AMS vs. Serious Altitude Illness

Mild AMS is uncomfortable but does not necessarily require immediate evacuation. However, it should never be ignored.

The more serious altitude-related conditions are:

High-Altitude Cerebral Edema (HACE)

HACE is a severe and potentially life-threatening form of altitude illness involving the brain.

Warning signs include:

  • Confusion
  • Severe difficulty walking or loss of coordination
  • Altered mental state
  • Extreme drowsiness
  • Severe deterioration of symptoms

These symptoms require urgent descent and medical attention.

High-Altitude Pulmonary Edema (HAPE)

HAPE affects the lungs and is another potentially life-threatening altitude illness.

Warning signs can include:

  • Breathlessness that is unusual for the level of activity
  • Difficulty breathing while resting
  • Persistent cough
  • Weakness
  • Chest tightness or discomfort
  • Blue or grey lips or skin in severe cases

Suspected HAPE requires urgent descent and medical assistance. Oxygen may also be used where available, but descent remains a critical part of treatment in remote environments.

How to Prevent Altitude Sickness on the Manaslu Circuit

The best approach to altitude sickness is prevention.

1. Ascend Gradually

Your body needs time to adapt to reduced oxygen levels. The CDC’s 2026 Yellow Book recommends avoiding a rapid increase in sleeping altitude. Once above approximately 3,000 m, a commonly recommended approach is to increase sleeping altitude by no more than about 500 m per day, with additional acclimatization time as altitude increases.

This is one reason a well-planned Manaslu itinerary matters. Rather than rushing toward the pass, the trek gradually moves through intermediate elevations before reaching the highest section.

2. Take Acclimatization Seriously

Acclimatization is not a wasted trekking day. It is the process through which your body adjusts to the reduced oxygen available at altitude. The initial acclimatization process is particularly important during the first several days of exposure to high altitude. Spend time resting and exploring rather than treating every day as a race.

3. Walk at a Comfortable Pace

There is no prize for reaching the lodge first. At high altitude, walking slowly and steadily is usually more sustainable than maintaining a fast pace and exhausting yourself early in the day. Your guide can help set an appropriate pace based on the group and the conditions.

4. Stay Hydrated

Drink regularly throughout the trek and pay attention to your body’s needs. However, hydration should not mean forcing excessive amounts of water. Drink regularly, eat properly and replace fluids lost through exertion.

5. Eat Even When Your Appetite Drops

Loss of appetite is common at altitude, but your body still needs energy. Try to eat regular meals and choose foods that provide carbohydrates, protein and sufficient calories for long trekking days. Hot meals, soups and familiar foods can be particularly appealing in the colder high-altitude environment.

6. Avoid Alcohol at High Altitude

Alcohol can interfere with sleep and may worsen the effects of altitude exposure. The CDC recommends avoiding alcohol during the first 48 hours at high altitude and avoiding substances that depress breathing. For the Manaslu Circuit, it is better to prioritize rest, hydration and acclimatization as you move into the higher elevations.

7. Sleep Well and Rest

Sleep can become more difficult as altitude increases. Periodic breathing and more frequent awakenings are common at elevations above approximately 2,700 m. Don’t worry if your sleep is not perfect at high altitude. What matters is allowing enough time for rest and paying attention to any other symptoms.

8. Listen to Your Guide

An experienced trekking guide is one of your most important safety resources in the Himalayas. Guides familiar with the Manaslu region can monitor your pace, recognize changes in your condition and recommend appropriate action when necessary.

Himalayan Yatri states that its high-altitude trekking teams are trained in first aid and carry first-aid equipment and oxygen support, with emergency helicopter rescue arranged when required.

What Should You Do If You Develop Mild AMS?

If you develop mild symptoms such as headache, nausea, dizziness or unusual fatigue, do not continue ascending until your symptoms have improved.

Tell your guide immediately.

Depending on the severity of the symptoms, your trekking team may recommend:

  • Resting at the current altitude
  • Monitoring symptoms closely
  • Avoiding further ascent
  • Treating individual symptoms as medically appropriate
  • Descending if symptoms worsen or fail to improve

The Wilderness Medical Society recommends that people with mild-to-moderate AMS should not ascend while symptomatic. If symptoms worsen or fail to improve despite appropriate measures, descent should be initiated. Severe AMS requires stopping ascent and descending.

Should You Take Diamox for the Manaslu Circuit?

Diamox is the brand name commonly used for acetazolamide, a medication that can help prevent and treat acute mountain sickness.

Acetazolamide works by helping the body acclimatize to altitude more quickly and is an established option for AMS prevention. However, it should not be treated as a substitute for proper acclimatization.

Whether you should take acetazolamide depends on your medical history, itinerary, previous altitude experience and other factors. Speak with a qualified doctor or travel-medicine professional before your trek to determine whether it is appropriate for you.

Do not start prescription medication simply because another trekker is taking it.

Can Physical Fitness Prevent Altitude Sickness?

Being fit is extremely useful for the Manaslu Circuit, but fitness alone does not prevent altitude sickness. A very fit runner can still experience AMS, while someone with moderate fitness may acclimatize well.

Physical preparation helps you handle:

  • Long trekking days
  • Steep ascents and descents
  • Carrying a backpack
  • Cold conditions
  • Consecutive days of walking

But acclimatization is a separate physiological process. For that reason, training before the trek and ascending gradually should both be part of your preparation.

Why the Larkya La Pass Requires Extra Care

Crossing Larkya La Pass at approximately 5,106 m is one of the defining moments of the Manaslu Circuit Trek. It is also one of the most demanding days.

The route from Dharamsala/Phedi crosses high mountain terrain before reaching the pass and then descends toward Bhimthang. Himalayan Yatri’s itinerary describes this as an approximately 8–10 hour trekking day.

Because of the combination of altitude, cold, wind, early-morning departure and long walking hours, trekkers need to be properly acclimatized before attempting the pass.

The goal should not simply be to reach the highest point. The goal is to cross Larkya La safely and descend comfortably.

What If You Have Altitude Symptoms Near Larkya La?

Do not attempt to “push through” serious symptoms just because you are close to the pass. Being only a few hours away from the summit does not make severe symptoms less dangerous.

If your condition deteriorates, inform your guide immediately. Depending on the situation, the safest option may be to stop, descend or seek emergency assistance. At high altitude, turning around is not failure. It is responsible trekking.

Does Everyone Get Altitude Sickness on the Manaslu Circuit?

No. Some trekkers complete the Manaslu Circuit without significant altitude problems, while others may experience mild symptoms.

There is no reliable way to predict exactly who will develop AMS. Previous experience at altitude can provide some indication, but it does not guarantee that you will have the same experience on every trek. The CDC notes that individual susceptibility varies considerably.

That is why every trekker should follow altitude-safety principles, regardless of previous experience.

A Simple Altitude Safety Rule for Manaslu

Remember these five principles:

Go slowly.
Sleep lower when possible.
Do not ascend with worsening symptoms.
Tell your guide how you feel.
Descend if serious symptoms develop.

These simple habits can make a major difference during a high-altitude trek.

Final Thoughts

The Manaslu Circuit Trek offers an incredible combination of mountain scenery, remote villages, Buddhist culture and high-altitude adventure. But the higher reaches of the route demand respect.

Altitude sickness should not discourage you from trekking in the Manaslu region. Instead, understanding AMS, acclimatization and the warning signs of serious altitude illness allows you to prepare responsibly and make better decisions on the trail.

With a gradual itinerary, appropriate acclimatization, sensible pacing, adequate preparation and an experienced trekking team, you can approach the higher sections of the Manaslu Circuit with greater confidence.

And when you finally stand at Larkya La Pass above 5,000 meters, the experience will be much more rewarding when you know you reached it safely.

Important Medical Note

This article is intended for general trekking and travel information and should not replace professional medical advice. If you have a medical condition, take regular medication, have previously experienced serious altitude illness, or are unsure whether high-altitude trekking is appropriate for you, consult a qualified medical professional before traveling to Nepal.

If symptoms become severe, particularly confusion, difficulty walking, severe breathlessness or rapidly worsening illness, seek emergency assistance and descend to a lower elevation as quickly and safely as possible.

Trek the Manaslu Circuit with Himalayan Yatri

Altitude is an important part of preparing for the Manaslu Circuit, but it should not prevent you from experiencing one of Nepal’s most spectacular Himalayan journeys.

Himalayan Yatri’s 16-day Manaslu Circuit Trek follows a gradual route from the lower valleys toward the high mountain settlements of Lho, Shyala, Sama Gaun, Samdo and Dharamsala before crossing Larkya La Pass at 5,106 m and descending toward Bhimthang. The itinerary also includes higher-elevation day hikes and carefully planned overnight stops along the route.

The trek is rated moderate to challenging, with typical trekking days of around 5–6 hours, although the Larkya La crossing is a longer 8–10-hour day.

If you’re planning your Manaslu adventure, preparation matters. Train before your trek, understand the symptoms of altitude sickness, follow a gradual ascent, stay hydrated and communicate openly with your guide throughout the journey. Respect the altitude, take your time, and let the Himalayas unfold one step at a time.

Manaslu Circuit Trek Difficulty: Is It Really That Hard?

Planning to trek around Mount Manaslu but wondering how difficult the Manaslu Circuit Trek really is? It is a fair question, especially if this will be your first high-altitude trek in Nepal.

The Manaslu Circuit Trek is a moderate to challenging Himalayan trek. It is physically demanding, but you do not need technical climbing skills or previous mountaineering experience to complete it. With good preparation, a sensible itinerary, and enough time to acclimatize, most reasonably fit trekkers can take on the route.

What makes the Manaslu Circuit challenging is the gradual change in terrain and altitude. The trek begins in the lower Budhi Gandaki Valley, where the trail passes through green hills, forests, rivers, waterfalls, and traditional villages. As you move higher, the trail becomes steeper and more rugged, the temperatures drop, and the air gets thinner. The biggest test comes when you cross Larkya La Pass at 5,106 meters (16,752 feet).

The pass is not a technical climb, but reaching it after several days of trekking requires stamina and proper acclimatization. You also have to deal with long walking days, rocky trails, steep ascents and descents, cold mornings, and the remote nature of the Manaslu region.

So, is the Manaslu Circuit Trek suitable for beginners? How many hours do you walk each day? How fit do you need to be, and how should you train before the trek? This guide covers the Manaslu Circuit Trek difficulty in detail, so you can understand exactly what to expect and decide whether this Himalayan adventure is right for you.

Manaslu Circuit Trek Difficulty at a Glance

Difficulty Factor Details
Overall difficulty Moderate to challenging
Highest point Larkya La Pass – 5,106 m
Trek duration Usually 14–18 days
Average walking 5–8 hours per day
Hardest section Dharamsala to Bimthang via Larkya La
Technical climbing Not required
Main challenge Altitude and endurance
Fitness level Good physical fitness recommended
Experience Helpful but not essential
Best preparation Hiking, cardio, stairs, and strength training

The exact difficulty varies depending on your itinerary, weather, fitness, backpack weight, acclimatization, and personal response to altitude.

Why Is the Manaslu Circuit Trek Difficult?

The Manaslu Circuit Trek is not difficult for just one reason. The challenge builds gradually as the trail takes you from the lower Budhi Gandaki Valley into the high Himalayas. What begins as a walk through green hills and villages eventually becomes a demanding high-altitude trek involving long walking days, steep trails, cold temperatures, and the crossing of Larkya La Pass at 5,106 meters (16,752 feet).

Several factors contribute to the overall Manaslu Circuit Trek difficulty, including:

  • High altitude and reduced oxygen
  • Long days on the trail
  • Steep ascents and descents
  • Rocky and uneven terrain
  • The Larkya La Pass crossing
  • Cold and changing mountain weather
  • Physical fatigue from consecutive trekking days
  • Remote sections with basic facilities
  • Risk of altitude-related illness

The difficulty also changes throughout the journey. The lower sections are generally warmer and greener, while the upper Manaslu region becomes colder, more rugged, and physically demanding. Once you reach Samagaon and the areas beyond, altitude becomes a much more important part of the trekking experience.

Here are the main factors that determine how hard the Manaslu Circuit Trek feels.

1. High Altitude

Altitude is one of the biggest challenges of the Manaslu Circuit Trek. The route gradually climbs from the lower Budhi Gandaki Valley to elevations above 4,000 meters before reaching Larkya La Pass at 5,106 meters (16,752 feet).

As you gain altitude, the air becomes thinner and your body gets less oxygen. Even a simple uphill walk can feel much harder than it does at lower elevations. You may experience headache, fatigue, dizziness, reduced appetite, shortness of breath, or difficulty sleeping.

Good physical fitness does not prevent altitude sickness, so acclimatization is just as important as training. A well-planned Manaslu Circuit Trek itinerary should include enough time for your body to adjust before reaching the highest sections.

Walking slowly, staying hydrated, eating properly, and listening to your body can make a big difference. If altitude symptoms become worse, inform your guide rather than trying to push through them.

2. Larkya La Pass

Larkya La Pass is usually the hardest and most demanding part of the Manaslu Circuit Trek. At 5,106 meters, it is the highest point of the trek and requires a combination of stamina, acclimatization, and mental strength.

The crossing normally begins early in the morning when temperatures are very cold. You then climb gradually toward the pass through high-altitude terrain. The thin air makes the ascent feel harder, even for experienced hikers.

After reaching the top, the day is not over. You still have a long descent toward Bimthang, making the entire crossing day around 8–10 hours or longer depending on weather, trail conditions, and walking pace.

The good news is that Larkya La is a trekking pass rather than a technical climbing route. You generally do not need ropes, climbing equipment, or mountaineering experience. Good fitness, proper acclimatization, suitable clothing, and a steady pace are the main requirements.

3. Long Walking Days

Another major factor in Manaslu Circuit Trek difficulty is the number of hours spent walking each day. Most trekking days involve around 5–8 hours on the trail, although some days are shorter and the Larkya La crossing can take considerably longer.

The real challenge is not completing one long hike. You have to continue walking for several consecutive days while gradually gaining altitude. Your legs may already be tired when another uphill section appears.

For this reason, endurance is more important than walking speed. Starting too quickly can leave you exhausted later in the day. A slow and consistent pace allows you to conserve energy and enjoy the trek more comfortably.

Training with longer hikes before your trip, especially on hills and uneven terrain, can help your body adjust to the demands of multiple trekking days.

4. Steep and Uneven Trails

The Manaslu Circuit offers a wide variety of terrain, and not every section is an easy walk. The trail includes rocky paths, stone steps, forest trails, suspension bridges, steep climbs, narrow sections, and long descents.

As you move into the higher elevations, the terrain becomes more rugged. Depending on the season and weather, you may also encounter snow, ice, or slippery sections around the higher parts of the route.

Downhill walking can be just as tiring as climbing, particularly after several hours on the trail. Long descents place extra pressure on your knees, thighs, and ankles.

This is why your preparation should include both uphill and downhill hiking. Exercises such as squats, lunges, step-ups, and stair climbing can also help strengthen the muscles you will use most during the trek.

5. Weather and Cold

Mountain weather can change quickly, and conditions at higher elevations can be very different from those in the lower valleys.

During the trek, you may experience sunshine, rain, strong winds, fog, snowfall, and freezing temperatures. The higher sections around Larkya La are particularly cold in the early morning, when most trekkers begin the pass crossing.

Snow or ice can also make the trail slower and more difficult to walk. Poor visibility can add another challenge, especially on high-altitude sections.

Proper clothing is therefore essential. A good layering system, warm jacket, waterproof outer layer, gloves, hat, and comfortable trekking boots can make a significant difference.

It is also important to remain flexible with your itinerary. If weather conditions become unsafe, your guide may recommend waiting or adjusting the day’s plan.

6. Remote Mountain Conditions

The remote nature of the Manaslu Circuit Trek is one of its biggest attractions, but it also adds to the overall challenge.

Compared with more developed trekking routes in Nepal, the Manaslu region has fewer facilities, particularly in the upper sections. As you climb higher, accommodation becomes simpler and access to modern services becomes limited.

You may stay in basic teahouses with simple rooms, shared bathrooms, limited hot water, basic food choices, and limited electricity. Mobile connectivity and charging facilities may also be less reliable in remote areas.

After a long day of walking, these basic conditions can make recovery more challenging. However, they are also part of the authentic mountain experience that attracts trekkers to Manaslu.

If you are comfortable with simple accommodation and a few days away from modern conveniences, the remote environment becomes one of the most memorable parts of the journey.

Is the Manaslu Circuit Trek Suitable for Beginners?

Yes, beginners can complete the Manaslu Circuit Trek, but it is not a trek to undertake without preparation. Although previous high-altitude trekking experience is helpful, you do not need to be an experienced mountaineer or a regular long-distance trekker.

The key is having a good level of fitness, proper acclimatization, and enough preparation before you start. The trek involves several hours of walking each day, steep ascents and descents, rugged trails, and a challenging crossing of Larkya La Pass at 5,106 meters.

If you are a first-time trekker, start training several months before the trip. Regular walking, hiking, stair climbing, and cardiovascular exercises can help build the endurance you need. It is also a good idea to complete a few long day hikes and at least one or two multi-day hikes before

Previous trekking experience can make the journey more comfortable because you already know how your body responds to long walking days, changing weather, basic accommodation, and physical fatigue.

So, is Manaslu suitable for a beginner? Yes, if you are reasonably fit, prepare properly, follow a gradual itinerary, and respect the effects of high altitude. With the right preparation and a steady pace, first-time Himalayan trekkers can take on this challenging but rewarding adventure.

How Can You Make the Manaslu Circuit Trek Easier?

The Manaslu Circuit is physically demanding, but the right preparation can make it much more comfortable. You do not need to walk fast or be an athlete. The key is to manage your energy, respect the altitude, and prepare for the mountain conditions.

1. Walk at a Comfortable Pace

Do not try to keep up with faster trekkers. A slow and steady pace helps conserve energy, especially on long uphill sections and at higher elevations. Consistency is more important than speedon the Manaslu Circ

2. Acclimatize Properly

Give your body enough time to adjust to increasing altitude. Never rush the itinerary just to finish the trek a day earlier. Proper acclimatization is particularly important before heading toward Larkya La Pass at 5,106 meters.

3. Keep Your Backpack Light

Carrying unnecessary weight can make every climb harder. Pack only essential items and consider using a porter if available. A lighter backpack reduces strain on your legs, shoulders, and back.

4. Stay Hydrated and Eat Well

Drink water regularly and eat enough throughout the day. Trekking at high altitude requires plenty of energy, even when your appetite is low. Carry easy-to-eat snacks such as nuts, dried fruit, or energy bars.

5. Use Proper Gear

Comfortable, broken-in trekking boots, warm layers, waterproof clothing, and trekking poles can make a noticeable difference. Good footwear is especially important on the rocky, steep, and uneven sections of the trail.

6. Listen to Your Guide and Your Body

An experienced guide can help you manage the pace, weather, altitude, and difficult sections of the trail. At the same time, pay attention to how you feel. If you experience worsening altitude symptoms or unusual exhaustion, speak up rather than pushing yourself.

With proper acclimatization, a manageable backpack, suitable gear, and a steady pace, you can make the Manaslu Circuit Trek significantly easier and more enjoyable.

Manaslu Circuit vs. Everest Base Camp vs. Annapurna

Feature Manaslu Circuit Everest Base Camp Annapurna Circuit
Difficulty Moderate to challenging Moderate to challenging Moderate to challenging
Highest point Larkya La – 5,106 m Kala Patthar – 5,545 m Thorong La – 5,416 m
Main challenge Larkya La, rugged trails, altitude High altitude and long climbs High pass and altitude
Trail & terrain Remote and rugged Well-established Diverse and more developed
Remoteness High Moderate Lower
Crowds Fewer More crowded Moderate to busy
Facilities Basic in higher areas Well-developed Good infrastructure
Mountain experience Remote and peaceful Iconic Everest views Diverse landscapes and villages
Best for Adventure and solitude Classic Everest experience Variety and accessibility

Best Time for the Manaslu Circuit Trek

Best Time for the Manaslu Circuit Trek

Choosing the best time for the Manaslu Circuit Trek can make a big difference to your trekking experience. Weather, trail conditions, snowfall, temperature, and mountain visibility all affect the overall difficulty of the trek. Spring and autumn are generally the most favorable seasons.

Spring: March to May

Spring is a popular time for trekking in Nepal. Weather conditions are generally favorable, and the mountain scenery can be excellent.

Autumn: September to November

Autumn is another highly recommended season. Skies are often clear after the monsoon, making it a popular period for the Manaslu Circuit.

Winter: December to February

Winter brings very cold conditions at high elevations. Snow and freezing temperatures can make Larkya La considerably more challenging.

Monsoon: June to August

Rain can make lower sections muddy and difficult, while landslides and transportation disruptions can affect travel.

Is the Manaslu Circuit Trek Worth the Difficulty?

Yes, the Manaslu Circuit Trek is absolutely worth the effort, especially for trekkers

The trek begins in the lower valleys, where you walk through green hills, forests, rushing rivers, waterfalls, and traditional villages. As you gain altitude, the landscape gradually changes into alpine terrain, Tibetan-influenced villages, ancient monasteries, glaciers, and spectacular Himalayan peaks.

The biggest challenge comes with the Larkya La Pass at 5,106 meters. Reaching the pass after several days of trekking requires endurance, but standing above 5,000 meters surrounded by incredible mountain views makes the effort worthwhile.

For trekkers who are properly prepared and comfortable with challenging terrain, the Manaslu Circuit offers a rewarding combination of adventure, natural beauty, mountain culture, and solitude.

Frequently Asked Questions

Is the Manaslu Circuit Trek difficult?

Yes. It is generally rated moderate to challenging because of high altitude, long walking days, rugged terrain, and the Larkya La Pass. However, it is achievable for properly prepared trekkers.

Can beginners do the Manaslu Circuit Trek?

Yes. Beginners can complete the trek if they have good fitness, train beforehand, follow a gradual itinerary, and take acclimatization seriously.

What is the hardest part of the Manaslu Circuit?

The Larkya La Pass crossing is usually the hardest day. The high altitude, cold weather, early start, and long descent make it physically demanding.

How many hours do you walk each day?

Most days involve approximately 5–8 hours of walking. The Larkya La crossing can take longer depending on conditions and walking speed.

Do I need previous trekking experience?

No. Previous experience is helpful but not essential. Good physical preparation and endurance are more important.

How long should I train before Manaslu?

Around 8–12 weeks is a reasonable training period for someone who already has a basic fitness level. If you are starting from a low fitness level, allow more time.

Is Larkya La Pass technical?

No. Under normal conditions, it is a trekking pass rather than a technical climbing route. The main challenge is altitude and endurance.

Is Manaslu harder than Everest Base Camp?

Both treks are challenging in different ways. Manaslu is more remote and includes the demanding Larkya La crossing, while Everest Base Camp reaches higher elevations.

Is Manaslu harder than the Annapurna Circuit?

Both are challenging. Annapurna has a higher pass, while Manaslu is generally more remote and rugged. Individual fitness, weather, and acclimatization make a big difference.

Do I need a guide for Manaslu?

Manaslu is a restricted trekking region with specific permit and guide requirements. Current regulations should always be checked before your trip, as requirements can change.

What fitness level is required?

Good cardiovascular endurance and strong legs are recommended. You should be comfortable walking uphill and downhill for several hours on consecutive days.

Is the Manaslu Circuit worth doing?

Yes. If you are looking for a challenging but non-technical Himalayan trek with spectacular scenery, traditional villages, mountain culture, and fewer crowds than some of Nepal’s most famous routes, Manaslu is an excellent choice.

Best Time for Manaslu Circuit Trek: A Complete Seasonal Guide

Planning the Manaslu Circuit Trek and wondering which season is best? Choosing the right time is one of the most important parts of planning this Himalayan adventure. The weather in the Manaslu region changes significantly throughout the year, and conditions can directly affect trail difficulty, mountain visibility, temperature, snowfall, and the crossing of Larkya La Pass. The best time for the Manaslu Circuit Trek is spring and autumn. These seasons generally offer stable weather, clearer mountain views, comfortable daytime temperatures, and better trail conditions. Winter and monsoon are also possible, but they bring additional challenges that can make the trek more demanding.

In this seasonal guide, we look at spring, summer/monsoon, autumn, and winter and explain what you can expect during each period. This will help you choose the best season for your Manaslu Circuit Trek based on weather, scenery, trail conditions, and your trekking experience.

Best Time for Manaslu Circuit Trek: Comparison Season-wise

Season Months Weather Trail Conditions
Spring March–May Mild and generally stable Mostly favorable
Summer/Monsoon June–August Wet, cloudy, humid Muddy and slippery in places
Autumn September–November Clear, dry, stable Excellent
Winter December–February Very cold, possible snowfall Snow and ice at higher elevations

For most trekkers, spring and autumn are the ideal seasons. The Nepal Tourism Board also identifies March–May and September–November as the main trekking seasons for the Manaslu region.

Spring: The Best Season for Colorful Landscapes

Spring, from March to May, is one of the best times for the Manaslu Circuit Trek. After the cold winter months, temperatures gradually become warmer, the forests become greener, and the trail comes alive with blooming flowers.

The lower and middle sections of the trek are particularly beautiful during spring. Rhododendrons, Nepal’s national flower, add vibrant colors to the landscape, while the higher sections offer impressive views of Manaslu and surrounding Himalayan peaks.

Weather is generally favorable for trekking, although mornings and nights remain cold at higher elevations.

Why Trek Manaslu in Spring?

Spring is a great choice if you want:

  • Pleasant daytime temperatures
  • Beautiful mountain views
  • Blooming rhododendrons
  • Green forests and valleys
  • Generally dry and comfortable trails
  • Good conditions for Larkya La Pass
  • A balance between weather and crowds

The only drawback is that weather can become less predictable toward the end of May as the monsoon approaches.

Overall, spring is an excellent choice for trekkers who want beautiful scenery and comfortable trekking conditions.

Summer/Monsoon: A Challenging but Possible Season

Summer, from June to August, overlaps with Nepal’s monsoon season and is generally the least favorable time for the Manaslu Circuit Trek.

Rainfall is common, particularly in the lower sections of the route. Trails can become muddy, slippery, and uncomfortable, while clouds may frequently cover the mountain views.

Heavy rainfall can also increase the risk of landslides and affect road transportation to and from the trekking region.

However, the entire Manaslu region does not receive the same amount of rainfall. Some northern areas lie within the Himalayan rain shadow and can be considerably drier.

Why Trek Manaslu During Monsoon?

The Manaslu Circuit Trek during monsoon can be a rewarding option for experienced trekkers who enjoy quieter trails, lush green landscapes, and fewer crowds. Although June to August brings frequent rainfall, muddy and slippery trails, cloudy skies, possible landslides, and transportation delays, some northern sections of the Manaslu region can remain relatively dry due to the Himalayan rain shadow. Lower-season travel may also offer quieter trails and potentially lower costs. However, monsoon trekking requires flexibility and preparation for rapidly changing weather and trail conditions, making it more suitable for experienced trekkers than first-time hikers.

Summer/monsoon is possible, but it is better suited to experienced trekkers who are comfortable with unpredictable weather and changing trail conditions.

Autumn: The Best Overall Season

Autumn, from September to November, is widely considered the best time for the Manaslu Circuit Trek.

After the monsoon, the skies generally become clearer, the air is fresh, and the mountains can be seen with excellent visibility. The weather is also relatively stable, making autumn ideal for long trekking days and the Larkya La Pass crossing.

The Nepal Tourism Board lists September to November as one of the two main trekking seasons in Nepal.

Autumn is also a popular period, so the trail can be busier than during other seasons. If you prefer a quieter experience, traveling toward the beginning or end of the season may be worth considering.

Why Trek Manaslu in Autumn?

Autumn offers:

  • Clear Himalayan views
  • Stable weather
  • Dry trails
  • Comfortable daytime temperatures
  • Excellent visibility
  • Favorable Larkya La conditions
  • Great photography opportunities

For most trekkers, autumn is the best overall season for the Manaslu Circuit Trek.

If clear mountain views and reliable weather are your main priorities, autumn is hard to beat.

Winter: Beautiful but More Challenging

Winter, from December to February, is the most challenging season for the Manaslu Circuit Trek.

Temperatures drop significantly at higher elevations, and snowfall can affect the upper sections of the trail. The Larkya La Pass crossing can become considerably more difficult when snow and ice are present.

Despite these challenges, winter has its own appeal. The mountains can look spectacular under fresh snow, and the trails are much quieter than during the main trekking seasons.

Why Trek Manaslu in Winter?

Winter can be attractive for experienced trekkers who want:

  • Fewer people on the trail
  • Peaceful mountain scenery
  • Snow-covered landscapes
  • Clear winter skies
  • A more adventurous experience

However, winter trekking requires proper preparation for freezing temperatures, snow, and potentially difficult trail conditions.

You should have suitable winter clothing, a warm sleeping bag, proper footwear, and enough flexibility in your itinerary to deal with changing conditions.

Winter is possible, but it is not the best choice for trekkers looking for the most comfortable and predictable experience.

Spring

Both spring and autumn are excellent seasons for the Manaslu Circuit, but they offer slightly different experiences.

Feature Spring Autumn
Weather Generally mild Stable and dry
Mountain views Very good Excellent
Landscape Green and colorful Clear and fresh
Flowers Excellent Limited
Temperature Warmer toward late spring Cooler toward late autumn
Trail conditions Generally good Generally excellent
Larkya La Favorable Favorable
Crowds Moderate Higher
Overall Excellent Best overall

Choose Spring If:

You love colorful landscapes, blooming rhododendrons, greener valleys, and relatively warm conditions.

Choose Autumn If:

You want the clearest skies, dry trails, excellent mountain visibility, and generally stable weather.

For the most reliable overall experience, autumn has a slight advantage.

Which Season Is Best for Larkya La Pass?

The best seasons for crossing Larkya La Pass are spring and autumn.

At 5,106 meters, Larkya La is the highest point of the Manaslu Circuit and one of the most demanding sections of the trek.

Weather conditions can have a major impact on the crossing. Strong winds, snowfall, ice, fog, or poor visibility can make the pass much more difficult.

During spring and autumn, conditions are generally more favorable. Winter can bring snow and ice, while monsoon conditions can create poor visibility and unpredictable weather.

Even during the best season, however, mountain weather can change quickly. A good itinerary should include some flexibility rather than assuming perfect conditions on the day of the crossing.

How Does Each Season Affect Trekking Difficulty?

The season can significantly change the Manaslu Circuit Trek difficulty.

Spring

Generally comfortable, with favorable temperatures and good trail conditions. Snow may remain at higher elevations early in the season.

Summer/Monsoon

Rain can make lower trails muddy and slippery. Clouds can reduce visibility, while landslides may affect transportation and some sections of the route.

Autumn

Usually the most comfortable season. Dry trails, stable weather, and clear views make the trek easier to manage.

Winter

Cold temperatures, snow, and ice can make the high-altitude sections considerably more demanding.

Therefore, if you want to make the trek as comfortable as possible, spring and autumn are the best choices.

Best Season for Different Types of Trekkers

Your ideal trekking season can depend on what you value most.

Your Priority Best Season
Best overall weather Autumn
Clear mountain views Autumn
Colorful landscapes Spring
Rhododendron blooms Spring
Fewer tractors Winter
Snow-covered scenery Winter
Quiet trails and lush landscapes Monsoon
Easier Larkya La conditions Spring or Autumn
First-time Manaslu trek Spring or Autumn

What Should You Consider Before Choosing a Season?

Weather should not be your only consideration when choosing the best time for the Manaslu Circuit Trek.

Your Trekking Experience

If this is your first high-altitude trek, spring or autumn is generally the better choice because conditions are more predictable.

Your Tolerance for Cold

Winter can be extremely cold at high elevations. If you do not enjoy freezing temperatures, avoid winter.

Your Preference for Crowds

Autumn is the busiest season. If you prefer quieter trails, spring or the shoulder periods may be more suitable.

Your Flexibility

If you are traveling during monsoon or winter, allow extra days in case weather conditions affect your itinerary.

Your Main Goal

If photography and mountain views are your priority, autumn is an excellent choice. If you want flowers and colorful landscapes, spring is ideal.

Tips for Trekking Manaslu in the Best Season

Even during the best seasons for the Manaslu Circuit Trek, mountain weather can change quickly, particularly at higher elevations. Whether you trek in spring or autumn, proper preparation can make your journey safer, more comfortable, and more enjoyable.

  • Check the weather forecast: Monitor updated weather forecasts before and during your trek, especially before crossing Larkya La Pass.
  • Allow extra days: Build some flexibility into your itinerary in case bad weather, trail conditions, transportation delays, or altitude-related issues affect your schedule.
  • Prepare for cold temperatures: Even in spring and autumn, temperatures can drop significantly at higher elevations. Carry warm layers, gloves, a hat, and a suitable sleeping bag.
  • Acclimatize properly: Favorable weather does not eliminate the risks of high altitude. Follow a gradual itinerary and allow enough time for your body to adjust to increasing elevation.
  • Pack appropriately: Conditions can range from warm and comfortable in the lower valleys to cold, windy, and potentially snowy at higher elevations. Pack clothing and trekking gear suitable for changing conditions.
  • Book ahead during peak seasons: Spring and autumn are the most popular times for the Manaslu Circuit Trek, so booking accommodation, guides, permits, and transportation in advance can make your trek more convenient.
  • Stay flexible: Mountain conditions can change unexpectedly, so be prepared to adjust your daily itinerary when necessary. Safety should always take priority over maintaining a fixed schedule.

Frequently Asked Questions

What is the best season for the Manaslu Circuit Trek?

Autumn and spring are the best seasons. September to November and March to May generally provide favorable weather, good visibility, and comfortable trekking conditions.

Is autumn better than spring for Manaslu?

Both are excellent. Autumn generally has an advantage for clear skies and stable weather, while spring offers beautiful flowers, greener landscapes, and warmer conditions.

Can I trek Manaslu during monsoon?

Yes, but June to August is generally less favorable. Rain, muddy trails, clouds, and possible landslides can make the trek more difficult.

Can I trek Manaslu in winter?

Yes, but winter requires more preparation. Snow, ice, and freezing temperatures can make Larkya La and other high-altitude sections significantly more challenging.

Which season has the best mountain views?

Autumn generally offers the clearest mountain views, particularly after the monsoon has ended.

Which season is best for Larkya La Pass?

Spring and autumn are generally the best seasons for crossing Larkya La because weather and trail conditions tend to be more favorable.

What is the least recommended season for Manaslu?

For most trekkers, the monsoon season from June to August is the least favorable because of rain, muddy trails, limited visibility, and possible transportation problems.

Khopra Ridge Trek Difficulty: Is It Really Hard? Everything You Need to Know Before You Go

Khopra Ridge Trek Difficulty is one of the first things you may wonder about when planning this beautiful Himalayan adventure. Whether it’s your first trek in Nepal or your first experience hiking at high altitude, it’s completely normal to ask, “How difficult is the Khopra Ridge Trek?”

The Khopra Ridge Trek is moderately difficult. You don’t need to be an experienced trekker, a mountaineer, or someone who spends every weekend climbing mountains. If you’re in good health, have a reasonable level of fitness, and prepare yourself before the trek, you’ll find that this adventure is well within reach.

Over several days, you’ll hike through lush forests, climb long uphill trails, cross peaceful mountain ridges, and gradually gain altitude. Some days will test your endurance, especially as the air gets thinner, but every climb brings you closer to breathtaking views of the Annapurna and Dhaulagiri ranges.

What makes the Khopra Ridge Trek truly special isn’t just the scenery, it’s the experience. Unlike some of Nepal’s busier trekking routes, you’ll enjoy quieter trails, authentic teahouses, welcoming mountain communities, and a chance to connect with nature without the crowds. It’s the kind of trek where the journey feels just as rewarding as the destination.

In this guide, you’ll discover exactly how difficult the Khopra Ridge Trek is, what challenges you can expect, whether it’s suitable for beginners, and how you can prepare to make your trek safer, easier, and more enjoyable.

Quick Answer 

The Khopra Ridge Trek is a moderate trek suitable for beginners with a reasonable level of fitness. You’ll typically walk 5–7 hours per day, reach an altitude of 3,660 meters (12,008 feet) at Khopra Danda, and face the biggest challenges from long uphill climbs and high altitude rather than technical terrain. With proper preparation and a gradual itinerary, most first-time trekkers can complete the trek successfully.

How Difficult Is the Khopra Ridge Trek?

The Khopra Ridge Trek is a moderate Himalayan trek suitable for beginners with a reasonable level of fitness. Most trekkers walk between 5 and 7 hours each day, reaching an altitude of around 3,660 meters (12,008 feet) at Khopra Danda. If you choose the optional hike to Khayer Lake, you’ll climb to approximately 4,660 meters (15,289 feet), making that day the most demanding part of the journey.

The trail doesn’t involve technical climbing, exposed cliff sections, or specialized mountaineering equipment. However, you’ll need to be prepared for steep ascents, uneven stone steps, changing weather, and thinner air as you gain elevation.

For most people, the biggest challenge isn’t the trail; it’s pacing yourself and adjusting to the altitude. Walk slowly, stay hydrated, and let your body adapt, and you’ll likely find the trek challenging in the best possible way.

What Makes the Khopra Ridge Trek Challenging?

Every trek in Nepal has its own challenges, and Khopra Ridge is no exception. While the trail isn’t technically difficult, there are a few factors that make it more demanding than a simple hike.

Altitude

For many trekkers, altitude is the biggest challenge.

Khopra Danda sits at around 3,660 meters (12,008 feet) above sea level, while the optional hike to Khayer Lake reaches approximately 4,660 meters (15,289 feet). At these elevations, the air contains less oxygen, so your body has to work harder even during easy sections of the trail.

You might notice that you’re breathing more heavily than usual or needing more frequent breaks. Even if you’re physically fit, altitude affects everyone differently.

That’s why it’s important to walk at your own pace rather than trying to keep up with others. The mountain isn’t going anywhere, and there’s no prize for reaching the teahouse first.

Daily Walking Hours

You’ll usually spend five to seven hours walking each day, depending on your itinerary and pace. Some days are shorter and allow you to relax in the afternoon, while others involve longer climbs through forests and ridges. Walking for several consecutive days can be tiring, especially if you’re not used to hiking.

The good news is that the route is well-paced. Most itineraries include enough time to enjoy the scenery, stop for tea, and rest along the way instead of rushing from one destination to another.

Uphill and Downhill Trails

One thing many first-time trekkers underestimate is how tiring both uphill and downhill walking can be.

The climb toward Khopra Ridge includes several steep sections that require patience and steady breathing. On the way down, your knees and leg muscles will likely feel the strain, particularly if you’re carrying your own backpack.

Using trekking poles can make both ascents and descents much easier by improving your balance and reducing pressure on your joints.

Khopra Ridge Trek Difficulty: Is It Hard for Beginners?

No, the Khopra Ridge Trek is not too difficult for beginners, and that’s one of the reasons it has become a popular choice for trekkers looking for a quieter Himalayan adventure.

You don’t need years of trekking experience to enjoy Khopra Ridge. In fact, many people choose it as their first multi-day trek in Nepal because it offers an excellent balance of challenge and comfort.

If you’re reasonably active, willing to prepare before your trip, and happy to walk at your own pace, there’s every reason to believe you can complete the trek successfully.

Preparing doesn’t have to be complicated. A few weeks of regular walking, climbing stairs, or weekend hikes can make a huge difference. More importantly, arrive with the right mindset. Trekking isn’t a competition. It’s an experience.

Some days you’ll feel strong and energetic. Other days you’ll slow down because of the altitude or a long climb. That’s perfectly normal. The mountains have their own rhythm, and you’ll enjoy the journey far more when you follow it instead of fighting against it.

By the time you reach Khopra Ridge and watch the sunrise paint the snow-covered peaks in shades of gold and orange, the effort it took to get there will feel completely worthwhile. It isn’t just about reaching the viewpoint; it’s about everything you experience along the way.

Is the Khopra Ridge Trek Right for You?

Yes, it is the best fit if you’re looking for a trek that combines incredible Himalayan scenery with peaceful trails and authentic village experiences.

This trek is perfect if you:

  • Want to avoid crowded trekking routes.
  • Prefer nature over busy tourist trails.
  • Enjoy walking for several hours a day.
  • Are looking for your first moderate trek in Nepal.
  • Want breathtaking mountain views without extreme altitude.

It may not be the best choice if you’re looking for luxury accommodation every night or prefer short day hikes with minimal physical effort.

Frequently Asked Questions (FAQs)

1. Is the Khopra Ridge Trek difficult for beginners?

No. The Khopra Ridge Trek is considered a moderate trek and is suitable for beginners with a reasonable level of fitness. You don’t need previous trekking experience, but preparing with regular walking or hiking before your trip will make the journey much more enjoyable.

2. How many hours do you walk each day on the Khopra Ridge Trek?

Most trekking days involve 5 to 7 hours of walking, depending on your itinerary, pace, and weather conditions.

3. What is the highest point of the Khopra Ridge Trek?

Khopra Danda sits at approximately 3,660 meters (12,008 feet). If you include the optional Khayer Lake hike, you’ll reach around 4,660 meters (15,289 feet).

4. Is altitude sickness common on the Khopra Ridge Trek?

Altitude sickness can affect anyone above 3,000 meters, but following a gradual itinerary, staying hydrated, and walking at a steady pace significantly reduces the risk.

5. Which season is best for the Khopra Ridge Trek?

Spring (March to May) and autumn (September to November) are the best seasons because they offer stable weather, comfortable temperatures, and excellent mountain views.

6. Do I need a guide for the Khopra Ridge Trek?

While experienced trekkers may navigate the route, hiring a licensed guide is highly recommended. A guide enhances your safety, shares local knowledge, and helps manage logistics throughout the trek.

7. How fit should I be for the Khopra Ridge Trek?

You don’t need to be an athlete, but you should be comfortable walking for several hours a day. A few weeks of walking, stair climbing, or light hiking before your trip will prepare you well.

8. Is the Khayer Lake hike worth the extra effort?

Absolutely. Although it’s the most challenging day of the trek, the sacred alpine lake and panoramic Himalayan views make it one of the most rewarding experiences for many trekkers.

Khopra Ridge Trek: Complete Guide 2026

The Khopra Ridge Trek is a moderate, off-the-beaten-path trekking route in Nepal’s Annapurna Conservation Area that climbs to a forested ridge line at roughly 3,660 meters, with an optional extension to the alpine Khayar Lake at close to 4,660 meters. Unlike Everest Base Camp or the classic Annapurna Base Camp trail, Khopra Ridge sees a fraction of the foot traffic, which is exactly why so many trekkers who have done both routes now rank it above the more famous ones.

The trek typically runs 7 to 10 days round trip from Pokhara, depending on whether you add the Khayar Lake side trip and how many rest days you build in. Along the way, the trail passes through Gurung and Magar villages, dense rhododendron and oak forest, and open alpine meadows before reaching the ridge itself, where a short pre-dawn walk delivers uninterrupted views of more than 20 Himalayan peaks, including Dhaulagiri, Annapurna I, Nilgiri, and Machhapuchhre.

Because the trail was only opened to trekkers in the last decade or so, infrastructure is newer and noticeably quieter than nearby alternatives like Poon Hill or Annapurna Base Camp, even during the busiest trekking months of the year. For travelers who want serious Himalayan scenery without competing for teahouse beds or trail space, Khopra Ridge has become one of the most frequently recommended alternatives in the entire Annapurna region.

Why Trekkers Are Choosing Khopra Ridge Right Now

• Far fewer trekkers than ABC or Poon Hill, even in peak season

• Panoramic ridge-top sunrise views of 20+ Himalayan peaks

• A rare two-in-one route: forested ridge walk plus alpine Khayar Lake

• Authentic Gurung and Magar villages with genuine home-style hospitality

• Newly opened trail, so infrastructure is fresh and trails are well-marked

Khopra Ridge Trek at a Glance

Before working through logistics, it helps to see the trek’s core numbers side by side. This snapshot covers the same information most trekkers search for first altitude, duration, difficulty, and season condensed into one reference table you can return to while arranging flights, permits, and gear.

Two figures matter most: the trek’s maximum altitude and its typical duration, since both drive nearly every other planning decision, from the sleeping bag rating you’ll need to how many acclimatization days to build in. The “moderate” difficulty rating reflects average trail conditions on the core ridge route; the Khayar Lake extension pushes a couple of days into moderate-to-challenging territory because of the altitude gain involved in a single push above 4,000 meters.

Detail Information
Region Annapurna Conservation Area, western Nepal
Trek duration 7 to 10 days (varies by route and side trips)
Max altitude Khayar Lake, approx. 4,660m (15,290ft); Khopra Ridge itself sits near 3,660m
Difficulty Moderate; moderate-to-challenging with the Khayar Lake extension
Starting point Nayapul or Ghandruk, reached by road from Pokhara
Accommodation Teahouses and community-run lodges
Best seasons Spring (March–May) and autumn (September–November)
Permits needed ACAP permit and TIMS card
Daily walking time 5 to 7 hours on average
Crowd level Low — one of the quieter Annapurna routes

Where Is Khopra Ridge and How Do You Get There?

Khopra Ridge sits in the Annapurna region of western Nepal, west of the more heavily trekked Annapurna Base Camp route and within the Annapurna Conservation Area. Most trekkers begin in Pokhara, Nepal’s lakeside gateway city to the Annapurna range, which you reach from Kathmandu by a scenic 25-minute domestic flight or a 6 to 7 hour drive along the Prithvi Highway through the hills. Pokhara itself is worth a day, both to arrange permits and to acclimatize slightly before heading into the mountains.

From Pokhara, a local jeep, shared bus, or private vehicle takes you roughly one to two hours to the trailhead, usually Nayapul or Ghandruk, both of which double as starting points for the Annapurna Base Camp and Ghorepani-Poon Hill routes. From there, the trail splits off toward Tadapani, Dobato, and eventually the Khopra viewpoint; this is where the trail traffic thins out and the trek starts to feel genuinely remote.

Road access ends well before the ridge itself, so every kilometer past Ghandruk is on foot. Mobile signal becomes patchy above Tadapani, and there are no ATMs past Pokhara, so plan cash and communications accordingly before you leave the city.

Best Time to Trek Khopra Ridge

Timing matters more on this trek than many people expect, since the route climbs high enough that weather and visibility shift quickly with the seasons. Autumn, from September through November, delivers the most stable weather of the year along with the sharpest mountain visibility, making it the season most guiding companies recommend for first-time visitors to the route. Spring, from March through May, runs a close second and adds a distinct advantage the autumn months don’t offer: rhododendron forests in full bloom across the mid-altitude sections of the trail.

Winter, from December through February, is workable for well-prepared trekkers who don’t mind cold, quiet trails and the real possibility of snow above 3,500 meters, but conditions are less predictable and some lodges reduce their services. The monsoon months of June through August are generally best avoided altogether; trails turn muddy and slippery, leeches appear at lower elevations, and cloud cover regularly blocks the long-distance mountain views that are the whole point of the trip.

Season Months Conditions
Spring March – May Rhododendron forests in full bloom, mild days, clear morning views; afternoon clouds are common
Autumn September – November The most stable weather of the year, sharp mountain visibility, cool nights, busiest of the low-crowd months
Winter December – February Cold and quiet, snow likely above 3,500m, doable with the right gear but less predictable
Summer / Monsoon June – August Wet trails, leeches at lower elevation, limited long-distance views — generally best avoided

How Difficult Is the Khopra Ridge Trek?

Khopra Ridge is generally rated moderate, sitting comfortably between an easy trek like Poon Hill and a demanding one like the Everest Three Passes. Most days involve 5 to 7 hours of walking with a mix of steep stone staircases, forest trail, and open ridge sections, and no technical climbing skills, ropes, or prior mountaineering experience are required at any point on the standard route.

What makes it slightly tougher than it looks on paper is the altitude gain if you add the Khayar Lake extension. Climbing from roughly 3,660 meters to 4,660 meters in a single push is a serious day even for experienced trekkers, and it’s the point in the itinerary where acute mountain sickness becomes a genuine risk. Watch for the standard warning signs: persistent headache, nausea, dizziness, and unusual fatigue that doesn’t improve with rest or hydration. Any of these are a signal to stop ascending and, if symptoms worsen, descend.

Reasonable fitness, a few months of hiking or stair-climbing preparation, and a sensible daily pace are usually enough to complete the trek comfortably. You don’t need previous high-altitude trekking experience to attempt Khopra Ridge, though anyone who has done a similar trek before will have an easier time judging their own limits, especially on the Khayar Lake day.

Permits Required for Khopra Ridge

Two permits cover the entire Khopra Ridge Trek, and neither is difficult to arrange. The Annapurna Conservation Area Permit, or ACAP, grants entry into the conservation area the trek passes through and funds local conservation and community projects. The TIMS card, short for Trekkers’ Information Management System, exists purely for trekker safety. It logs your route and movements so authorities can locate you in an emergency.

Both permits are issued through the Nepal Tourism Board offices in Kathmandu or Pokhara, and most trekking agencies handle the paperwork automatically as part of a guided package, which is one less thing to arrange yourself. Independent trekkers should plan to visit the tourism board office in Pokhara a day before departure, bring a couple of passport photos and your passport, and budget half a day in case of queues. Permit fees are modest relative to the overall trip cost and are typically paid in Nepali rupees or US dollars.

Permit Purpose Where to Get It
ACAP (Annapurna Conservation Area Permit) Required for entry into the Annapurna Conservation Area Nepal Tourism Board office in Kathmandu or Pokhara
TIMS Card (Trekkers’ Information Management System) Tracks trekker movement for safety purposes Nepal Tourism Board office or through a registered agency

Khopra Ridge vs. Annapurna Base Camp

Trekkers planning a trip to the Annapurna region almost always end up comparing Khopra Ridge. They share similar starting points around Ghandruk and Tadapani, which makes the comparison a fair one and the decision mostly about crowd tolerance, time available, and how much altitude you want to take on.

Annapurna Base Camp delivers the iconic amphitheater view of peaks surrounding the base camp itself and has the most established teahouse infrastructure of the three, at the cost of significant crowding in October and April. Khopra Ridge threads the needle between them: comparable mountain views to ABC, a moderate difficulty level similar to ABC’s, and a crowd level closer to a genuinely remote trek.

Feature Khopra Ridge Annapurna Base Camp
Duration 7–10 days 7–12 days
Max altitude ~4,660m (with Khayar Lake) 4,130m
Crowd level Low High in peak season
Difficulty Moderate Moderate to challenging
Signature view Sunrise ridge walk, Khayar Lake Annapurna Sanctuary amphitheater
Best for Trekkers wanting solitude plus big views First-time high-altitude trekkers

What to Pack for Khopra Ridge

Because temperatures swing from warm forest walking at lower elevations to sub-zero mornings at Khopra Ridge and Khayar Lake, layering is the single most important packing principle for this trek. Base layers should move moisture away from your skin, a mid layer should trap warmth, and an outer shell should block wind and light precipitation without you needing to carry a heavy mountaineering jacket.

Footwear deserves special attention: broken-in, waterproof hiking boots with ankle support handle the stone staircases and uneven forest trail far better than trail runners, and trekking poles noticeably reduce knee strain on the steep Dobato ascent and the long descents that follow. Above 3,000 meters, nights get cold enough that a sleeping bag rated to at least -10°C is worth the extra pack weight, especially if you’re adding the Khayar Lake night.

  •     Insulated down jacket for evenings and the Khayar Lake push
  •     Moisture-wicking base layers and a fleece mid-layer
  •     Waterproof, broken-in hiking boots with ankle support
  •     Trekking poles, especially for the steep Dobato ascent and descents
  •     Sleeping bag rated to at least -10°C for higher lodges
  •     Sun protection: hat, sunglasses rated for UV/snow glare, sunscreen
  •     Basic first-aid kit including altitude sickness medication approved by your doctor
  •     Reusable water bottle or bladder plus water purification tablets
  •     Headlamp for the pre-dawn walk to the Khopra viewpoint
  •     Cash in Nepali rupees as there are no ATMs once you leave Pokhara

How Much Does the Khopra Ridge Trek Cost?

Costs vary considerably depending on whether you trek independently or join a guided package. And on how many comfort items a private room, a porter, hot showers- you add along the way. A fully guided 7-to-9-day package booked through a Nepal-based agency, including a guide, permits, teahouse accommodation, and meals on the trail, typically runs between $500 and $900 per person, with the range driven mostly by group size and the level of service.

Independent trekkers who arrange their own permits and pay for lodging and food as they go can expect to spend roughly $20 to $30 per day, though this requires more legwork before departure and assumes you’re comfortable navigating without a guide. Porters and guides, if hired independently rather than through a package, typically charge $20 to $35 per day each, and tipping at the end of the trek is customary and appreciated, though not legally required.

Expense Estimated Cost (USD)
Guided package (7–9 days, all-inclusive) $500 – $900
Independent trekking (permits, lodging, food only) $25 – $40 per day
ACAP permit Approx. $25–30
TIMS card Approx. $10–20
Porter (optional, per day) $20 – $25
Guide (optional, per day) $25 – $35

Frequently Asked Questions About Khopra Ridge Trek

Is the Khopra Ridge Trek suitable for beginners?

Yes, in good physical condition. The core ridge trek without the Khayar Lake extension is achievable for beginners with some prior hiking experience, since the trail is well-marked and daily distances are manageable at 5 to 7 hours. The Khayar Lake side trip is significantly harder and better suited to trekkers with some altitude experience, given the single-day gain above 4,000 meters.

Do I need a guide for Khopra Ridge?

A guide isn’t legally mandatory since Khopra Ridge isn’t a restricted area, but it’s strongly recommended. The trail is less developed than Annapurna Base Camp, signage can be limited in poor weather or fog, and a local guide adds real value for safety, navigation, and cultural context in the Gurung and Magar villages along the way.

How cold does it get at Khopra Ridge and Khayar Lake?

Nighttime temperatures at Khopra Ridge commonly drop below freezing outside of summer, and Khayar Lake, at nearly 4,660 meters, can see temperatures well below -10°C at night during the shoulder seasons. A four-season sleeping bag and proper insulated layers are essential for anyone continuing to the lake.

Can I combine Khopra Ridge with the Annapurna Base Camp trek?

Some trekkers link the two routes since they share trailheads around Ghandruk and Tadapani, but combining them extends the trip considerably and requires strong fitness plus extra acclimatization days. Most trekkers treat Khopra Ridge as a standalone trip rather than an add-on to Annapurna Base Camp.

Is Khopra Ridge better than Annapurna Base Camp?

Neither trek is objectively better; they serve different goals. Khopra Ridge offers comparable mountain views with far fewer people on the trail, while Annapurna Base Camp delivers the iconic amphitheater of peaks around the base camp itself and has more established infrastructure. Trekkers who have done both routes often rate Khopra Ridge higher specifically for the solitude.

What is the highest point of the Khopra Ridge Trek?

The highest point is Khayar Lake, at approximately 4,660 meters (15,290 feet), reached as a side trip from the main Khopra Ridge camp at around 3,660 meters. Trekkers who skip the lake extension top out at the ridge itself.

How many days do I need for the Khopra Ridge Trek?

Most itineraries run 7 to 10 days including travel from and back to Pokhara. Seven days covers the core ridge trek without Khayar Lake, while 9 to 10 days allows for the lake extension plus a proper acclimatization day, which is the version most guiding agencies recommend.


Everest Base Camp Trek: The Complete 2026 Guide

There’s a reason that makes the Everest Base Camp travel guide keep showing up on every “trip of a lifetime” list you scroll past. It’s not just about standing near the world’s tallest mountain; it’s the whole build-up to that moment: the tiny mountain airstrip at Lukla, the swinging suspension bridges, the smell of juniper incense drifting out of a monastery in Tengboche, and the slow, satisfying burn in your legs as the trail climbs higher each day.

If you’re thinking about doing the Everest Base Camp trek, you probably have a dozen questions already: How hard is it really? How much does it cost? What permits do you need? How do you avoid altitude sickness? This guide answers all of it, in plain language, so you can start planning with confidence instead of guesswork.

Why the Everest Base Camp Trek Is Worth It

Search “Everest Base Camp trek”, and you’ll find no shortage of opinions on whether it’s worth the money, the effort, and the physical toll. Having a clear picture of what you’re actually getting helps answer that for yourself. You’re not just walking to a pile of rocks with a view, you’re walking through Sagarmatha National Park, a UNESCO World Heritage Site, past centuries-old monasteries, and through Sherpa villages that have supported Everest expeditions since the 1950s.

Along the way, you’ll pass Tengboche Monastery, cross the Dudh Kosi river on high suspension bridges strung with prayer flags, and watch the skyline fill with some of the most recognizable peaks on Earth: Everest, Lhotse, Nuptse, and Ama Dablam. For most trekkers, it’s less about the destination and more about how much the trail changes you by the time you’re back in Lukla.

Everest Base Camp Travel Guide: Quick Facts

• Distance: roughly 130 km (80 miles) round trip from Lukla

• Duration: 12–14 days on average, including acclimatization days

• Max altitude: 5,364 m at Everest Base Camp, 5,545 m if you add Kala Patthar

• Difficulty: Challenging, mainly due to altitude rather than technical terrain

• Starting point: Lukla, reached by a short mountain flight from Kathmandu

• Average cost: USD 1,200–2,500 depending on services and season

Best Time for the Everest Base Camp Trek

Picking the right season matters more on this trek than almost any other decision you’ll make. Weather at high altitude can shut down flights to Lukla or bury the trail in snow, so timing your trek around Nepal’s clearer months pays off.

Season Months What to Expect
Autumn (peak season) September – November Clear skies, stable weather, and the best mountain visibility of the year. Also the busiest time on the trail.
Spring March – May Warm days, blooming rhododendrons, and good visibility, second most popular season.
Winter December – February Very cold at altitude, but quiet trails and clear skies for those who don’t mind the chill.
Monsoon June – August Wet, cloudy, and prone to flight delays, generally not recommended for this route.

If you want the classic postcard views of Everest, Lhotse, and Ama Dablam, aim for late September through November. If you’d rather skip the crowds and don’t mind bundling up, winter is an underrated option.

Everest Base Camp Trek Itinerary

Most trekking itineraries for Everest Base Camp follow a similar rhythm: a few hours of walking each day, broken up by two built-in acclimatization days that are just as important as the walking days themselves.

Day Route Altitude
1 Fly Kathmandu to Lukla, trek to Phakding 2,610 m
2 Phakding to Namche Bazaar 3,440 m
3 Acclimatization day in Namche Bazaar 3,440 m
4 Namche to Tengboche 3,860 m
5 Tengboche to Dingboche 4,410 m
6 Acclimatization day in Dingboche 4,410 m
7 Dingboche to Lobuche 4,910 m
8 Lobuche to Gorak Shep, then on to Everest Base Camp 5,364 m
9 Sunrise at Kala Patthar, descend to Pheriche 5,545 m / 4,240 m
10 Pheriche to Namche Bazaar 3,440 m
11 Namche to Lukla 2,860 m
12 Fly from Lukla to Kathmandu 1,400 m

Some itineraries stretch this out further with extra buffer days for weather delays at Lukla, which is worth building into your schedule since flights here are notoriously weather-dependent.

Everest Base Camp Trek Difficulty: How Hard Is It Really?

Here’s the honest answer: the Everest Base Camp trek isn’t technically difficult. You don’t need climbing skills, ropes, or crampons. What makes it hard is the altitude and the number of consecutive days spent walking uphill with less oxygen in the air each day.

Expect to walk 5 to 7 hours a day on uneven, rocky trails, with some steep sections around Namche Bazaar and the final push to Everest Base Camp itself. If you can comfortably hike for several hours on consecutive days at home, you have the physical base you need. The bigger variable is how your body responds to altitude, which no amount of gym training can fully predict.

Everest Base Camp Travel Guide Cost Breakdown

Costs for this trek vary widely depending on how you organize it: a fully guided package, a semi-independent trip with just a guide, or a fully independent teahouse trek. Here’s roughly how the numbers break down.

Expense Approximate Cost (USD)
Domestic flights (Kathmandu–Lukla return) $340–400
Teahouse accommodation (12 nights) $60–120
Meals (12 days) $250–400
Permits (Sagarmatha National Park + Khumbu Rural Municipality entry) $50–60
Guide (per day, if hired) $25–35
Porter (per day, if hired) $20–25
Travel insurance with high-altitude and evacuation cover $80–150

All told, most trekkers spend somewhere between USD 1,200 and 2,500 for the full trip, with fully guided packages from a trekking agency sitting toward the higher end since they bundle in permits, guides, and logistics.

Permits Required for the Everest Base Camp Trek

Permit Checklist

• Sagarmatha National Park Entry Permit — required for anyone entering the park

• Khumbu Pasang Lhamu Rural Municipality Entry Permit — replaced the old TIMS card for this specific region

• Both permits can be arranged in Kathmandu or at the park entrance in Monjo

• Carry a few passport photos and your passport; checkpoints will ask for both

Everest Base Camp Trek Packing List

What to Pack

• Broken-in, waterproof trekking boots with ankle support

• A down jacket rated to at least -15°C for the higher camps

• Moisture-wicking base layers, a warm mid-layer, and a waterproof outer shell

• A 4-season sleeping bag (many teahouses provide only a blanket)

• Trekking poles, they save your knees on the descent more than you’d expect

• A headlamp, sunglasses with strong UV protection, and high-SPF sunscreen

• Water purification tablets or a filter bottle

• A basic first-aid kit, including altitude sickness medication approved by your doctor

• Nepali rupees in cash, ATMs disappear after Namche Bazaar

Altitude Sickness on the Everest Base Camp Trek

Altitude sickness is the single biggest risk on this trek, and it has nothing to do with fitness level. It’s caused by climbing faster than your body can adjust to thinner air, which is exactly why the itinerary above includes two dedicated acclimatization days.

How to Avoid Altitude Sickness

• Don’t skip the acclimatization days in Namche Bazaar and Dingboche, they’re built in for a reason

• Walk slowly and steadily, rushing uphill raises your risk significantly

• Drink at least 3–4 liters of water a day

• Avoid alcohol and sleeping pills above 3,000 meters

• Watch for headache, nausea, dizziness, or loss of appetite, and tell your guide immediately if symptoms appear

• If symptoms worsen at rest, descend; altitude sickness doesn’t improve by staying at the same elevation

Everest Base Camp Trek Without a Guide: Is It Possible?

Yes, it’s possible to trek to Everest Base Camp independently; the trail is well marked, teahouses are frequent, and you won’t get lost in the way you might on a more remote route. That said, most first-timers still choose to hire a guide, and there are good reasons for it beyond just navigation.

  • A guide can spot early signs of altitude sickness that you might dismiss as tiredness
  • Guides know which teahouses are quieter, warmer, or have better food along a crowded route
  • Hiring locally puts your trekking budget directly into the Sherpa community livelihoods
  • If you’re trekking solo, a guide adds a safety net that’s hard to replace

If you’re an experienced high-altitude trekker with good route-planning instincts, going independently is a realistic option. If this is your first big mountain trek, a guide is worth the cost.

Everest Base Camp Trek vs. Other Everest Region Treks

Everest Base Camp isn’t the only way to experience the Khumbu region. If you have more time or want a quieter alternative, it’s worth comparing it against two other popular routes.

Trek Duration Max Altitude Highlight
Everest Base Camp 12–14 days 5,364 m The classic route to the foot of Everest
Gokyo Lakes Trek 12–14 days 5,357 m Turquoise glacial lakes and fewer crowds
Everest Three Passes 18–21 days 5,545 m The full Khumbu experience, crossing three high passes

Where to Stay: Teahouses on the Route

You won’t need a tent for this trek. Teahouses line the entire route from Lukla to Gorak Shep, offering a simple room, usually with twin beds and a shared bathroom, along with a dining hall heated by a central stove. Rooms are basic, but after a full day of walking, a hot bowl of dal bhat and a warm stove feel like luxury.

Rooms get occupied during peak autumn season, so if you’re trekking through a licensed agency, they’ll typically pre-book accommodation for you along the route. Independent trekkers should aim to arrive at each stop by early-to-mid afternoon to secure a room before it fills up.

Frequently Asked Questions

How long does the Everest Base Camp trek take?

Most itineraries run 12 to 14 days round trip from Lukla, including two acclimatization days. Shorter 8 to 9 day options exist using a helicopter for part of the route, but the classic walking itinerary gives your body the best chance to adjust to altitude.

How much does the Everest Base Camp trek cost?

Budget somewhere between USD 1,200 and 2,500 depending on whether you go fully guided, hire just a guide, or trek independently. Flights, permits, and travel insurance with high-altitude evacuation cover are the biggest fixed costs.

Do I need prior trekking experience for Everest Base Camp?

No prior high-altitude experience is required, but a reasonable fitness level helps. Regular hiking, stair climbing, or cardio training in the two to three months before your trip makes the daily walking much more manageable.

What is the best time of year for the Everest Base Camp trek?

Late September through November is the most popular window, thanks to clear skies and stable weather. Spring, from March to May, is a close second, with warmer days and blooming rhododendrons along the lower trail.

Is travel insurance required for the Everest Base Camp trek?

Yes, and it should specifically cover trekking at altitude and emergency helicopter evacuation, since regular travel insurance policies often exclude both. Given how remote parts of this route are, evacuation coverage isn’t optional in any practical sense.

Can beginners do the Everest Base Camp trek?

Yes, plenty of first-time trekkers complete this route successfully every season. The trail itself doesn’t require technical skill, success mostly comes down to pacing yourself, respecting the acclimatization days, and listening to your body along the way.

Final Thoughts

The Everest Base Camp trek asks a lot of you: early mornings, cold teahouses, and legs that will absolutely feel it by day five. But it gives back just as much, in mountain views that don’t photograph the same twice, in villages that have welcomed trekkers for generations, and in the quiet, almost unreal feeling of standing at the base of the tallest mountain on Earth.

Plan around the right season, respect the altitude, and give yourself enough days to enjoy it rather than rush it. The trail will do the rest.

Annapurna Base Camp Trek Packing List

Planning the Annapurna Base Camp Trek? Packing the right gear can make the difference between a comfortable Himalayan adventure and a challenging experience. From warm clothing and proper footwear to essential documents and medical supplies, this comprehensive packing guide covers everything you need to bring for a safe and enjoyable journey to Annapurna Base Camp.

The Annapurna Base Camp Trek is one of Nepal’s most iconic trekking adventures, attracting thousands of trekkers every year. The journey takes you through traditional Gurung and Magar villages, dense rhododendron forests, terraced farmlands, and alpine landscapes before reaching the spectacular Annapurna Base Camp at an altitude of 4,130 meters (13,550 feet).

Although the trek is considered moderately difficult, the changing weather, varying temperatures, and increasing altitude make proper preparation essential. One of the most important aspects of preparing for the trek is knowing what to pack and what to leave behind.

Packing too much can make your trek unnecessarily difficult, while forgetting essential gear can lead to discomfort and even safety concerns. This comprehensive Annapurna Base Camp Trek Packing List covers everything you need to ensure a safe, comfortable, and enjoyable trekking experience.

Annapurna Base Camp Trek Packing List at a Glance

Category Recommendation
Trek Duration 7-12 Days
Highest Elevation 4,130 m (13,550 ft)
Trek Difficulty Moderate
Best Seasons Spring (March-May) and Autumn (September-November)
Recommended Backpack Weight 8-12 kg
Sleeping Bag Rating -10°C to -15°C
Essential Gear Down jacket, trekking boots, trekking poles, thermal layers, rain gear, and first-aid kit

What Should You Pack for the Annapurna Base Camp Trek?

For the Annapurna Base Camp Trek, you should pack layered clothing, waterproof trekking boots, a warm down jacket, thermal wear, a sleeping bag rated for -10°C to -15°C, trekking poles, a first-aid kit, water purification tablets, and important documents such as your passport, permits, and travel insurance.

Why Your Packing List Matters for the Annapurna Base Camp Trek

The Annapurna region experiences four distinct seasons, and temperatures can vary dramatically depending on altitude and time of day.

For example:

  • During the daytime at lower elevations like Ghandruk and Chhomrong, temperatures can reach 20°C.
  • At Annapurna Base Camp, nighttime temperatures can drop below -10°C, especially in winter.
  • Weather can change rapidly, with sunny mornings turning into snowy or rainy afternoons.

Packing appropriately helps you:

  • Stay warm and comfortable.
  • Reduce the risk of altitude-related illnesses.
  • Protect yourself from rain, snow, and strong UV rays.
  • Prevent injuries and blisters.
  • Enjoy the trek without carrying unnecessary weight.

Understanding Weather Conditions on the Annapurna Base Camp Trek

Spring (March-May)

Spring is one of the best seasons for the Annapurna Base Camp Trek. The weather is stable, and the rhododendron forests are in full bloom.

Temperature Range:

  • Daytime: 10°C to 20°C
  • Nighttime: -5°C to 5°C

Additional Packing:

  • Light fleece jacket
  • Sunglasses
  • Sunscreen
  • Lightweight gloves

Summer/Monsoon (June-August)

The monsoon brings frequent rainfall and humid conditions. Trails can become muddy and slippery.

Temperature Range:

  • Daytime: 15°C to 25°C
  • Nighttime: 5°C to 12°C

Additional Packing:

  • Waterproof jacket
  • Rain pants
  • Gaiters
  • Quick-dry clothing
  • Waterproof bags

Autumn (September-November)

Autumn is the most popular trekking season due to clear skies and excellent mountain views.

Temperature Range:

  • Daytime: 10°C to 18°C
  • Nighttime: -5°C to 5°C

Additional Packing:

  • Warm fleece
  • Down jacket
  • Wool hat
  • Extra pair of socks

Winter (December-February)

Winter offers peaceful trails and snow-covered landscapes but requires extra preparation.

Temperature Range:

  • Daytime: 5°C to 12°C
  • Nighttime: -15°C or lower

Additional Packing:

  • Heavy down jacket
  • Thermal layers
  • Insulated gloves
  • Thick socks
  • Hand warmers

Seasonal Packing Requirements for the Annapurna Base Camp Trek

Item Spring Summer Autumn Winter
Down Jacket ✓ Optional ✓ ✓✓
Rain Gear Optional Essential Optional Optional
Thermal Layers ✓ Optional ✓ ✓✓
Gaiters Optional ✓ Optional ✓
Hand Warmers No No Optional ✓


How Much Weight Should You Carry?

A common mistake among first-time trekkers is overpacking.

Recommended Backpack Weight

Trekking Style Recommended Weight
Independent Trekker 8-12 kg
With Porter 5-7 kg

In Nepal, a porter usually carries up to 20-25 kg shared between two trekkers, allowing you to carry only a small daypack with daily essentials.

Essential Documents for the Annapurna Base Camp Trek

Passport and Visa

Carry your original passport and a few photocopies.

Annapurna Conservation Area Permit (ACAP)

This permit is mandatory for entering the Annapurna Conservation Area.

TIMS Card

Depending on current regulations and whether you are trekking independently or with an agency, a TIMS card may also be required.

Travel Insurance

Choose an insurance policy that covers:

  • High-altitude trekking above 4,000 meters
  • Emergency helicopter evacuation
  • Medical expenses
  • Trip cancellation

Cash

ATMs are unavailable once you begin the trek. Carry enough Nepali Rupees to cover:

  • Meals
  • Charging fees
  • Hot showers
  • Snacks
  • Wi-Fi services
  • Tips for guides and porters

Choosing the Right Backpack

Main Backpack (40-60 Liters)

A 40-60 liter backpack is sufficient for most trekkers.

Look for:

  • Padded hip belt
  • Adjustable shoulder straps
  • Multiple compartments
  • Rain cover

Daypack (20-30 Liters)

Carry:

  • Water bottles
  • Snacks
  • Camera
  • Extra layer
  • Personal medicines

Duffel Bag

If you hire a porter, your belongings are usually packed in a duffel bag provided by your trekking company.

Clothing Packing List for the Annapurna Base Camp Trek

The key to dressing comfortably in the Himalayas is the three-layer system.

Base Layers

These help wick moisture away from your skin.

Pack:

  • 2 thermal tops
  • 2 thermal bottoms
  • 3 quick-dry T-shirts

Mid Layers

These provide insulation.

Pack:

  • Fleece jacket
  • Lightweight insulated jacket

Outer Layers

These protect you from wind and rain.

Pack:

  • Waterproof jacket
  • Waterproof pants
  • Windproof shell

Trekking Pants

Pack:

  • 2 trekking pants
  • 1 comfortable pair for evenings

Convertible pants are a great option for changing temperatures.

Down Jacket

A good-quality down jacket is essential above 3,000 meters.

You can rent one in Kathmandu or Pokhara if you don’t want to purchase your own.

Underwear and Socks

Pack:

  • 4-5 pairs of underwear
  • 3-4 pairs of hiking socks
  • 1-2 thermal socks

Merino wool socks are highly recommended because they keep your feet warm and dry.

Gloves and Headwear

Pack:

  • Inner gloves
  • Waterproof gloves
  • Sun hat
  • Wool hat
  • Neck gaiter or buff

A buff is particularly useful because it can protect you from cold winds, dust, and strong sunlight.

Footwear for the Annapurna Base Camp Trek

Trekking Boots

Your boots should be:

  • Waterproof
  • Comfortable
  • Breathable
  • Well broken-in

Never wear brand-new boots on the trek, as they often cause painful blisters.

Camp Shoes

A pair of lightweight sandals or sneakers is perfect for evenings in teahouses.

Gaiters

Gaiters are especially useful during:

  • Winter snow
  • Monsoon conditions
  • Muddy trails

Sleeping Gear

Sleeping Bag

Even though teahouses provide blankets, temperatures can get extremely cold.

A sleeping bag rated between -10°C and -15°C is recommended.

Sleeping Bag Liner

Benefits:

  • Adds warmth
  • Improves hygiene
  • Protects your sleeping bag

Earplugs and Eye Mask

Teahouses often have thin walls and shared rooms, making these items surprisingly useful.

Essential Trekking Equipment and Accessories

Trekking Poles

Trekking poles reduce pressure on your knees, particularly during long descents.

Headlamp

Useful for:

  • Early morning hikes
  • Power outages
  • Nighttime bathroom visits

Water Bottles

Carry enough capacity for at least 2 liters of water.

Water Purification Tablets

Purchasing bottled water on the trek can be expensive and creates unnecessary plastic waste.

Water purification tablets or a filtration bottle are environmentally friendly alternatives.

Sunglasses

Choose sunglasses with UV protection to protect your eyes from intense mountain sunlight.

Electronics and Gadgets

Pack:

  • Mobile phone
  • Camera
  • Power bank
  • Charging cables
  • Universal adapter
  • Spare batteries
  • Memory cards

Electricity is available in most teahouses but often comes with an additional fee.

Toiletries and Personal Care Items

Bring travel-sized toiletries.

Checklist:

  • Toothbrush
  • Toothpaste
  • Soap
  • Shampoo
  • Wet wipes
  • Toilet paper
  • Sunscreen (SPF 50+)
  • Lip balm
  • Moisturizer
  • Hand sanitizer
  • Nail clipper

At higher altitudes, your skin and lips can become extremely dry, making moisturizer and lip balm essential.

First Aid and Medical Kit

A small medical kit can save your trek.

Pack:

  • Prescription medicines
  • Diamox
  • Pain relievers
  • Bandages
  • Blister treatment
  • Antiseptic cream
  • Oral rehydration salts
  • Anti-diarrheal medicine
  • Cold medicine

Always consult a healthcare professional before using altitude medication.

Snacks and Energy Foods

Food is readily available in teahouses, but carrying additional snacks can help maintain your energy levels.

Recommended snacks:

  • Energy bars
  • Chocolate
  • Nuts
  • Dried fruits
  • Electrolyte tablets
  • Protein bars

Women’s Packing List for the Annapurna Base Camp Trek

Additional items may include:

  • Sports bras
  • Feminine hygiene products
  • Extra base layers
  • Hair ties
  • Personal medications
  • Moisturizer

Things You Should Not Pack

Avoid carrying:

  • Heavy books
  • Excessive clothing
  • Hair dryers
  • Large bottles of toiletries
  • Too many gadgets
  • Expensive jewelry
  • Large suitcases

Every extra kilogram becomes noticeable during long days of trekking.

Complete Annapurna Base Camp Trek Packing Checklist

Category Essential Items
Documents Passport, Permits, Insurance
Clothing Thermals, Down Jacket, Fleece
Footwear Trekking Boots, Sandals
Equipment Trekking Poles, Headlamp
Electronics Phone, Power Bank
Toiletries Sunscreen, Soap
Medical First Aid Kit
Snacks Energy Bars, Nuts

Final Thoughts

Packing smart is one of the most important steps in preparing for the Annapurna Base Camp Trek. The right clothing, equipment, and accessories can significantly improve your comfort and safety on the trail.

Focus on lightweight, multi-purpose gear and avoid overpacking. Plan your packing list according to the season, trekking style, and personal needs.

With proper preparation and this complete Annapurna Base Camp Trek Packing List, you’ll be fully equipped to enjoy one of Nepal’s most spectacular Himalayan adventures and create unforgettable memories in the Annapurna region.

Frequently Asked Questions

Can I rent trekking gear in Nepal?

Yes. Kathmandu and Pokhara have many shops where you can rent:

  • Down jackets
  • Sleeping bags
  • Trekking poles
  • Duffel bags

How cold does Annapurna Base Camp get?

Winter temperatures can fall below -15°C, while spring and autumn nights typically range between -5°C and 0°C.

Do I need a sleeping bag?

Yes. A sleeping bag provides additional warmth and comfort, especially during colder months.

Is hiring a porter necessary?

No, but many trekkers find it helpful because it reduces physical strain and allows them to enjoy the trek more comfortably.

What size backpack should I bring?

A 40-60 liter backpack is ideal for most trekkers.

Annapurna Sanctuary Trek

The Annapurna Sanctuary Trek can be rightly referred to as one of the most beautiful treks in Nepal where trekkers get a chance to experience walking in a natural amphitheater of Himalayan mountains which boasts some of the most famous peaks of the world. Annapurna I (8,091 m), Machhapuchhre (Fishtail), Hiunchuli, and Annapurna South make up the ring surrounding the Annapurna Sanctuary and providing a magnificent 360-degree view of a mountainous basin.

One of the best things about this trek is the possibility to see a great number of interesting things during a single journey. Along with stunning views of majestic mountains, trekkers can explore traditional Gurung villages, terraced farms, rhododendron forests, streams of water on their way up towards the sanctuary that lies in the high alpine zone.

This sanctuary at 4,000 meters above sea level offers wonderful views of snow-capped mountains and glaciers, however, despite the high altitude, this trek is still rather moderate in difficulty.

Everything you need to know about the Annapurna Sanctuary Trek is included in this complete guide, which features a map of the journey, distance to cover, duration of the trip, altitude details, difficulty levels, and budget details. Furthermore, this guide will tell you when the ideal time for visiting is, what benefits you can derive from going at different seasons, and the climate of the region. Moreover, a comparison between the Annapurna Sanctuary Trek and the famous Annapurna Base Camp Trek is also provided.

For all types of trekkers, whether first-timers or experienced ones, the Annapurna Sanctuary Trek is the ultimate Himalayan experience in Nepal.

What is Annapurna Sanctuary Trek?

The Annapurna Sanctuary Trek is a popular classic trek in the Himalayas. This trek offers visitors a chance to explore a glacial basin located on an altitude above 4,000 meters in the middle of the magnificent Annapurna mountain range. It is considered a holy ground because of its geography and spiritual significance and a sanctuary due to its environmental protection status in Nepal.

Unlike many other treks, Annapurna Sanctuary Trek offers an incredible natural formation. It is surrounded by a chain of mountains forming a 360-degree amphitheater around the valley. Annapurna I, Machhapuchhre, Hiunchuli, and Annapurna South create a natural boundary for this sanctuary.

This trek is one part of what is called a Himalayan sanctuary trek Nepal. In addition to amazing nature scenery, it involves a great amount of interaction with local culture and traditions. On the way, trekkers can visit villages of local tribes Gurung and Magar that have preserved their ancient way of life and hospitality until today. Stone-built houses, prayer flags and terraces fields are clear examples of the rich cultural heritage of this region.

Apart from cultural interactions, the trail passes through thick forests of rhododendrons and bamboo, waterfalls, and picturesque alpine areas. As the altitude changes, the scenery is drastically transformed to show icy valleys and scenic mountain ranges.

Ultimately, the Annapurna Sanctuary Trek is not only an exploration of a destination; rather, it is an experience in nature and spirituality as well.

Annapurna Sanctuary Trek Route Map

The trekking route to the Annapurna Sanctuary is well-established and follows a gradual ascent through diverse landscapes.

Main Route Overview:

  • Nayapul / Siwai (starting point)
  • Ghandruk
  • Chhomrong
  • Bamboo
  • Dovan
  • Deurali
  • Machhapuchhre Base Camp (MBC)
  • Annapurna Base Camp (ABC) / Sanctuary Core

Route Highlights:

  • The trail begins in green hills and terraced farmland.
  • It passes through dense rhododendron and bamboo forests.
  • Gradually transitions into alpine terrain near the sanctuary.

Ghorepani Poon Hill Trek Connection

Many trekkers combine the Ghorepani Poon Hill Trek connection with the Annapurna Sanctuary route. Poon Hill offers a stunning sunrise view over Annapurna and Dhaulagiri ranges, making it a perfect warm-up trek before entering the sanctuary.

The return route usually follows the same path, though some variations go through Jhinu Danda, famous for its natural hot springs.

Annapurna Sanctuary Trek Distance, Duration & Altitude

Annapurna Sanctuary Trek Distance

Distance Covered on Annapurna Sanctuary Trek

Depending on various factors such as the specific route that one chooses, the starting point, and whether one intends to take some side trips during the expedition, the total trekking distance will vary. On average, trekkers can expect a distance covered during a round trip of about 70 km to 115 km.

Shorter itineraries will begin from either Nayapul or Siwai and travel straight to Annapurna Base Camp. Longer itineraries will have an extra stopover such as Ghorepani Poon Hill or Jhinu Danda hot springs. The journey involves a combination of stone stairways, forest paths, crossing of rivers, and climbing up slowly.

Annapurna Sanctuary Trek Duration

The typical duration of the trek ranges from 7 to 12 days, depending on the itinerary style and walking pace.

  • 7–8 days itinerary: Suitable for experienced trekkers or those with limited time. This option follows a more direct route with fewer rest days.
  • 9–12 days itinerary: A more balanced and recommended approach that allows proper acclimatization, better cultural exploration, and a more relaxed trekking rhythm.

Longer itineraries are especially beneficial for first-time trekkers in the Himalayas, as they reduce the risk of altitude sickness and provide more time to enjoy the landscapes and villages along the route.

Annapurna Sanctuary Trek Altitude

The altitude gain during the Annapurna Sanctuary Trek is gradual but significant, reaching a maximum elevation of 4,130 meters at Annapurna Base Camp, the heart of the sanctuary.

Key altitude points along the route include:

  • Chhomrong: 2,170 meters (important gateway village)
  • Bamboo / Dovan: 2,300–2,600 meters (forest zone)
  • Deurali: 3,200 meters (transition to alpine terrain)
  • Machhapuchhre Base Camp (MBC): 3,700 meters
  • Annapurna Base Camp (ABC): 4,130 meters

Although the ascent is relatively gradual compared to other high-altitude treks, trekkers should still be cautious of Acute Mountain Sickness (AMS). Proper hydration, steady pacing, and acclimatization days are highly recommended to ensure a safe and enjoyable journey.

Annapurna Sanctuary Trek Difficulty Level

Annapurna Sanctuary Trek Difficulty is usually rated as moderate, making it one of the easier high-altitude Himalayan treks in Nepal. No technical climbing skills are required, but the trek requires a certain physical conditioning and stamina because of its constant ascent and elevation gain.

Why the trek is moderate

The first major reason why this trek is feasible for most trekkers is its well-developed trail network. The trekking route is clearly marked and well traveled, which means there are no difficulties with navigation. Another important element is the possibility to use tea houses along the whole trekking route, meaning that there is no need for camping and carrying bulky expedition equipment.

The gradualness of ascent is another aspect that should be mentioned. While the trek always goes to higher altitudes, it is carefully arranged in such a way that allows it to gradually adapt to elevation changes.

Main challenges on the trek

Despite being moderate, the trek still presents several physical challenges:

  • Long uphill stone staircases: Especially in sections like Chhomrong, where continuous stone steps can be tiring on the knees and legs.
  • Frequent ascents and descents: The trail is not flat, and trekkers often lose and gain elevation multiple times in a single day.
  • High-altitude sections above 3,000 meters: As you move closer to Machhapuchhre Base Camp and Annapurna Base Camp, oxygen levels decrease noticeably.
  • Weather variability: Conditions can change quickly in the Himalayas, with cold mornings, strong winds, or sudden cloud cover.

Who can do the Annapurna Sanctuary Trek?

This trek is suitable for a wide range of trekkers, including:

  • Beginners with good physical fitness who are prepared for daily walking and altitude gain
  • Experienced trekkers looking for a scenic and culturally rich Himalayan route
  • Travelers capable of walking 5–7 hours per day with a steady pace

No prior trekking experience is required, but basic preparation such as cardio training, hiking practice, and stamina building is highly recommended.

Overall assessment

With proper planning, pacing, and acclimatization, the Annapurna Sanctuary Trek is achievable for most healthy individuals. It offers a perfect balance between challenge and comfort, making it an ideal introduction to high-altitude trekking in the Himalayas while still delivering an unforgettable adventure experience.

Best Time for Annapurna Sanctuary Trek

Timing plays a crucial role in the trekking experience.

Best Season to Do Annapurna Sanctuary Trek in Nepal

Spring (March to May)

  • Blooming rhododendron forests
  • Clear mountain views
  • Moderate temperatures
  • One of the most beautiful seasons

Autumn (September to November)

  • Best overall weather
  • Crystal-clear visibility
  • Stable trekking conditions
  • Peak trekking season in Nepal

Off-season trekking

Winter (December to February)

  • Cold temperatures at higher altitudes
  • Fewer crowds
  • Snow-covered landscapes

Monsoon (June to August)

  • Heavy rainfall
  • Slippery trails
  • Limited mountain views

Autumn and spring remain the best choices for the Annapurna Sanctuary Trek.

Annapurna Sanctuary Trek vs Annapurna Base Camp Trek

Many trekkers confuse these two routes, but they are closely related.

Similarities:

  • Both lead to Annapurna Base Camp (4,130m)
  • Same general region and trail system
  • Stunning Himalayan views

Differences:

Feature Annapurna Sanctuary Trek Annapurna Base Camp Trek
Experience type Full sanctuary immersion Direct ABC focus
Route style More cultural + scenic Shorter & direct
Duration 7–12 days 5–9 days
Crowd level Less crowded More popular

Which one should you choose?

  • Choose Sanctuary Trek for a deeper cultural and natural experience
  • Choose ABC Trek for a shorter and more direct Himalayan adventure

Guide and Porter Cost for Annapurna Sanctuary Trek

Getting a guide or porter for the Annapurna Sanctuary Trek is advisable because of its benefits in terms of safety and comfort and cultural experience. Although the trekking trail is fairly well-defined, having a local guide makes all the difference when it comes to safety and enjoying the trip.

Guide’s Fee

On average, a licensed trekking guide would charge between USD 25-35 per day. The role of the guide is not only to show you the way; he is also responsible for controlling the pace of your trekking and informing you of the altitude, climate, and other relevant issues. However, the most important thing that guides are responsible for is being able to deal with emergencies, such as signs of altitude sickness.

Porter Cost

Porter’s pay varies between $18 to $25 based on distance, seasons, and load carried. The porters normally carry 15 to 25 kilograms of baggage, making it easy for trekkers to hike with just a small backpack. This helps save one from much physical exhaustion especially during tough and steep climbs through stone stairs.

Why hire a guide or porter?

There are several important advantages to hiring local support:

  • Navigation assistance: Even though the route is popular, weather changes or forest sections can sometimes make navigation confusing.
  • Local cultural insight: Guides share valuable knowledge about Gurung villages, traditions, festivals, and Himalayan lifestyle, making the trek more meaningful.
  • Safety in remote areas: In case of injury, altitude sickness, or weather issues, having a guide ensures quick and informed decision-making.
  • Reduced physical burden: Porters carry your heavy backpack, allowing you to focus on enjoying the scenery and maintaining your energy.

Nepal trekking packages option

Many trekkers also prefer booking Nepal trekking packages that include everything in one arrangement—permits, accommodation, meals, guide, and porter services. These packages offer a hassle-free experience, especially for first-time visitors, as they eliminate the need to manage logistics on the trail.

Choosing a package can also help with better cost control and smoother coordination throughout the journey, making the overall trekking experience more organized and stress-free.

Is Annapurna Sanctuary Trek Worth It?

Yes—absolutely. The Annapurna Sanctuary Trek is widely considered one of the most rewarding trekking experiences in Nepal, offering a rare combination of dramatic mountain scenery, cultural richness, and manageable trekking difficulty. It is a journey that delivers a true Himalayan experience without requiring technical climbing skills or extreme expedition-level preparation.

Key highlights:

  • 360-degree mountain views inside a natural amphitheater
  • Close-up view of Annapurna I and Machhapuchhre
  • Rich Gurung cultural experience
  • Diverse landscapes from forests to glaciers

Why it stands out:

When compared to other trekking routes in Nepal that involve the Himalayas, one of the most unique trekking routes is the Annapurna Sanctuary Trek. This trek does not require one to have any technical skills or be physically fit to enjoy the spectacular views of the mountains.

This is because it is highly supported by the teahouses along the trail and the terrain is fairly easy for everyone.

Connection with Other Treks

Annapurna Base Camp Trek

The Annapurna Sanctuary Trek shares the final destination with the Annapurna Base Camp Trek, making them closely connected experiences.

Ghorepani Poon Hill Trek Connection

Many trekkers combine this route with Poon Hill, known for its sunrise view over Annapurna and Dhaulagiri ranges. This combination enhances the overall trekking experience.

Permits Required for Annapurna Sanctuary Trek

Two main permits are required:

  • Annapurna Conservation Area Permit (ACAP)
  • TIMS Card (Trekkers’ Information Management System)

These permits help support conservation and ensure safe trekking management in the region.

Packing List for Annapurna Sanctuary Trek

Essential items include:

Clothing:

  • Thermal layers
  • Waterproof jacket
  • Fleece or down jacket
  • Trekking pants

Gear:

  • Trekking boots
  • Backpack (30–50L)
  • Sleeping bag (for colder months)

Essentials:

  • Sunscreen and sunglasses
  • First aid kit
  • Water purification tablets
  • Trekking poles

Tips for a Successful Annapurna Sanctuary Trek

  • Maintain steady walking pace to avoid altitude sickness
  • Stay hydrated throughout the trek
  • Acclimatize properly at higher elevations
  • Hire a local guide for better safety and navigation
  • Check weather conditions before starting

Conclusion

Annapurna Sanctuary Trek is one of the most popular treks in the Himalayas of Nepal, which gives you all the things that one can expect from trekking in Nepal, from natural beauty to adventure and culture. Right from the green valley to Annapurna Base Camp, everything on this trek is magical.

It is ideal for both beginners as well as experienced trekkers. If you have decided to go for any trekking package in Nepal, then Annapurna Sanctuary Trek is something that should be considered as your first choice. It is not just a trek—it is a journey into one of the most spectacular natural sanctuaries in the world.

Ultimate Manaslu Circuit Trek Packing List: Everything You Need for a Safe Himalayan Adventure

The Manaslu Circuit Trek Packing List is one of the most important aspects of preparing for this spectacular Himalayan journey. The Manaslu Circuit Trek is known for its remote mountain landscapes, authentic cultural experiences, and challenging high-altitude terrain. Proper packing can make the difference between a comfortable trek and a difficult one.

Unlike popular trekking routes in Nepal, the Manaslu region remains relatively untouched and remote. Facilities are limited, weather conditions can change rapidly, and temperatures can drop significantly, especially near Larkya La Pass (5,106m). Therefore, having a well-planned Manaslu Trek packing checklist is essential.

This comprehensive guide covers everything you need to know about what to pack for Manaslu Circuit Trek, including clothing, equipment, personal items, and seasonal considerations.

Understanding the Manaslu Circuit Trek Environment

Before preparing your packing list for Manaslu Trek Nepal, it’s important to understand the trekking conditions.

Trek Duration and Altitude

Most trekkers spend between 12 and 18 days on the trail. The trek reaches its highest point at Larkya La Pass, situated at 5,106 meters. At this altitude, temperatures can be freezing even during peak trekking seasons.

Weather Conditions

The best trekking seasons are spring (March–May) and autumn (September–November). During these periods, skies are generally clear and temperatures are comfortable.

Winter brings heavy snowfall and extreme cold, while the monsoon season introduces rain, mud, and leeches at lower elevations.

Tea House Trekking

Most trekkers stay in tea houses. While accommodation and meals are available, don’t expect luxury. Essential gear such as sleeping bags, warm clothing, and personal hygiene products should be part of your Manaslu Circuit Trek equipment list.

Essential Documents and Permits

Documents are among the most important items in your Manaslu Trek essentials.

Required Permits

You will need:

  • Manaslu Restricted Area Permit (RAP)
  • Manaslu Conservation Area Permit (MCAP)
  • Annapurna Conservation Area Permit (ACAP)

Personal Documents

Pack the following:

  • Original passport
  • Multiple passport-sized photos
  • Travel insurance documents
  • Emergency contact information
  • Flight tickets and itinerary copies

Financial Essentials

ATMs are unavailable along most of the route. Carry sufficient Nepalese Rupees for:

  • Accommodation
  • Meals
  • Charging devices
  • Hot showers
  • Snacks

Keep your cash in a waterproof pouch.

Manaslu Circuit Trek

Clothing Packing List for Manaslu Circuit Trek

Choosing the right clothing is crucial for a successful Manaslu Circuit Trek packing list.

Base Layers

These help regulate body temperature and wick moisture away from your skin.

Pack:

  • 2–3 thermal tops
  • 2 thermal leggings
  • Moisture-wicking underwear

Mid Layers

Mid layers provide insulation.

Recommended items:

  • Fleece jacket
  • Lightweight insulated jacket
  • Wool sweater (optional)

Outer Layers

Weather in the Himalayas can change quickly.

Pack:

  • Waterproof jacket
  • Waterproof trekking pants
  • Windproof shell layer

Trekking Clothes

Bring:

  • 3–4 quick-dry trekking shirts
  • 2 trekking pants
  • 1 pair of trekking shorts
  • Comfortable camp clothes

Sleepwear

A lightweight set of thermal clothing reserved for sleeping helps maintain comfort during cold nights.

Essential Footwear for the Trek

Footwear can significantly impact your trekking experience.

Trekking Boots

A good pair of trekking boots is perhaps the most important item in your essential gear for Manaslu Circuit Trek.

Choose boots that are:

  • Waterproof
  • Ankle-supporting
  • Well broken-in

Avoid using new boots on the trek.

Camp Shoes

Lightweight sandals or slip-on shoes are ideal for relaxing after a long day of hiking.

Trekking Socks

Pack:

  • 4–5 pairs of wool socks
  • 2 pairs of liner socks

Quality socks help prevent blisters and keep feet warm.

Gaiters

Optional but useful during snowy conditions and muddy sections of the trail.

Cold Weather Accessories

As you gain altitude, temperatures can become extremely cold.

Warm Hat or Beanie

A fleece or wool beanie helps retain body heat.

Sun Hat

Protection from strong Himalayan sunlight is essential.

Neck Gaiter or Buff

A versatile item that protects your neck and face from dust, wind, and cold.

Gloves

Pack:

  • Lightweight inner gloves
  • Waterproof insulated outer gloves

Sunglasses

UV rays are stronger at higher elevations. Bring sunglasses with UV400 protection.

Trekking Equipment and Gear

The right trekking gear for Manaslu Circuit can greatly improve comfort and safety.

Backpack

Choose a backpack between 40 and 60 liters depending on whether you hire a porter.

Features should include:

  • Comfortable shoulder straps
  • Hip belt support
  • Rain cover

Daypack

A smaller backpack is useful for carrying daily essentials.

Trekking Poles

Trekking poles help reduce stress on knees and improve balance during steep climbs and descents.

Sleeping Bag

A sleeping bag rated to at least -10°C is highly recommended.

Many tea houses are unheated, especially at higher elevations.

Dry Bags

Use dry bags to keep electronics, clothing, and documents safe from moisture.

Rain Cover

Essential during unexpected rain or snowfall.

Personal Hygiene and Toiletries

Maintaining hygiene is important during multi-day trekking adventures.

Basic Toiletries

Pack:

  • Toothbrush
  • Toothpaste
  • Soap
  • Shampoo
  • Small towel

Hygiene Essentials

Bring:

  • Wet wipes
  • Hand sanitizer
  • Toilet paper
  • Tissue paper

These items may be expensive or unavailable in remote villages.

Skin Protection

High-altitude environments can be harsh on the skin.

Pack:

  • Sunscreen SPF 50+
  • Lip balm with SPF
  • Moisturizer

First Aid and Health Essentials

Your high altitude trekking packing list should always include a first aid kit.

Personal Medications

Bring enough medication for the entire trek.

Altitude Sickness Medication

Consult a doctor regarding medications such as Diamox before your trip.

First Aid Supplies

Include:

  • Adhesive bandages
  • Blister pads
  • Pain relievers
  • Antiseptic cream
  • Elastic bandage
  • Antihistamines

Water Purification

Avoid drinking untreated water.

Options include:

  • Water purification tablets
  • Portable water filters
  • UV purification devices

Electronics and Useful Gadgets

While trekking through remote regions, certain electronics can be very useful.

Smartphone

Useful for:

  • Navigation
  • Photography
  • Emergency communication

Power Bank

Electricity may not always be available.

A power bank with at least 20,000mAh capacity is recommended.

Headlamp

Essential for:

  • Early morning starts
  • Night-time bathroom visits
  • Emergencies

Pack extra batteries if required.

Charging Adapters

Nepal uses Type C, D, and M plugs.

Camera Equipment

Photography enthusiasts should bring:

  • Camera
  • Spare batteries
  • Memory cards

Cold temperatures can drain batteries quickly.

Snacks and Energy Boosters

Food is available along the route, but carrying additional snacks is highly recommended.

Energy Bars

Provide quick energy during long trekking days.

Nuts and Dry Fruits

Lightweight and nutrient-dense.

Electrolyte Powders

Help maintain hydration and replace lost minerals.

These are particularly useful at higher elevations.

Seasonal Packing Tips for Manaslu Circuit Trek

Spring (March–May)

Pack:

  • Lightweight layers
  • Sunglasses
  • Sunscreen

Expect pleasant weather and blooming rhododendrons.

Autumn (September–November)

This is the most popular season.

Pack:

  • Warm layers
  • Waterproof jacket
  • Trekking poles

Winter (December–February)

Winter requires extra preparation.

Bring:

  • Heavy down jacket
  • Additional thermal layers
  • Insulated gloves

Monsoon (June–August)

Pack:

  • Waterproof clothing
  • Quick-dry garments
  • Extra socks
  • Rain cover

Items You Can Rent in Kathmandu

Many trekkers prefer renting equipment rather than purchasing it.

Popular rental items include:

  • Sleeping bags
  • Down jackets
  • Trekking poles
  • Duffel bags
  • Gaiters

Renting can significantly reduce travel costs.

Common Packing Mistakes to Avoid

Overpacking

One of the biggest mistakes is carrying too much weight.

Only pack what you truly need.

Packing Cotton Clothing

Cotton absorbs moisture and dries slowly.

Choose synthetic or wool materials instead.

Ignoring Weather Conditions

Always prepare for sudden weather changes in the Himalayas.

Forgetting Essential Documents

Double-check permits, passport, and insurance documents before departure.

Complete Manaslu Circuit Trek Packing Checklist

Documents

  • Passport
  • Permits
  • Insurance
  • Photos
  • Cash

Clothing

  • Thermal layers
  • Fleece jacket
  • Down jacket
  • Waterproof shell
  • Trekking shirts
  • Trekking pants

Footwear

  • Trekking boots
  • Camp shoes
  • Wool socks

Gear

  • Backpack
  • Daypack
  • Trekking poles
  • Sleeping bag
  • Dry bags

Toiletries

  • Toothbrush
  • Toothpaste
  • Sunscreen
  • Wet wipes
  • Hand sanitizer

First Aid

  • Personal medications
  • Bandages
  • Painkillers
  • Water purification tablets

Electronics

  • Phone
  • Headlamp
  • Power bank
  • Camera

Snacks

  • Energy bars
  • Nuts
  • Electrolytes

Conclusion

Preparing a complete Manaslu Circuit Trek Packing List is one of the most important steps toward a successful Himalayan adventure. By bringing the right clothing, equipment, health supplies, and travel documents, you can focus on enjoying the stunning landscapes, traditional mountain villages, and unforgettable experience that the Manaslu region offers.

Whether you’re an experienced trekker or embarking on your first Himalayan journey, following this detailed Manaslu Trek packing checklist will ensure you stay safe, comfortable, and well-prepared throughout the trek. Pack smart, travel light, and enjoy one of Nepal’s most rewarding trekking experiences.

Frequently Asked Questions

How much weight should I carry on the Manaslu Circuit Trek?

If carrying your own backpack, try to keep it under 12–15 kg. If hiring a porter, you can pack slightly more, but lighter is always better.

Do I need a sleeping bag for Manaslu Circuit Trek?

Yes. Even though tea houses provide blankets, temperatures can drop below freezing at higher elevations.

Can I rent trekking gear in Kathmandu?

Yes. Sleeping bags, down jackets, trekking poles, and other equipment are widely available for rent.

What type of backpack is best for Manaslu Circuit Trek?

A comfortable 40–60-liter backpack with good support and a rain cover is ideal.

Is a down jacket necessary for the Manaslu Circuit Trek?

Absolutely. Temperatures near Larkya La Pass can be extremely cold, even during peak trekking seasons.


Khopra Danda Trek: A Complete Guide to the Khopra Ridge Community Trek in Nepal

The Khopra Danda Trek, also widely known as the Khopra Ridge Community Trek, is one of Nepal’s most scenic and peaceful trekking experiences in the Annapurna region. This hidden gem offers breathtaking Himalayan views, authentic village life, and a true off-the-beaten-path adventure far from the crowded trekking routes.

Unlike popular trails such as the Annapurna Base Camp Trek or Ghorepani Poon Hill Trek, the Khopra Ridge Community Trek in Nepal focuses on sustainability and local involvement. The route is managed by local communities, ensuring that tourism directly supports villagers, schools, and conservation efforts.

For trekkers seeking tranquility, culture, and panoramic mountain landscapes, the Khopra Danda Trek is one of the best choices in Nepal.

Where is Khopra Danda Located?

Khopra Danda is located in the Annapurna region of western Nepal, within the protected Annapurna Conservation Area. The trekking route usually branches off from well-known trails such as Ghorepani, Tadapani, or Ghandruk and gradually ascends toward the remote and peaceful Khopra Ridge. Positioned between popular trekking corridors, this area remains relatively untouched, making it an ideal destination for trekkers seeking a quiet Himalayan experience away from heavy crowds. From the ridge, the journey opens up to spectacular panoramic mountain views and a deep sense of natural solitude.

From Khopra Ridge, trekkers can enjoy breathtaking views of several iconic Himalayan peaks, including:

  • Annapurna South
  • Dhaulagiri (8,167m)
  • Machhapuchhre (Fishtail Mountain)
  • Hiunchuli
  • Nilgiri Himal

The trek also offers an optional extension to the sacred Khayer Lake, a high-altitude alpine lake that holds spiritual significance for both Hindu and Buddhist pilgrims, adding a cultural and spiritual dimension to the journey.

Highlights of the Khopra Ridge Community Trek

The Khopra Ridge Community Trek is known for combining natural beauty with community-based tourism.

1. Spectacular Himalayan Views

Khopra Ridge offers one of the best panoramic viewpoints in the Annapurna region, especially during sunrise and sunset.

2. Community-Based Tourism Experience

This trek is unique because it is operated by local communities. Profits from lodges and services directly benefit schools, infrastructure, and village development.

3. Peaceful and Less Crowded Trails

Unlike commercial trekking routes, Khopra Danda remains quiet, offering a peaceful and immersive nature experience.

4. Khayer Lake Excursion

A challenging yet rewarding hike to the sacred alpine lake adds adventure and spiritual value.

5. Natural Beauty and Forests

Rhododendron forests, waterfalls, and alpine landscapes make the trek visually stunning throughout the journey.

Difficulty Level of Khopra Danda Trek

The Khopra Ridge Community Trek difficulty is considered moderate, making it suitable for beginners with a decent level of fitness and a willingness to walk for several hours each day. While it does not involve any technical climbing, the trek requires good stamina due to continuous uphill and downhill walking across varied terrain. Trails pass through forests, stone steps, and open ridgelines, offering both challenge and beauty throughout the journey.

Trekkers typically walk for 5–7 hours daily, which can feel demanding, especially during steep ascents between villages like Tadapani, Bayeli Kharka, and Khopra Danda. The pace is steady but consistent, and proper preparation makes a big difference in comfort and enjoyment.

Altitude is another important factor, as the trek reaches around 3,660 meters at Khopra Ridge, with the optional hike to Khayer Lake rising to approximately 4,660 meters. At these elevations, reduced oxygen levels can cause mild altitude-related symptoms if proper care is not taken.

Key Difficulty Factors:

  • 5–7 hours of walking per day
  • Steep uphill and downhill sections
  • High altitude (up to 3,660m at Khopra Ridge and 4,660m at Khayer Lake)
  • Basic accommodation and facilities in teahouses
  • Long trekking duration requiring endurance

Despite these challenges, the trek remains very achievable and highly rewarding, offering peaceful trails, stunning Himalayan views, and a true off-the-beaten-path experience.

Best Time for Khopra Danda Trek

The best time for the Khopra Ridge Community Trek depends on the kind of experience you are looking for, but generally, spring and autumn are considered the most ideal seasons. During these periods, the weather is stable, the skies are clear, and the Himalayan views are at their best. Each season, however, offers a different charm, from blooming forests in spring to snow-covered silence in winter, while the monsoon is usually less favorable for trekking due to rain and poor visibility.

Spring (March–May)

  • Blooming rhododendron forests
  • Clear mountain views
  • Pleasant temperatures

Autumn (September–November)

  • Best visibility of Himalayan peaks
  • Stable weather conditions
  • Peak trekking season

Winter (December–February)

  • Snow-covered landscapes
  • Very peaceful trails
  • Cold but beautiful environment

Monsoon (June–August)

  • Not recommended due to heavy rain and slippery trails
  • Limited visibility

Permits Required for Khopra Danda Trek

To complete the Khopra Ridge Community Trek, trekkers must obtain a couple of essential permits, as the route lies within the protected Annapurna Conservation Area. These permits are mandatory for legal entry and play an important role in supporting conservation efforts, maintaining trekking trails, and ensuring the safety of visitors. The system also helps promote responsible and sustainable tourism in the region while benefiting local communities along the route.

Required Permits:

  • Annapurna Conservation Area Permit (ACAP)
    This is compulsory for all trekkers entering the Annapurna region. The permit fee is used for environmental conservation, trail maintenance, wildlife protection, and community development projects in local villages. It is one of the most important permits for trekking in this region.
  • Trekkers’ Information Management System (TIMS) Card
    The TIMS card is designed to enhance trekker safety by recording trekking details and movements. It allows authorities and rescue teams to track trekkers in case of emergencies, ensuring a safer trekking experience in remote areas.

Both permits are easily available in Kathmandu and Pokhara through registered trekking agencies or official tourism offices. It is highly recommended to arrange them in advance before starting the trek to avoid delays and ensure a smooth journey.

Accommodation and Food on the Trek

One of the strongest features of the Khopra Ridge Community Trek Nepal is its community lodge system.

Accommodation:

  • Simple but comfortable teahouses
  • Run by local villagers
  • Basic rooms with shared bathrooms

Food:

  • Traditional Nepali dal bhat
  • Noodles, soups, pasta
  • Tea, coffee, and local snacks

The income generated directly supports local communities, making this trek socially responsible.

Khayer Lake Extension Trek

The Khayer Lake extension is one of the most rewarding parts of the journey.

Key details:

  • Altitude: ~4,660 meters
  • Duration: 6–8 hours round trip
  • Difficulty: Challenging

Spiritual significance:

Khayer Lake is sacred to Hindu and Buddhist pilgrims. Many believe the lake holds divine energy, and it becomes a pilgrimage destination during festivals.

The route offers dramatic mountain views and a true sense of Himalayan wilderness.

Cost of Khopra Danda Trek

The cost of the Khopra Ridge Community Trek depends on travel style.

Estimated breakdown:

  • Permits: $40–50
  • Food & accommodation: $25–40 per day
  • Guide: $25–35 per day
  • Porter: $20–30 per day

Total cost:

  • Budget trek: $400–600
  • Guided trek: $600–1,000+

Compared to other Annapurna region treks, it remains relatively affordable.

What to Pack for Khopra Danda Trek

Proper preparation ensures a smooth trekking experience.

Essentials:

  • Waterproof trekking boots
  • Warm layered clothing
  • Down jacket
  • Rain protection gear
  • Sleeping bag (recommended)

Health essentials:

  • First aid kit
  • Altitude sickness medicine
  • Water purification tablets

Extras:

  • Power bank
  • Camera
  • Energy snacks

Tips for a Safe Khopra Ridge Community Trek

A safe and enjoyable Khopra Ridge Community Trek requires good preparation, responsible trekking habits, and awareness of high-altitude conditions. Since the trail passes through remote villages and reaches elevations above 3,000 meters, following proper trekking guidelines not only improves safety but also enhances your overall experience. Most issues on this trek come from rushing the ascent, dehydration, or lack of local knowledge, so a mindful approach is very important.

  • Walk slowly and maintain a steady pace
    The trek involves long uphill sections, so walking slowly helps your body adjust to increasing altitude and reduces the risk of altitude sickness.
  • Stay properly hydrated throughout the journey
    Drink plenty of water every day. Proper hydration helps your body cope with thin air and reduces fatigue during long trekking hours.
  • Hire a local guide for navigation and safety
    A licensed guide provides route knowledge, cultural insights, and emergency support, especially in less-marked sections of the trail.
  • Respect local culture and traditions
    The route passes through Gurung and Magar villages, so being polite, dressing modestly, and respecting local customs is highly appreciated.
  • Avoid plastic waste and support eco-friendly tourism
    Carry reusable bottles and dispose of waste responsibly to help preserve the natural beauty of the Annapurna region.

Following these tips ensures a safer, smoother, and more meaningful trekking experience in the Himalayas.

Why Choose Khopra Danda Trek?

The Khopra Ridge Community Trek in Nepal stands out because:

  • It is less crowded than mainstream trekking routes
  • It offers strong community-based tourism benefits
  • It provides breathtaking Himalayan ridge views
  • It supports sustainable and eco-friendly travel
  • It delivers authentic cultural experiences

This makes it one of the most meaningful trekking experiences in the Annapurna region.

Conclusion

The Khopra Danda Trek (Khopra Ridge Community Trek) is a perfect blend of nature, culture, and sustainability. It offers peaceful trails, majestic Himalayan scenery, and a deep connection with local communities.

Whether you are a beginner or an experienced trekker, this trek provides a rewarding Himalayan journey without the crowds of popular routes.

If you are planning a trek in Nepal that combines adventure with purpose, the Khopra Ridge Community Trek should be at the top of your list.

FAQs – Khopra Danda Trek

1. How difficult is the Khopra Danda Trek?

The Khopra Ridge Community Trek is considered a moderate trek. It does not require technical climbing skills, but you should be prepared for 5–7 hours of walking daily, steep ascents, and high-altitude conditions up to 3,660m.

2. How long does the Khopra Danda Trek take?

The trek usually takes 7 to 9 days, depending on the itinerary and whether you include the Khayer Lake extension. A shorter or longer version can be arranged based on your fitness and travel plan.

3. What is the best time for Khopra Danda Trek?

The best seasons are spring (March–May) and autumn (September–November). These months offer clear skies, stable weather, and the best Himalayan views. Winter is possible but cold, while monsoon is not recommended.

4. Do I need a guide for Khopra Ridge Community Trek?

A guide is not mandatory, but it is highly recommended. Since the route passes through remote villages and forest trails, a guide improves safety, navigation, and cultural experience.

5. What permits are required for this trek?

You need:

  • Annapurna Conservation Area Permit (ACAP)
  • TIMS Card

Both can be obtained in Kathmandu or Pokhara.

6. Is Khopra Danda Trek crowded?

No, it is much quieter compared to popular routes like Poon Hill or Annapurna Base Camp. It is ideal for trekkers looking for peace and fewer crowds.

7. Can beginners do the Khopra Ridge Community Trek?

Yes, beginners with good fitness can complete this trek. Regular walking preparation before the trip is recommended for better comfort and endurance.


Trekking Season in Nepal

Trekking in Nepal is one of the most rewarding outdoor experiences in the world, attracting thousands of travelers every year to the Himalayas. From the legendary Everest Base Camp routes to the scenic Annapurna trails, Nepal offers trekking adventures for beginners as well as experienced hikers. However, choosing the right trekking season in Nepal is crucial for safety, comfort, mountain visibility, and overall experience.

The trekking conditions in Nepal vary greatly throughout the year due to changing weather patterns, altitude differences, and monsoon influence. While some months offer crystal-clear skies and breathtaking Himalayan views, others bring heavy rainfall, snow, or limited trail accessibility. Understanding the Nepal trekking seasons helps travelers plan better, avoid risks, and enjoy the journey to the fullest.

Generally, Nepal has four distinct trekking seasons: spring, autumn, winter, and monsoon. Among these, spring and autumn are considered the most popular due to stable weather and excellent visibility. However, each season has its own charm depending on the region and trekking route.

Overview of Nepal’s Climate and Trekking Conditions

Nepal’s climate is extremely diverse due to its dramatic elevation changes, ranging from lowland Terai regions to the world’s highest mountains. This variation directly affects trekking conditions throughout the year. Understanding the country’s climate is essential when planning trekking in Nepal.

The country experiences four main seasons: spring, summer (monsoon), autumn, and winter. In the Himalayas, weather conditions can change rapidly within a single day. Lower regions remain relatively warm, while higher altitudes can experience freezing temperatures even during peak trekking seasons.

Monsoon months bring heavy rainfall, making trails slippery and reducing visibility in many popular trekking regions. On the other hand, winter brings snowfall at high elevations, sometimes blocking passes but offering peaceful, snow-covered landscapes. Spring and autumn provide the most stable trekking conditions with clear skies and moderate temperatures.

Altitude plays a major role in trekking difficulty. As trekkers ascend, temperatures drop significantly, and oxygen levels decrease, making proper acclimatization important. Weather forecasts are less predictable in remote mountain regions, so preparation is key.

Overall, Nepal’s trekking climate demands careful planning, but it also ensures diverse experiences throughout the year, from lush green valleys to snowy Himalayan peaks.

Spring Season (March to May) – Best Time for Rhododendron Trails

Spring is one of the most beautiful and popular trekking seasons in Nepal. From March to May, the weather becomes warmer, skies are generally clear, and nature comes alive with vibrant colors. This season is especially famous for blooming rhododendron forests, which paint the hillsides in red, pink, and white.

Temperatures during spring are moderate, making it comfortable for long trekking days. At lower elevations, the weather is pleasantly warm, while higher regions remain cool but manageable. This balance makes spring ideal for trekking routes like Everest Base Camp, Annapurna Circuit, and Langtang Valley.

One of the biggest highlights of spring trekking is the excellent visibility of the Himalayan peaks. Trekkers can enjoy panoramic mountain views without heavy cloud cover. Wildlife activity also increases during this time, adding to the natural experience.

However, spring is also a busy trekking season. Popular trails may experience moderate crowd levels, especially in well-known regions. Early booking of permits and accommodations is recommended.

Despite the crowds, the combination of stable weather, natural beauty, and blooming landscapes makes spring one of the best trekking seasons in Nepal for both beginners and experienced trekkers.

Autumn Season (September to November) – Peak Trekking Season in Nepal

Autumn is widely regarded as the best trekking season in Nepal. From September to November, the monsoon rains end, leaving behind fresh, clean air and crystal-clear mountain views. The weather becomes stable, dry, and ideal for trekking in almost all regions of the country.

During this season, temperatures are comfortable during the day and slightly colder at night, especially at higher altitudes. The skies remain consistently clear, offering some of the most breathtaking views of Himalayan giants like Everest, Annapurna, and Manaslu.

Autumn is considered the peak trekking season, meaning trails are lively and well-serviced. Tea houses, guides, and trekking infrastructure operate at full capacity. This makes it a safe and convenient time for both first-time trekkers and seasoned hikers.

Major trekking routes such as Everest Base Camp, Annapurna Base Camp, and Upper Mustang see high visitor traffic. While this adds vibrancy to the experience, it is advisable to book accommodations and guides in advance.

Overall, autumn offers the perfect balance of weather, visibility, and trail conditions, making it the most recommended trekking season in Nepal for unforgettable Himalayan adventures.

Winter Season (December to February) – Cold but Peaceful Trekking Experience

Winter trekking in Nepal offers a completely different experience. From December to February, the mountains are covered in snow, and temperatures drop significantly, especially at higher elevations. Despite the cold, winter trekking is peaceful and rewarding for those who enjoy solitude and snowy landscapes.

The biggest advantage of winter is the low number of trekkers on the trails. Popular routes become quiet, allowing for a more personal and immersive experience. The views of snow-covered peaks are stunning, especially during clear days.

However, winter trekking requires careful planning. High passes may be blocked due to heavy snowfall, and some remote tea houses may close for the season. Treks like Ghorepani Poon Hill, lower Annapurna regions, and cultural trails in Langtang are better suited for winter.

Proper winter gear, including thermal clothing, insulated jackets, gloves, and sleeping bags, is essential. Trekking during this season is best suited for experienced hikers or those prepared for cold conditions.

In summary, winter trekking in Nepal is ideal for travelers seeking peaceful trails, snowy beauty, and a more challenging Himalayan adventure.

Monsoon Season (June to August) – Off-Season Adventure

The monsoon season in Nepal lasts from June to August and brings heavy rainfall across most trekking regions. This is generally considered the off-season for trekking due to slippery trails, leeches in lower forests, and reduced visibility in the mountains.

Despite the challenges, monsoon trekking has its unique advantages. The landscapes become lush and green, rivers flow powerfully, and the environment feels fresh and alive. Trekkers who prefer solitude will find very few crowds during this time.

Certain regions lie in rain-shadow areas and remain suitable for trekking even during monsoon. These include Upper Mustang and parts of Dolpo, which receive minimal rainfall and offer dry, desert-like landscapes.

Travel during monsoon requires waterproof gear, strong trekking boots, and flexible planning due to possible delays. Flights to mountain regions may also be affected by weather conditions.
While monsoon trekking is not ideal for beginners, adventurous travelers can still enjoy a unique and less commercialized Himalayan experience during this season.

Near badal danda 1

Best Overall Time for Trekking in Nepal

The best trekking season in Nepal depends on what kind of experience you are looking for. However, two seasons stand out clearly: spring (March–May) and autumn (September–November). These months offer the most reliable weather, excellent visibility, and safe trail conditions.

Autumn is generally considered the absolute best time for trekking due to post-monsoon clarity and stable weather. Spring, on the other hand, offers beautiful landscapes with blooming flowers and slightly warmer conditions.

For beginners, autumn is ideal due to predictable weather and better infrastructure support. Experienced trekkers may also enjoy spring for its scenic diversity. Winter and monsoon are more specialized seasons suitable for those seeking solitude or offbeat adventures.

Ultimately, the best time depends on your trekking destination, physical fitness, and personal preference for weather and crowd levels.

Region-Wise Best Trekking Seasons in Nepal

Different trekking regions in Nepal have different ideal seasons due to geography and climate variations.

The Everest region is best visited during spring and autumn for clear views of Mount Everest and surrounding peaks. The Annapurna region also follows the same seasonal pattern but offers more flexibility due to varied altitudes.

The Langtang region is accessible almost year-round, though spring and autumn provide the best combination of safety and visibility. Meanwhile, Mustang and Dolpo are unique rain-shadow regions that can be trekked even during the monsoon season.

Understanding regional differences helps trekkers choose the right route based on timing and expected conditions.

Tips for Choosing the Right Trekking Season

Choosing the right trekking season in Nepal depends on preparation and personal preference. Beginners should prioritize stable seasons like autumn or spring for safety and comfort. Experienced trekkers can explore winter or monsoon routes for more challenging adventures.

Always check weather forecasts before starting your trek and ensure proper gear is packed according to the season. Hiring local guides can improve safety and enhance cultural experiences.
Booking permits, accommodation, and transportation in advance is highly recommended during peak seasons.

Conclusion – Choosing the Perfect Trekking Season in Nepal

Nepal offers trekking opportunities throughout the year, but each season provides a unique Himalayan experience. Spring and autumn are the most popular due to perfect weather and visibility, while winter and monsoon cater to more adventurous travelers seeking solitude and raw natural beauty.

The best trekking season in Nepal ultimately depends on your goals, fitness level, and preferred trekking region. With proper planning and preparation, every season can offer an unforgettable journey through the world’s highest mountains.

FAQs on Trekking Season in Nepal

What is the best trekking season in Nepal?

The best trekking seasons in Nepal are spring (March to May) and autumn (September to November). These months offer stable weather, clear mountain views, and comfortable temperatures, making them ideal for most trekking routes.

Can I trek in Nepal during the monsoon season?

Yes, trekking is possible during the monsoon (June to August), but it is more challenging due to heavy rainfall, slippery trails, and poor visibility. However, rain-shadow regions like Upper Mustang and Dolpo are excellent monsoon trekking destinations.

Is winter a good time for trekking in Nepal?

Winter (December to February) is suitable for trekking in lower-altitude regions. High-altitude treks may be blocked by snow, but you can still enjoy peaceful trails, clear skies, and fewer crowds in places like Ghorepani and lower Annapurna.

Which month has the clearest views of the Himalayas?

October and November offer the clearest mountain views after the monsoon season. The air is fresh, dust-free, and visibility is at its peak, making it perfect for photographing Himalayan ranges.

Is trekking in Nepal safe during all seasons?

Trekking in Nepal is generally safe if you choose the right season and follow proper preparation. Spring and autumn are the safest, while monsoon and winter require more experience and careful planning.

What is the cheapest trekking season in Nepal?

The monsoon season (June to August) and winter season (December to February) are usually the cheapest due to fewer tourists. Accommodation and guide prices are often lower compared to peak seasons.

Do I need a guide for trekking in Nepal?

A guide is not always mandatory for all routes, but it is highly recommended—especially for remote or high-altitude treks. Guides improve safety, navigation, and provide cultural insights.

Which trekking season is best for beginners in Nepal?

Autumn (September to November) is the best season for beginners. The weather is stable, trails are busy and well-maintained, and there is better support infrastructure along popular trekking routes.

Best Treks from Pokhara in 2026: The Complete Guide

Pokhara has long been known as the trekking capital of Nepal. Nestled beside the tranquil Phewa Lake and framed by the dramatic Annapurna range, this beautiful city is the starting point for some of the most iconic Himalayan adventures. Whether you are a beginner seeking a short scenic hike or an experienced trekker dreaming of high mountain passes, Pokhara offers something for everyone.

As we move into 2026, trekking from Pokhara is becoming even more attractive thanks to improved trails, better accommodation, safer routes, and a growing focus on eco-friendly tourism. If you are planning a Himalayan adventure, this guide will help you discover the best treks from Pokhara in 2026, along with practical tips, costs, seasons, and safety advice.

Trekking Around Pokhara Rim: A Growing Trend in 2026

For travelers who want stunning Himalayan views without going deep into remote high-altitude regions, trekking around Pokhara rim is one of the best options in 2026.

The “Pokhara Rim” refers to the hills surrounding Pokhara Valley that offer panoramic views of Annapurna, Machapuchare, and Dhaulagiri while staying at relatively low elevations. These treks are perfect for:

  • Beginners
  • Families
  • Older travelers
  • Luxury or comfort trekkers
  • Short-holiday visitors

Why Start Your Trek from Pokhara?

Pokhara is more than just a pretty lakeside city — it is the gateway to the Annapurna region. Here’s why trekkers love starting from Pokhara:

Easy Access to Major Trails

Most Annapurna trekking routes begin within a few hours’ drive from Pokhara. This means less travel time and more time on the trail.

Stunning Natural Setting

Few cities in the world offer such close views of 8,000-meter peaks. On a clear day, you can see Annapurna, Dhaulagiri, and Machapuchare right from the city.

Excellent Infrastructure

Pokhara has an international airport, quality hotels, trekking shops, and experienced guides. Last-minute planning is easy here.

Ideal Acclimatization Point

At around 800 meters altitude, Pokhara provides a comfortable starting point before heading higher.

Wide Range of Trekking Services

Quick Comparisons

From budget to luxury, Pokhara offers guides, porters, agencies, and gear rentals for every style of trekking.

Trek Duration Difficulty Max Altitude Best For
Annapurna Base Camp 7–12 days Moderate 4,130 m Classic Himalayan trek
Poon Hill 3–5 days Easy 3,210 m Beginners & families
Mardi Himal 5–7 days Moderate 4,500 m Scenic ridge trekking
Annapurna Circuit 12–18 days Challenging 5,416 m Experienced trekkers
Khopra Ridge 7–10 days Moderate 3,660 m Quiet trails
Mohare Danda 5–7 days Easy 3,300 m Eco trekking
Ghandruk Trek 2–4 days Easy 2,012 m Cultural trek
Australian Camp 1–2 days Easy 2,100 m Short getaway
Kapuche Lake 5–7 days Moderate 2,546 m Hidden gem
Sikles Trek 4–6 days Easy–Moderate 2,000 m Cultural experience

Top 10 Best Treks from Pokhara in 2026

1. Annapurna Base Camp (ABC Trek)

The Annapurna Base Camp trek remains one of Nepal’s most loved adventures. It takes you through terraced fields, bamboo forests, and traditional Gurung villages before reaching the natural amphitheater of Annapurna Base Camp.

Highlights:

  • 360° mountain panorama
  • Machapuchare Base Camp
  • Natural hot springs at Jhinu Danda

Best for: Trekkers wanting a classic Himalayan experience without extreme difficulty.

Why popular in 2026: Improved teahouses and better trail management make it more comfortable than ever.

2. Ghorepani Poon Hill Trek

This is one of the best short treks from Pokhara. The sunrise from Poon Hill is legendary, offering golden views of Dhaulagiri and Annapurna.

Highlights:

  • Easy access
  • Colorful rhododendron forests
  • Ideal introduction to trekking

Best for: Beginners, families, and time-limited travelers.

3. Mardi Himal Trek

Once a hidden trail, Mardi Himal is now a favorite for those wanting fewer crowds and dramatic ridge walks.

Highlights:

  • Close-up Machapuchare views
  • Peaceful trails
  • Compact duration

Best for: Trekkers seeking a quieter alternative to ABC.

4. Annapurna Circuit (Short Version)

The Annapurna Circuit is legendary. While road construction has changed parts of it, the high sections remain spectacular.

Highlights:

Best for: Experienced trekkers seeking variety.

5. Khopra Ridge Trek

A fantastic off-the-beaten-path trek, Khopra Ridge offers stunning views without the crowds.

Highlights:

  • Khayer Lake side trip
  • Community lodges
  • Deep mountain views

Best for: Nature lovers wanting solitude.

6. Mohare Danda Trek

Known as the eco-trek, Mohare Danda supports local communities and sustainable tourism.

Highlights:

  • Eco-lodges
  • Sunrise mountain views
  • Cultural immersion

Best for: Responsible travelers.

7. Ghandruk Village Trek

Short, cultural, and scenic, Ghandruk is perfect for those wanting a taste of trekking.

Highlights:

  • Gurung culture
  • Traditional stone houses
  • Annapurna views

Best for: Cultural explorers.

8. Australian Camp Trek

A quick escape from Pokhara, ideal for those with limited time.

Highlights:

  • Panoramic views
  • Comfortable lodges
  • Easy trails

Best for: First-time trekkers.

9. Kapuche Lake Trek

Kapuche is the world’s lowest glacier lake and a newly popular destination.

Highlights:

  • Unique glacial lake
  • Less crowded route
  • Raw natural beauty

Best for: Adventurous trekkers.

10. Sikles Trek

Sikles offers an authentic village experience.

Highlights:

  • Traditional Gurung culture
  • Quiet trails
  • Cultural homestays

Best for: Cultural and slow travelers.

Best Time for Treks from Pokhara in 2026

Spring (March–May)

  • Blooming rhododendrons
  • Clear mountain views
  • Comfortable weather

Autumn (Sept–Nov)

  • Best visibility
  • Stable weather
  • Peak trekking season

 Winter

  • Fewer crowds
  • Cold but possible for short treks

Monsoon

  • Lush landscapes
  • Lee-side treks still doable

Permits Needed for Trekking

Most treks from Pokhara require:

ACAP Permit

For Annapurna region conservation.

TIMS Card

Trekkers’ Information Management System.

Approximate cost:

ACAP: ~$30

TIMS: ~$20

Always check latest regulations before trekking.

How to Choose the Right Trek

Consider:

Fitness Level

Choose difficulty wisely.

Time Available

Short vs long treks.

Budget

Luxury vs budget trekking.

Experience

Beginner vs advanced routes.

Solo or Guided

Guides improve safety and experience.

Trekking Costs from Pokhara (2026 Estimates)

Budget Trek

  • $30–50/day

Mid-Range Trek

  • $60–100/day

Luxury Trek

  • $150+/day

Costs include:

  • Guide/porter
  • Accommodation
  • Food
  • Permits
  • Transport

Essential Packing List

Clothing

  • Down jacket
  • Base layers
  • Rain gear

Gear

  • Trekking boots
  • Backpack
  • Sleeping bag

Documents

  • Permits
  • Insurance
  • Passport copies

Tech

  • Power bank
  • Headlamp
  • Camera

Safety Tips for Trekking from Pokhara

Watch for Altitude Sickness

  • Ascend gradually and hydrate.

Get Travel Insurance

  • Helicopter evacuation coverage is vital.

Hire Licensed Guides

  • Improves safety and local insight.

Monitor Weather

  • Mountain weather changes fast.

Final Thoughts: Which Trek Should You Choose in 2026?

If you want a classic Himalayan experience, go for Annapurna Base Camp.
If you prefer short and scenic, choose Poon Hill or Australian Camp.
If you seek quiet trails, try Khopra Ridge or Mardi Himal.

No matter which trek you choose, Pokhara remains the perfect starting point for unforgettable adventures. With improved infrastructure and growing sustainable tourism in 2026, trekking from Pokhara is more rewarding than ever.

Plan, trek responsibly, and enjoy the Himalayas.

Altitude Sickness/Acute Mountain Sickness (AMS)

Altitude sickness is one of the biggest concerns for trekkers, climbers, and travelers visiting high-altitude destinations. Whether you are trekking in Nepal, exploring the Himalayas, or visiting mountain regions anywhere in the world, understanding altitude sickness can protect your health and even save your life.

Many people underestimate how quickly altitude can affect the body. Even fit and healthy individuals can experience altitude sickness. The good news is that with the right knowledge, preparation, and precautions, altitude sickness is largely preventable.

This complete guide explains what altitude sickness is, its causes, symptoms, prevention tips, and treatment options.

What is Altitude Sickness?

Altitude sickness, also called Acute Mountain Sickness (AMS), refers to health problems caused by reduced oxygen levels at high elevations. As altitude increases, the air pressure drops and less oxygen is available for your body.

Your body needs time to adjust to these lower oxygen levels. When you ascend too quickly without proper acclimatization, you may develop altitude sickness.

Altitude sickness usually occurs at elevations above 2,500 meters (8,200 feet). However, some people may experience symptoms even at lower heights.

How Common is Altitude Sickness?

Altitude sickness is more common than many travelers realize:

  • About 25% of people who live at sea level develop altitude sickness when visiting elevations between 2,500–3,000 meters
  • Around 50% of people may experience AMS above 3,500 meters
  • The risk increases further above 4,000 meters

Importantly, altitude sickness does not depend on age, gender, or fitness level. Anyone can get it.

Why Does Altitude Sickness Happen?

At high altitude:

  • Air pressure decreases
  • Oxygen levels drop
  • Your body receives less oxygen with each breath

This forces your body to work harder. Your heart rate increases, breathing becomes faster, and fluid balance can change. If your body cannot adapt quickly enough, altitude sickness develops.

Rapid ascent, dehydration, alcohol use, and overexertion can increase the risk.

Types of Altitude Sickness

Altitude sickness can range from mild to life-threatening. There are three main types:

1. Acute Mountain Sickness (AMS)

This is the most common and mildest form. Symptoms often feel like a hangover and include headache, nausea, and fatigue.

2. High Altitude Pulmonary Edema (HAPE)

This is a serious condition where fluid builds up in the lungs. It can make breathing extremely difficult and is a medical emergency.

3. High Altitude Cerebral Edema (HACE)

This occurs when the brain swells due to lack of oxygen. It is life-threatening and requires immediate descent and medical attention.

Both HAPE and HACE typically occur above 4,000 meters and must never be ignored.

Signs and Symptoms of Altitude Sickness

Recognizing symptoms early is crucial. Common symptoms include:

Mild to Moderate Symptoms

  • Headache
  • Feeling tired or weak
  • Dizziness
  • Loss of appetite
  • Nausea or vomiting
  • Difficulty sleeping
  • Shortness of breath during activity
  • Mood changes
  • Feeling lazy or low energy

Severe Symptoms

  • Severe headache
  • Persistent vomiting
  • Double or blurred vision
  • Confusion or poor coordination
  • Trouble breathing even at rest
  • Chest tightness
  • Blue or pale lips
  • Extreme fatigue

If symptoms worsen, immediate descent is necessary.

Best Ways to Prevent Altitude Sickness

Prevention is always better than treatment. The best prevention method is proper acclimatization.

1. Ascend Gradually

Do not climb too high too quickly. Once above 3,000 meters:

  • Increase sleeping elevation by no more than 300–500 meters per day
  • Take a rest day every 3–4 days

2. Follow “Walk High, Sleep Low”

A golden rule in trekking:

  • Climb higher during the day but return to sleep at a lower altitude.

This helps your body adjust safely.

3. Stay Hydrated

Drink plenty of fluids. Dehydration can worsen symptoms. Warm soups and hot drinks are helpful in cold mountain environments.

4. Eat Properly

Even if you lose appetite, try to eat. Choose:

  • Light meals
  • Carbohydrate-rich foods
  • Low-fat and low-protein foods

These are easier to digest at altitude.

5. Avoid Alcohol and Smoking

Alcohol and smoking reduce oxygen efficiency and can worsen symptoms.

6. Do Not Overexert

Take it slow. Trek at a comfortable pace and avoid pushing your limits.

Treatment of Altitude Sickness

If altitude sickness occurs, take it seriously.

1. Stop and Rest

  • Do not continue ascending if symptoms appear. Rest at the same altitude.

2. Descend

Descending is the most effective treatment.

  • Go down at least 1,000 meters from where symptoms began
  • Even a small descent can bring relief

Never ignore worsening symptoms.

3. Oxygen Support

  • Supplemental oxygen can help in severe cases if available.

4. Stay Warm and Hydrated

  • Drink hot liquids and keep your body warm to maintain circulation.

Medication for Altitude Sickness

Diamox (Acetazolamide)

Diamox is commonly used for preventing and treating altitude sickness. It helps your body acclimatize faster.

Benefits:

  • Speeds up altitude adjustment
  • Reduces symptoms duration
  • Helps prevent AMS

Possible Side Effects:

  • Tingling or numbness in hands and feet
  • Frequent urination
  • Nausea
  • Sleepiness
  • Vision changes
  • Altered taste for carbonated drinks

Always consult a doctor before using medication.

When to Seek Immediate Help

Descend immediately and seek medical help if someone experiences:

  • Severe breathlessness
  • Confusion or inability to walk properly
  • Loss of consciousness
  • Persistent vomiting
  • Symptoms getting worse instead of better

These may indicate HAPE or HACE, which can be fatal if untreated.

Who is at Higher Risk?

Some people are more vulnerable:

  • Travelers flying directly to high altitudes
  • People who ascend rapidly
  • Those with previous AMS history
  • Individuals with lung or heart conditions
  • Dehydrated or exhausted trekkers

Even experienced climbers are not immune.

Practical Tips for Trekkers

  • Plan extra acclimatization days
  • Choose experienced guides
  • Monitor symptoms daily
  • Trek with a group
  • Learn basic altitude illness signs
  • Carry a first-aid kit and medicines

Preparation is key to safe trekking.

Final Thoughts

Altitude sickness is a serious but manageable risk for anyone traveling to high elevations. The key to safety is awareness, gradual ascent, and listening to your body.

Remember:

  • Do not rush your climb
  • Acclimatize properly
  • Stay hydrated and nourished
  • Descend if symptoms worsen

Mountains are beautiful but demand respect. With the right approach, you can enjoy high-altitude adventures safely and comfortably.

Note: You shouldn’t take Diamox® if you have allergic to sulfa drugs.

Accommodation, Meals in Cities & During Treks

Himalayan Yatri prefer to use 3 stars to 5 stars Hotel around Kathmandu valley, Pokhara and Jungle resorts in Chitwan as well as best available guest house as per required by member, with the emphasis on location, hospitality and excellent atmosphere. Our trips are based on twin sharing accommodation with bed and breakfast (B&B) basis. Single supplements are available on your request.

While on Camping/Tent Trek typically, each pair of trekkers will sleep in a spacious, 2-person mountain tents with a durable rain fly and full insect netting. We supply foam mattresses. You may be invited to sleep in the homes of local people if trek is in the remote area. Sometime our campsites are near villages or local tea-house lodges, but having our own tents and equipment gives us the flexibility to camp where we wish for a good view or proximity to interesting natural features.

We provide three meals in trekking i. e Breakfast, Lunch & Dinner [B/L/D]. We think we have the best cooks in the Himalayas. Your meals in Nepal will be mostly local food with a few American and European-style touches. But our aim is to make the hot continental food in our camp cooked by our own trekking cook.

Mornings begin with a hot drink in your tent. Breakfast usually includes cereal, porridge, Pancake and eggs in different style, coffee, tea, bread with jam, honey and butter. Lunch typically includes Indian-style bread (chapati), vegetable salads, French fries, fruits, beverages and local snack food.

On other occasion lunch may be fried rice, chowmein (noodles), macaroni and sandwiches. We have afternoon snack such as popcorn, cookies, biscuits and tea. Dinner includes soup and a full hot meal including rice, potatoes, cooked fresh vegetables and lentils or other sauce followed by dessert BUT if you book the Tea-house Lodge Trek with us then your accommodation and 3 meals: Breakfast, Lunch and Dinner [B/L/D] will be provide in tea-house lodge by menu on the trail.

Accommodation

Meals during Trekking

  • In Kathmandu & Pokhara:

We will be staying in hotel. There are many hotels and restaurants in Kathmandu catering to western tastes as well as plenty of local Daal & Bhat (rice and lentils) shops at very reasonable prices. In the cities like Kathmandu, Pokhara and so on. We will book hotels per B&B basis (Including Bed & Breakfast only).

  • On Tea-house Lodge Trek:

Generally, along the regular trekking areas have developed well facilities available tea-house lodges. Which are mainly used by trekkers walk along the trail, however some are very cozy and comfortable and some are basic standard. We will accommodate you as best available lodges en route along the journey and your lodge room will be provided [bed, pillow & mattress]. Your own personal sleeping bag is always recommended to bring with you.

Foods at local tea-houses are hygienic and usually delicious which are prepared by using local agro-products. They offer variety foods for breakfast like Toast, different styles of eggs, pancake, porridge, Muesli with milk and other creels. For lunch and dinner variety of potato, different curries, rice, lentils, noodles, pasta, pizza, spring roll, Nepali food and others food as well as soup and seasonal vegetables too. They also use some foods from market which are not possible to grow up there and produce locally.

  • On Camping/Tent Trek:

Along the regular trekking areas there are clean and spacious camp sites. We always try to camp away from the crowded site to a cozy solitude premises. Each client will have their own tent unless there are couples or they wish to share the tent. Tents are all equipped with mattresses and a ground sheet for preventing cold. Our professional cooks prepare three time meals in a day (Breakfast, Lunch and Dinner). They are well trained & educated of hygienic variety and have broad knowledge to cook different dishes like Mexican, Indian, Chinese, Italian and all are prepared to Western hygiene standards to keep you healthy. If someone prefers pure Nepalese food will be served during the treks. Nepalese food includes Daal (lentils), Bhat (rice), Gundruk ko tarakari (dried vegetables curry) is the special one. Please remember that Mexican, Italian & Chinese dishes prepared in typical way.

  • Drinking water in trekking trails:

Drinking water will be provided at camps (collected with care, filtered, treated with chemicals and boiled) and at lunch time where possible. It is wise to carry a small number of purifying chemicals (e.g. Iodine or chlorine) with you, in case you happen to need water at an odd time. In the developing world care, should be taken to avoid untreated water and potentially contaminated foods like uncooked salads and some fruit. Bottled water is available in cities, but off course you can treat tap water in your own bottle too.

General Information of Nepal

General Information of Nepal

Nepal is in Southern Asia, between China and India. It covers total area of 1,47,181 sq km and its boundary is 2,926 km long in total, bordered by China 1,236 km and India 1,690 km. It is a landlocked country.

The word Nepal is derived from Nepa, the old name of Katmandu valley. “Nepal” derived from the Sanskrit nipalaya, which means “at the foot of the mountains” or “abode at the foot” or in Tibetan niyampal, which means “holy land”. A third theory suggests that Nepal came from compounding the words NE, which means “wool”, and PAL, which means a “tented house” – Thus the word “NE-PAL”.

Nepal is a mountainous country 76% of it is area consists of high mountains and hills including valley, tars, basins and low hills and 24% of the low level lands. On the basis of Topographic altitude, it was divided into Himalayan, Hilly and Terai region. Nepal is the most famous tourist destination for adventure tours and travels in Asia. The topography of the Himalaya Region makes it the tourists’ first choice for adventure tours and trekking.

It is known as the land of “Mt. Everest”. In Nepal we find more than 6,500 types of vegetation, 850 types of birds, different species of butterflies and many more species of herbs. The “rhododendron” which is the National flower of Nepal makes the forest of Nepal paradise for the nature lovers. The weather and climate varies from hot summers to severe winters. Nepal has varieties of lands as it has weather and people. The land starts from 70m from sea level from Kanchan Kalan in Terai and passes though hilly region to the world’s highest point Mount Everest at 8,850m.

Every visitor can notice the different ethnic groups with their cultures and their living styles of people. The Kathmandu valley which is land of Newars (Vajrayana Budhdist) is one of the ethnic groups of Nepal. The Northern Region which is habited by the Sherpa (The people from the East- Tibet) also belongs to the ethnic group. The ancient groups which are habited in the Mountains are Gurung, Magar, Rai, Limbu, Tamang etc. The Southern part of Nepal is habited by the Tharu, Danuwar, and Rajbanshi so on. So, Altogether we have more than 66 Ethnic groups in Nepal.

The Ethnic groups of Nepal they have their own language and they speak their language too. Like Sherpa speak their own language whereas Tharu speak their own language but the official language is Nepali. People practice several religions. Till now Hinduism and Buddhism have the largest population.

Kathmandu is the capital, and Nepal has 30 million people.

Ready to Start Your Journey?

Customize your own travel plans based on your needs and preferences.

Plan your trip
chat-in-website
Need Help? Chat with us
chat-in-website
Need Help? Chat with us